Backpacking
Backpacking. Backpacks. Internal Frame: Closer and conforms to the body for better control. Can be sweaty and there are less pockets for the disorganize hiker. There are a lot of different models to choose from. External Frame:
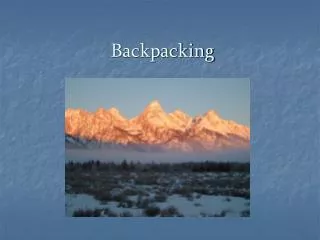

Backpacking
E N D
Presentation Transcript
Backpacks Internal Frame: Closer and conforms to the body for better control. Can be sweaty and there are less pockets for the disorganize hiker. There are a lot of different models to choose from. External Frame: Inexpensive and often useful for beginning hikers. Good for carrying awkward loads and cooler because they do not hug the body. Very cumbersome and awkward to travel with. Take the time to try on the pack to make sure it fits you correctly. It is never fun to be hiking all day with an uncomfortable pack on your shoulders.
Backpacks contd. If there is doubt choose a versatile internal frame backpack. Common Features: Hipbelt Shoulder harness Stabilizer straps Main compartments Pockets When buying a backpack getting name brand gear that is backed by the company is worth the time and expense. Here are several types: Dana Designs, Gregory, Mountainsmith, Vortex, North Face, Granite Gear, Kelty, Jansport, Osprey, Arc Teryx
Sleeping Bags and Pads • Sleeping bags provide comfort and warmth during your trip. When purchasing or renting sleeping bags choose the one that best suits your body type and is light weight. Check for: • Length • Width • Degree • Thickness • Layering • Connecting ability • Weight Do not be afraid to shop around. Take the time to get a sleeping bag that is right for you. Try different sleeping bags out in the store, and ask the sales representative for all the available information. As with any piece of equipment, ask about the guarantee or warranty provided by certain outdoor equipment companies
Ground Pads • Ground pads are used to make your sleeping experience more comfortable in the great outdoors. Sleeping pads range in size, color, thickness, and durability. • When buying or renting ground pads check for: • Length • Thickness • Weight • Convertability • Packability Note: Some ground pads can be converted into a camping chair. If you plan on doing more backpacking, having a camping chair can make moments by the fire more relaxing. Take time to look at pads that can provide this opportunity.
Choose the proper area to set up a tent • Find a spot that is safe. Stay away from hilltops as this will provide the least protection against wind, rain, and other extreme conditions. Additionally do not pitch the tent on low ground in case of flooding • Set up the tent in an area with natural obstacles (i.e. trees, boulders) because this will server as barriers against wind and rain • Try to find a location near an stream, but not in low ground, so that you will have access for cleaning and refilling water supply. • Find the flattest softest ground to set up the tent. Look for rocks and branches that can be moved to make area more comfortable • Make sure tent is in highest area in vicinity to avoid water flow into the tent. Tents and shelter
Tent and shelter contd. • Secure tent so that it may withstand any windy or rainy conditions that may develop overnight. • You will be given the opportunity to practice setting up tents during group activities. • The diagram to the left illustrates acceptable areas to set up tents and shelter. Included in the diagram are tent area, cooking area, washing area, and toilet area. http://www.abc-of-hiking.com/hiking-tents/camp-layout.asp
Common Sense: • Listen to your body • Plan carefully • Communicate your plans • Know when to go back • Strive for a simple and light load • Plan your gear inventory and purchases • Use a checklist
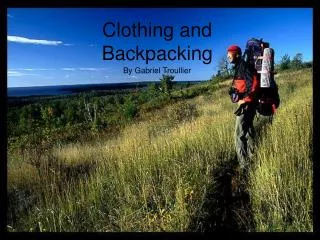
Clothing • Pack clothes that you will be comfortable in any kind of weather condition and terrain. • Prepare for any unexpected weather. • Remember: Being cold and wet could lead to some serious problems when camping outdoors. • Pack clothes that fit your body type and fitness level. • Clothes should keep you dry and warm but also provide ventilation. • Aim for clothes that are lightweight but will also provide any needed insulation. When packing include clothes that can provide a 1) base layer, 2)insulation, 3) outerwear.
Base Layer • Your base layer, or underwear, should keep you warm and maintain your body temperature. • Cotton underwear is not efficient in keeping you warm and maintaining your body temperature. Instead use a polyester or other synthetic material.
Insulation • This clothing should keep you warm but also wick moisture away from the body, picking up where the base layer left off. • Synthetic fleece is the most often material used for insulation because it is warm and dries quickly. It also moves moisture away from the skin. • Wool is another material that works well, however it does not dry as quickly as fleece.
Outerwear • The outerwear is intended to keep you protected against wet, windy, cold, and other extreme conditions. • With outerwear the more waterproof the clothing is the less breathable. • Therefore, the type of environment you will be in should be considered when choosing outerwear.
Foot Care • Make sure your feet can handle the hike • Blisters can be avoided by proper foot training, having the proper hiking boots and hiking socks • Friction between the feet and boot causes blisters. Wet feet are susceptible to blisters because the skin has been softened. Any sand or dirt that gets into the shoe can also cause blisters. • Prevention • Choose proper hiking boots: do not want any rubbing or uncomfortable pressure points. Try to choose a boot that is water resistant or waterproof. Choose boots that allow ventilation, and wear your boots before the hike so that you can break them in. • Give your feet rest during breaks. Change wet socks to dry socks so as to prevent rubbing.
Foot Care • Prevention Contd. • If you soak your feet in a stream ensure that they are dry before putting your boots on. • When possible, wear hiking sandals.
Blisters • Treatment: • Take off the boot and remove any dirt, gravel, or other material • Let your feet dry and cool down • Cover the blister with surgical tape, band-aids, or moleskin. • Take off shoe, remove tape, and allow blister to heal throughout the night. • If the blister is under the skin, do not pierce, and cover with moleskin. • If the blister is full of fluid and on the top of the skin, pierce with a needle on the bottom side of the blister. Allow the fluid to flow out. If the skin is intact just cover with moleskin, if the skin is peeling, cut it off, place gauze over it and wrap with moleskin or tape.
Socks • Socks should help reduce the friction between your feet and the boots. • Socks should provide additional cushion. • Socks should help prevent wear and tear from the damaging materials our feet shed during hiking • Socks should help equilibrate the loss of moisture and the production of heat from our feet during hiking. • Buying socks • Socks come in sealed packages but some stores will have samples you can try on…do this • Know your feet. Do they sweat a lot…if so ask the sales representative for advice on types of material • Take your boots with you. Thick socks may make boots tight which increase friction and rubbing.
Hiking Boots Weight: The lighter the boot the easier the walking. It is said that by adding a pound to the boot is like adding 5 pounds to your pack. Water Resistance: Moisture can cause blisters. Therefore, look for boots that allow moisture from sweating out, but keeps moisture from getting in. Also look for boots that have an upper portion that fit well so as to not allow water in. Lateral Rigidity: Your boot should support your foot regardless of what type of terrain you are walking on. Boots that are high with stiff ankles will provide this support. Longitudinal Rigidity: Your boot should be strong enough to support over-bending from placing too much weight on your toe or heel, but at the same time be flexible enough for the spring action of your arch.
Hiking Boots Contd. Arch support: Your boot should be flexible enough to support your arch without flattening under heavy pressure. Note: There are several different types of hiking boots. Take the time to try on several pair, walk around the store, and even take them home and try them out in the house. Boots are one of the most important equipment for hiking.
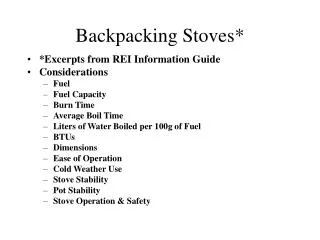
Cooking • When cooking outdoors you must ensure that you have the proper supplies • The supplies include: • Camping stove • Fuel for the stove • Pots and pans • Water • Plates, bowls, cups, and cutlery. • Wash cloth • Soap • When choosing a camping stove some things to consider are cost, weight, size, and ease of starting.
Stoves and Fuel: • 3. A camping stove has three main parts: a fuel container, a burner unit, and a pot support that will hold the pot above the flame. • Choose a backpacking stove according to your needs (i.e. where are you cooking, what are you cooking, and how many people are you cooking for?) • Consider the size and weight of both the stove and the fuel. • Look for a backpacking stove that is easy to set up and easy to light. The stove needs to be reliable and simple to maintain. • Consider the availability of the fuel that will be needed for the stove (i.e. how easy is it to find the fuel). • Finally, keep in mind the cost of both the stove and the fuel. Remember, you have to continuously purchase fuel, and it may be expensive to take care of the stove. • Note: If you are ever unsure, always ask the sales representative.
Pots and Pans • When choosing pots and pans consider the size, weight, cost, and efficiency. Camping pots and pans are now available with the nonstick element. This helps with the cleaning up process and takes less time. • Additionally, pots and pans can be heavy, so only take what you will need (consider how many people you will be cooking for. • Always ask the sales representative about the details of the pots and pans.
Creating Drinkable Water • When finding water to drink and use for cooking, do not assume that the water from the crystal clear mountain springs are digestible. This water contains dangerous bacteria that will make you sick. Additionally, unless otherwise posted, do not assume that any water from campground spigots are meant to be consumed.
Water When considering providing water on the trail there are some different methods to choose from: 1. Water purification: water purification usually consist of applying some type of treatment to the collected water. This can take the form of iodine tablets, chlorine dioxide, or other chemical treatments. 2. Another method that is most often employed is through the use of a water filter. Filters consist of two hoses, a pump, and a pleated microfilter cartridge. These are lightweight and easy to use. When choosing which type of method to use to produce drinkable water, consider price and use of equipment.
Have Fun! • Backpacking can be a wonderful experience. Make sure to take your camera so that you can collect some great pictures. Just look at these!