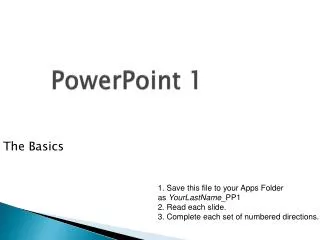
PowerPoint 1
PowerPoint 1. The Basics. 1. Save this file to your Apps Folder as YourLastName _PP1 2. Read each slide. 3. Complete each set of numbered directions. The Master Slide. The “Master Slide” is used to format all the slides of your presentation at once.

PowerPoint 1
E N D
Presentation Transcript
PowerPoint 1 The Basics 1. Save this file to your Apps Folder as YourLastName_PP1 2. Read each slide. 3. Complete each set of numbered directions.
The Master Slide • The “Master Slide” is used to format all the slides of your presentation at once. • You can change a lot in the “Master Slide” view, but for now we are just going to change one thing. “Memorize” the next three steps before trying them. • To get to the Master Slide, click on “View” then “Slide Master”. • Change the words “Click to edit Master title style” to a blue color. • Click on “Close Master View”. • Now, every slide in this presentation should have a blue title. If they don’t, go back and try these directions again.
Inserting New Slides • We’ll actually add new slides to this presentation in a minute, for now just read this slide and the next 2. • To make a brand new slide • Click on the Home tab and then “New Slide” • If you click the words “New Slide”, you’ll be able to choose the layout of your new slide. • You can also use the keyboard shortcut “Control M”.
Inserting Duplicate Slides • Oftentimes, you’ll want to make a similar slide. Click the same “New Slide” button, but choose “Duplicate Selected Slides”.
Inserting a New Slide • Insert three new slides. Use these layouts: • Title Slide • Two Content • Content with Caption • Type one word in each box of the new slides. For now, it doesn’t matter what you put in there. Just practice and put something in there. • Continue on to the next slide (it will become slide #9 after you add in your slides) when you are done.
Backgrounds (start here after finishing slide 5) • You can change the background of your slides using a couple of options. • Themes work just like in Word (change fonts, colors, and effects) • Start by clicking on the Design tab • Change the Theme to “Metro”. Hint: They are in alphabetical order, and you can see their names if you hover your mouse over the previews.
Backgrounds • You can also add gradients, texture, patterns, and pictures just like in Word, Excel and Publisher. • On the Design tab, click “Background Styles” in the “Background” group. • Choose “Format Background”. • Choose “Picture or texture fill”. • Click on the “File…” button and navigate to ComputerBuildingShareKMAdamsSample Images. • Insert the image named “under armour” and click “Close” (do NOT click Apply to All).
Moving Slides • You can move slides around easily in PowerPoint. On the left, just click and hold on a slide and drag it into a new position. • Move slide #1 so that it’s after this slide.
Moving Slides • If you want to move more slides around, you’ll want to use the “Slide Sorter”. • Click the View tab then “Slide Sorter”. • Move this slide so that it’s the new 2nd slide. • Go back to the View tab and click on “Normal”. • Click on the slide titled “Slide Show” (should be slide #13).
Slide Show • To view your slide show full screen, press F5 or click the Slide Show tab. Notice you have the option to start from the beginning or from the current slide. • Pressing F5 starts from the beginning. If you press Shift-F5, you’ll start from the slide you’re viewing. • When you are in “Slide Show” mode there are some fun things if you click the partially “hidden” icons in the bottom left of your screen. • Also, you can right click to open a menu and get some other options. • Press Shift-F5. • Draw a circle around the words “Slide Show” at the top with the “Pen”. • Press the ESC key on your keyboard to exit the Slide Show. The circle should still be there when you exit.
Printing Options • PowerPoint is mostly for presentations, but you can also print it. • You will need to print this assignment for a grade...I’ll show you what I want shortly. • Before we print, insert a new slide and move it to the very beginning (slide #1). On this slide, include your name and period as big as it can be (it must still fit on the slide). Seriously. I mean BIG.
Printing Options • Now click the File tab then “Print”. • Zoom in on this slide to read it. • Click the box that says “Full Page Slides”. • Choose “9 Slides Horizontal”. • Change “Print One Sided” to “Print on Both Sides” (long edge). • Change “Collated” to “Uncollated”. • Check with me to make sure you did this correctly. • Grab your copy off the printer and put it in the basket. • When you are finished, open up a blank PowerPoint and use all of the skills (except printing) we just learned. Use the Sample Images in the Share drive to add to your presentation.