Get to work in PowerPoint
240 likes | 398 Vues
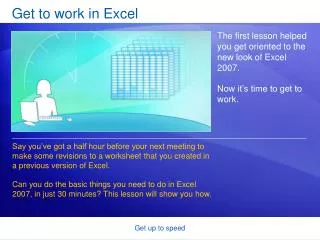
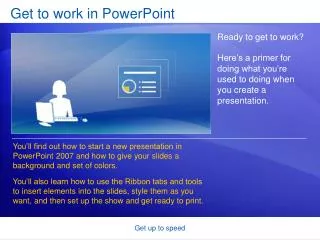
Get to work in PowerPoint. Ready to get to work? Here’s a primer for doing what you’re used to doing when you create a presentation. You’ll find out how to start a new presentation in PowerPoint 2007 and how to give your slides a background and set of colors.

Get to work in PowerPoint
E N D
Presentation Transcript
Get to work in PowerPoint Ready to get to work? Here’s a primer for doing what you’re used to doing when you create a presentation. You’ll find out how to start a new presentation in PowerPoint 2007 and how to give your slides a background and set of colors. You’ll also learn how to use the Ribbon tabs and tools to insert elements into the slides, style them as you want, and then set up the show and get ready to print. Get up to speed
Start a new presentation New presentations begin with the Microsoft Office Button, located at the upper left of the window. Here’s how to start. Click the Microsoft Office Button . Click New on the menu that opens. Choose an option in the New Presentation window. You can start with a blank slide or base the presentation on a template or existing presentation. Get up to speed
Choose a theme A theme supplies the look and feel of the presentation design. Choose a theme for the presentation right at the start, so you can see how all your content will look. The Design tab is the place to go for themes. A gallery appears there under Themes. Each theme has a name, which shows in the ScreenTip. Get up to speed
Choose a theme You can see a preview of how your theme will look, before you apply it. Seeing the effect before you apply it saves you the step of undoing it if you don’t like it. Rest the pointer over a theme thumbnail (the one shown is called Flow). The temporary preview appears on the slide. You can click the More arrow to the right of the Themes group to get more choices and information. Get up to speed
Tailor the theme The theme you choose is a complete design. But where’s the fun if you can’t do some tweaking? The Design tab has other galleries in case you want to modify the theme. Each provides a preview on the slide as you rest the mouse pointer over gallery choices. Get up to speed
Tailor the theme Here’s how to tweak the theme. Use the Colors, Fonts, and Effects galleries, all on the Design tab. Look at other Background Styles. The choices use the theme colors. Get up to speed
Tailor the theme Here’s how to tweak the theme. Point to a thumbnail to get a preview of the alternative background. To apply your own background, such as a photograph, click Format Background. Get up to speed
Add slides, pick layouts When you insert a slide, you can insert one that automatically applies a layout. You can also choose a layout before you insert the slide. To choose a layout before you insert a slide: On the Home tab, click New Slide (below the slide icon). This displays the layout choices. Click a layout to insert a slide with that layout. Get up to speed
Add slides, pick layouts PowerPoint 2007 layouts are more robust than before. Several of them include “content” placeholders, which you can use for either text or graphics. An example is the Title and Content layout. In the middle of its one placeholder is this set of icons: Get up to speed
Add slides, pick layouts PowerPoint 2007 layouts are more robust than before. Several of them include “content” placeholders, which you can use for either text or graphics. Click any of the icons to insert that type of content—a table, chart, SmartArt™ graphic, picture from a file, piece of clip art, or video file. Get up to speed
Insert a picture Time to insert a picture—a photo or piece of clip art, for example. You can do so right from the slide, from within a content placeholder. To insert a picture of your own, click the Insert Picture from File icon. To insert a piece of clip art, click the Clip Art icon. The picture will be positioned within the placeholder border. Get up to speed
Insert a picture Time to insert a picture—a photo or piece of clip art, for example. You can do so right from the slide, from within a content placeholder. After your picture is inserted, you may want to resize it or give it special effects. First, select the picture on the slide. Picture Tools appear on the Ribbon. Click the Format tab, and use the buttons and options there to work with the picture. Get up to speed
Insert a picture Inserting a picture from the slide itself is handy. It’s an especially good method if you have more than one placeholder on the slide because when you insert by using the slide icons, the picture goes within the placeholder that contains the icon. Get up to speed
Insert a picture Finally, don’t forget the Insert tab. You can use the Insert tab to insert a picture, too—as well as many other slide elements. The only difference in using this method is that sometimes PowerPoint has to guess which placeholder you want the picture to go in. Get up to speed
Insert a text box caption For your picture’s caption, insert a text box. You’ll find this on the Insert tab. When you insert the text box, Drawing Tools appear. Click the Format tab. Display the shapes gallery and point to any style. A preview of the style appears on the slide, applied to the text box. Get up to speed
Insert an org chart As you saw earlier, you can insert a picture and other graphics by using icons in the Title and Content layout. These include an icon for SmartArt graphics. SmartArt graphics offer org chart layouts as well as all other layouts for diagrams in PowerPoint 2007. Get up to speed
Insert an org chart As you saw earlier, you can insert a picture and other graphics by using icons in the Title and Content layout. When you click the SmartArt graphic icon… …you get a full gallery of the graphical layouts available. Get up to speed
Insert an org chart The picture shows some handy features of working with a new org chart. When you insert the org chart, it adopts the colors of the applied theme. A Text pane appears next to the chart where you can type text. Text you type in the Text pane maps to chart shapes and appears in the chart as you type. Get up to speed
Insert an org chart The picture shows some handy features of working with a new org chart. When you insert the org chart, it adopts the colors of the applied theme. A Text pane appears next to the chart where you can type text. Text you type in the Text pane maps to chart shapes and appears in the chart as you type. Get up to speed
Insert an org chart Also, now you can work in the other direction: convert an existing bulleted list on a slide into a graphic. Just use the Convert to SmartArt button on the Home tab. Look for SmartArt on the Insert tab if you prefer to insert your diagram that way. Get up to speed
Apply a simple animation To apply a simple animation to your org chart, go to the Animations tab. With the chart selected, click the arrow next to the Animate box to get the list of effects. Select an option for making the org chart pieces appear on the slide. As you point to an option, PowerPoint shows you a preview of the animation effect. Get up to speed
Set up the show, check spelling, review Time to put the final touches on your slide show. The commands for the finishing tasks are on the Slide Show and Review tabs. Narration, setup, and more: Use the Slide Show tab to create narration and run through the show. Spelling, research, and comments: On the Review tab, run spelling checks, use the Research service and thesaurus, and use comments to review the presentation. Get up to speed
Set up the show, check spelling, review How do you check your spelling? The same way you always have. On the Review tab, click Spelling. Select from the options you’re used to. Get up to speed
Print, distribute, and set program options Now it’s time to set options for previewing, printing, and distributing your presentation. Start by clicking the Microsoft Office Button. Then: Point to Print to open Print Preview. Click PowerPoint Options to change program-wide settings such as your default view or whether to turn spelling checker on or off. Get up to speed