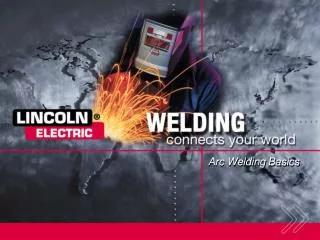
ELECTRIC ARC / WIRE WIRE WELDING
580 likes | 854 Vues
ELECTRIC ARC / WIRE WIRE WELDING. ARC/WIRE WELDING. OBJECTIVES. I can identify the main parts of the arc welding process. I can associated the terms with welding. I can describe the difference between AC, DC power input

ELECTRIC ARC / WIRE WIRE WELDING
E N D
Presentation Transcript
ELECTRIC ARC / WIRE WIRE WELDING ARC/WIRE WELDING
OBJECTIVES • I can identify the main parts of the arc welding process. • I can associated the terms with welding. • I can describe the difference between AC, DC power input • I can compare and contrast transformers, rectifiers and AC welding equipment. • I can identify electrodes and their application • I can identify welding equipment, positions and equipment.
WELDING BASIC TRAVEL ANGLE WORK ANGLE
SMAW • SMAW is the AWS name used by the American Welding Society for Shielded Metal Arc Welding. • Stick is the most commonly used name for SMAW. This is because the electrode resembles a stick. It is also, often referred to as manual welding. • The SMAW process uses constant current power sources. • SMAW is the most widely used arc welding process in the world. • All electrode polarities are used: DC-, DC+ and AC
SMAW PROCESS • SMAW is a process in which an electric arc is established between the electrically grounded work piece and a 9”-18” length of covered consumable metal rod, called the electrode. • The heat of the arc melts the base metal in the immediate area, the electrode’s metal core, and any metallic elements in the coating of the electrode. • It also melts, vaporizes or breaks down chemically non-metallic substances in the coating to shield the arc, protect the weld, and add alloys or properties to the weld deposit
Terms: • Arc-flow of current across a small gap • Base Metal -metal to be welded to • Bead --Weld made by one pass of the electrode • Crater --depression at the end of the weld • Penetration --depth of weld into the base metal • Bevel --cutting the edge of the metal at an angle • Welding --joining of two or more metal by fusion
TERMS • Electrode --Metal wire or rod covered with a chemical coating • Flux --Chemical coating to protect the bead, can be a solid or gas. • Speed --how fast you are traveling. • Slag --left over carbon on a bead made by an arc welder. Protects and cools the bead.
Summary of Shielded Metal Arc Welding—Why Do IT? • SMAW welding has grown tremendously in popularity due to all of its advantages • It is still the most popular welding process in North America. • SMAW is the most difficult welding process in which to train welders, but it is the foundation of electric arc welding processes. • The equipment is fairly basic and inexpensive comparatively to any other arc welding process. • A wide variety of base materials, including both ferrous and non-ferrous, can be welded using the SMAW process along with a variety of applications including sheet metal and thick sections of material.
Summary of Shielded Metal Arc Welding—Why Do IT? 2 • The process produces a protective slag that will need to be removed for cleanliness and to prevent slag inclusions in multiple pass welds. • The process also produces spatter, which is a visual defect. However, the spatter can be easily removed with a grinder.
ARC WELDING • There are several advantages to SMAW. • Low Start Up Costs - SMAW welding machines are relativity inexpensive • Portability - SMAW is a very portable process because it does not require any external shielding gas and equipment due to the ability of the electrode to produce its own shielding gases. • Outdoor Weldability - SMAW welding can be done outdoors. The shielding of the weld puddle from the coating of the electrode is not susceptible to winds and draft, and therefore, is an excellent choice for outdoor welding. • All Position Welding - SMAW can be done in all welding positions, which eliminates the need for expensive fixtures or manipulation of the part being welded. • Variety of Materials - Many base materials and alloys can be welded with the SMAW process.
DISADVANTAGES Low Efficiency - The efficiency of a SMAW electrode can be defined as the percentage of the electrode that is consumed and becomes part of the weld. SMAW electrodes are 60%-65% efficient. The primary reason for this low efficiency is stub loss, or the portion of the electrode that is unused and discarded. . • Operating Factor - Operating factor can be defined as the amount of arc on time in a shift of work, labeled as a percentage. SMAW welding has an operating factor of approximately 25% - 30%--workday is spent arc welding. • Restarts - SMAW electrodes are only 9”-18” in length. When the electrode is consumed in the arc, it needs to be replaced with a new one. This means that welding stops, and time is taken to replace each electrode. • Operator Skill - SMAW welding requires a high level of operator skill. This process is one of the hardest arc welding processes to learn. • Slag & Spatter .
Welding Equipment • Welders • AC (Alternating Current)--Current alternates direction, between positive & negative. DC (Direct Current)--Current flows in one direction • a.DC Positive (STRAIGHT) • Electrode negative, work positive • b.DC Negative(REVERSE) • Electrode positive, work negative • AC/DC Rectifiers
TRANSFORMER • The transformer in a power supply is a step-down transformer that takes high-voltage, low-amperage AC input supplied from power companies and changes it to low-voltage, high-amperage AC welding current. • For example, your input power may be 230 volts on a 50-amp branch circuit. This voltage is much too high and the amperage is much too low for welding applications. • The transformer takes this condition and reverses it to a much lower voltage, in the range of 13-45 volts (most applications 15-35 volts) and increases the amperage to a much higher level appropriate for welding.
RECTIFIER • In power supplies that deliver DC and/or AC and DC current to the arc, there needs to be a device that changes this now low-voltage, high-amperage AC into DC. • This device is called a rectifier. A rectifier converts AC to DC. They are very efficient and very reliable. • A rectifier is a device that allows current to flow in only one direction. • If we remember the path that alternating current takes, it takes one of a sine wave path. This represents one cycle in which current flows in one direction for ½ of the cycle, stops at the zero line, and reverses it’s direction of flow for the other ½ cycle. This cycle repeats itself over and over again at a frequency of 60 Hz or 60 times a second in the United States. • A rectifier does not allow current to reverse itself. It only allows current to flow in one direction. In essence, it directs current in the same direction rather that allowing it to change direction. This is called direct current of DC. The direction of current flow determines whether the polarity is DC+ or DC-.
DUTY CYCLE • The duty cycle of a power source is the percentage of a ten-minute period that it operates at its rated output current setting. • If a power source is rated at 300 amps at a 60% duty cycle, it means that the machine can be operated safely at 300 amps welding current for 6 out of every 10 minutes. • If this duty cycle is reduced in actual operation, the maximum permissible current is increased. Thus, at a 35% duty cycle, this same 300 amp power source could be operated at 375 amps
Direct Current Electrode Negative(Straight) A rectifier allows current to flow in one direction only. • The direction of the current flow determines the DC polarity. • DC- or direct current electrode negative is the arrangement of direct current arc welding cables/leads in which the electrode is the negative pole and the workpiece is the positive pole of the welding arc. • When using DC- polarity, the majority of the heat is directed at the electrode. • The electrodes designed for DC- polarity produce weld deposits with shallow penetration. Primary applications are fast travel speeds on sheet metal.
Direct Current Electrode Positive (Reverse) • DC+ or direct current electrode positive is the opposite of DC- or direct current electrode negative. • In this case, the electrode is the positive pole and the workpiece is the negative pole. • When using DC+ polarity, the majority of the heat is directed at the work piece. • The electrodes designed for DC+ polarity produce weld deposits with deep penetration. • Primary applications are for pipe welding, general purpose and maintenance welding, deep penetration applications, and on base material with surface contaminants.
STRAIGHT POLARITY DC-—ELECTRODE IS NEGATIVE; WORK IS POSITIVE REVERSE POLARITY DC+ —ELECTRODE IS POSITIVE; WORK IS NEGATIVE
Alternating Current • Alternating current is a current that reverses regularly in recurring intervals of time 1/120th (60Hz) of a second.. • AC is the type of power used in the United States as the standard for input power to run any electrical equipment or apparatus. It has alternating positive and negative values. In other words, it switches from DC+ to DC-, and it switches back and forth very rapidly. • An AC sine wave and the frequency of current flow through one sine wave is 60 Hz or 60 times a second in the U.S.
Equipment • Electrode holder—holds the rods • Ground clamp • Amp Adjustment--sets the heat to adjust the penetration. • Greater the heat, the more penetration • Usually 110-125 amps • Helmet--Number 10 lens—Eye protection • Flip down or automatic • Leather Gloves • Chipping Hammer--remove the slag • Wire Brush--Cleans the metal
LENS NUMBERS • Filter plates come in varying shades. • The shade required depends on the maximum amount of amperage to be used. • The recommended shade number for SMAW is 10 or 11. The lowest shade number recommended is a shade 7. • To determine the correct shade to use, start with the darkest shade number. If it is difficult to see the arc, reduce the shade number by one and so on until the appropriate shade is found to provide both shielding and visibility of the welding arc.
Welding Positions Sit or Stand in a relax position Weld with both hand Move across your body. Right handed person—Left to right. Lean electrode to the right a little bit Start Arc by Tapping Scratching. Move electrode either in circles or half moon
Adjusting the Current Heat is adjusted by: Thickness of metal Size of Electrode Speed of Travel Position of weld Bead should have deep and even penetration.
Molten Puddle When welding—watch your bead, not ahead of the arc. Molten Puddle should tell you: 1—Width of bead 2—Depth of penetration 3—Height of bead
Flux Used Around the Electrode Purposes: Forms a gaseous shield Gathers impurities Keep weld from cooling to fast Stabilizers and directs the arc. Wire Welding—this is the argon/carbon dioxide gas
ELECTRODE HOLDER • Electrode holders are also rated at a given amperage and duty cycle similar to power supplies. • The EH 200, EH 300, and EH 400. Each are rated at 200 amps, 300 amps, and 400 amps respectively. • The primary function of the electrode holder is to hold the electrode and to provide electrical contact of the electrode to the work piece while insulating the operator and the jaws from the power supply and from the work piece. • Copper jaws provide the best electrical contact. • The large insulated handle is designed for operator comfort. • Insulated jaws prevent accidental grounding. Jaws open wide for quick release of electrode stubs. • The positive grip handle remains cool after steady welding at rated current and is impact resistant for long life.
WORK CLAMPS • Work clamps are also rated at a given amperage and duty cycle. The GC 300 and GC 500 are rated at 300 amps and 500 amps respectively. • The work clamp completes the electrical circuit from the electrode as it strikes the arc either to or from the power supply. This depends upon welding polarity. • A heavy spring tightly clamps the jaws to promote positive electrical contact with the work piece. • Work clamps provide for quick connection to the work piece. They have easy operation. Just squeeze, slip the jaws over the work and let go. The jaws open to a full 2 ½” (63mm).
CABLES • The ground cable from the power source to the electrode carries current to the electrode and from the arc to the workpiece and back to the power source. These conductors are very important to the efficiency of welding as well as the arc characteristics or vice-versa depending upon welding polarity. • Cables must also be the proper size to deliver the appropriate amount of current to the welding arc. Sizing of the cable is also dependent upon the length of cable being used. • The conductors in the welding cable are made up of strands of copper or aluminum. The cables are wrapped in a paper wrapping. Next, rubber insulates and covers the jacket wrapping. The paper wrapping is for cable flexibility.
Electrode • Carries Current to the Metal • Small end goes into electrode holder. • Identification of Electrode, Example 6013 • 1st 2 numbers (60) strength in 10,000 psi---60,000 psi • 3rd number (1) Welding Position 1—All position-flat, horizontal, vertical, overhead. 2—Flat & horizontal 3—Flat • Last two number—chemical makeup of the flux, that determines polarity, AC or DC 10—DC Reverse 11—AC/DC Reverse 12—DC Straight 13—AC/DC Straight 14—DC either polarity 15—Low Hydrogen 16—AC/DC Reverse.
SMAW - AWS Classification • The American Welding Society or AWS sets guidelines for SMAW electrodes with which manufacturers have to comply. • These guidelines include chemistry and mechanical properties, and usability tests. • Each letter and digit stands for something very specific. • The E stands for electrode. AWS defines an electrode as the current carrying device, not necessarily the consumable that becomes the weldment. In the case of SMAW, the electrode core is consumed as well as any metallic elements in the coating to become the weld deposit. • The 70 stands for minimum tensile strength in 10,000 psi. The weld deposit made by this SMAW electrode must consistently meet a minimum tensile strength requirement of 70,000 pounds per square inch (psi).
SMAW - AWS Classification • The next digit is either a 1 or a 2 and indicates welding position. • A “1” indicates that the electrode is an all position electrode-- (flat, horizontal, vertical up, vertical down, and overhead). • While the 2 stands for welds that can only be made in the flat/horizontal position. • The 3rd and 4th digit combined indicates the type of current the electrode operates on and the type of coating.
ELECTRODE ANGLE • Electrode angle can also affect the weld bead profile. • When welding a fillet weld, the electrode should be held in the weld joint at approximately a 45 angle from the horizontal base plate. • The travel angle will be a drag angle of approximately 15-20. The electrode is then dragged down the weld joint at the appropriate travel speed. • Travel speed is determined by the size of the electrode being used, the type of electrode, the welding amperage and the desired weld bead size and shape. • If the electrode angle is too severe and exceeds the recommended 45, the weld will favor the horizontal plate and inadequate fusion can take place, and perhaps burn through on the bottom plate. The opposite effect can occur for too small of an electrode angle of the electrode in the weld joint.
STARTING THE ARC • When starting the arc, strike the electrode like a match on the work surface by gently and quickly moving it along the weld metal. • Next, withdraw the electrode to form an arc length from the work piece of approximately 1/8”. • Reduce the arc length to the approximate length required to produce the desired weld.
ARC LENGTH • Arc length is arc voltage. • As the arc length is shortened, the arc voltage is lowered. If the arc length is too close to the work piece, the arc will go out or create a dead short. In this situation, the voltage drops to 0 and the amperage rises significantly. This may cause the coating on the electrode to break down or even catch on fire if it has an organic coating. • Arc length is dependent upon the type of electrode used. Arc length can vary in height from just a drag to 3/16” distance from the work piece. • Too long of an arc length will cause the arc to go out. This situation is called a “pop out”.
DETERMING THE AMPERAGE • When determining electrode amperages, be sure to consider: • Position of the weld. • Thickness of the weld metal. • The type of joint being fabricated. • Diameter of core wire will be another variable to consider - when determining electrode amperages. • The polarity will determine the actual amperage setting.