Newsletter Plugin
Newsletter Plugin . The newsletter plugin allows you to create and send newsletters to a managed list or multiple lists of users. Your users can subscribe to one or more mailing lists and also unsubscribe from any lists individually.


Newsletter Plugin
E N D
Presentation Transcript
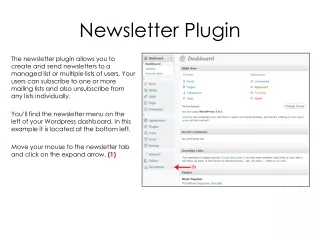
Newsletter Plugin The newsletter plugin allows you to create and send newsletters to a managed list or multiple lists of users. Your users can subscribe to one or more mailing lists and also unsubscribe from any lists individually. You’ll find the newsletter menu on the left of your Wordpress dashboard. In this example it is located at the bottom left. Move your mouse to the newsletter tab and click on the expand arrow. (1)
The Main Newsletter Menu Main menu options. Newsletters ( gives you an overview of all activity including number of subscribers, emails queued to go out, number of mailing lists ) Send Newsletter ( Allows you to create and send a newsletter to a mailing list ) Subscribers ( View , edit and delete your users who have subscribed to your mailing list ) Import / Export ( Import or Export mailing list users in CSV format ) Newsletter Templates ( Create a template that can be used for multiple newsletters) Email Queue (View outgoing emails waiting to be sent) History / Draft Emails ( Your emails sent previously, from here you can re-send an email ) Subscriber Stats (The subscriber statistics for the past 7 days)
Creating a Test Mailing List • In this tutorial we will create a test mailing list and then walk through creating a simple email. • First, click on the menu item Mailing Lists (1) and then click on add new (2) • note for this test mailing list we will use your email address, it is a good practice to test any campaign before sending it out.
In the Save a Mailing List window Type the name “Test List” into the title area, the list is not a private list so that can stay set to “no” In the custom fields area use the “check all” checkbox to select all the possible fields *note your custom fields will most likely differ from this example depending on how your site was designed. Now click on Save Mailing List (1) This code can be copied to any page in your site to add a form where users can sign up for this mailing list! You have now created a blank mailing list called “Test List” but there are no users in it yet, you can either manually add users to this group, or add a form on your website that will allows users to subscribe. Notice the code under Post/Page Embed [wpmlsubscribe type="list" id="3"] Simply copy and paste that code to any area of your website and a subscription form will be created for this particular mailing list.
Manually Adding Users to Email Lists For the Test List we don’t want any users to subscribe, so instead of pasting that embed code into a page we will manually add an email address (or several) First, click on “Subscribers” in the main menu (1) then click on “add new” * Note – you may want to add several users to the test list as sometimes an email campaign will need to be reviewed and approved before sending.
Manually Adding Users to Email Lists Enter your email address and check the mailing list called “Test List”, you do not need to register as a Wordpress User (you’re already a Wordpress admin) Chose the email format you prefer ( most often it’s html ) and fill in your first and last name. Finally click on “Save Subscriber” Next we will create a very basic newsletter and send it to the Test List *Note the difference between Html and Text is that Html emails display the full content ( like you would see in a web browser ) and Text is plain text only with no images or web content.
Sending a Basic Newsletter Save draft allows you to come back to this later. First click on “Send Newsletter (1) and then fill out the newsletter like in the Example. Under Mailing lists (2) make sure you check off the “Test List” group. If you were not quite ready to send the newsletter out, you can always save itas a draft. For this test however we will send this right now by clicking on “Queue Newsletter” Queue Newsletter send this to be emailed now. Once you click on Queue Newsletter your email has been sent ( or it is waiting to be sent if there are emails waiting ahead of it). You will see a confirmation at the top of the page.
Variables and Custom Fields Variables If we sent out our previous test email to multiple people everyone would get the text “Greetings Rob Jones,” Using Variables we can pull data from each users account and add that dynamically. If you expand the Variables & Custom Fields menu you will see a list of variables that you can use. For example [wpmlunsubscribe] will create a link to automatically unsubscribe from this list. Always give your recipient a chance to unsubscribe. You can apply any formatting you’d like to the text in your newsletter such as bold or underline. You can also insert pictures or clip art. * Note keep images small, a large or un-optimized image can cause the email to take too long to load and also puts a heavy load on the server causing emails to be sent out slowly.
Importing Email Recipients If you have a spreadsheet with customer data you wish to import it’s easy to get those addresses imported, For example; lets say I have an Excel spreadsheet with 4 columns. In this example there is only one person in the sheet. We first must prepare this data for import but saving the spreadsheet as a MS-DOS CSV file. To do this from Excel go to File / Save As and select the correct type. If youdon’t see the CSV options use the scroll bar to scroll down.
Click “Import / Export” on the main menu Use the Browse button to navigate to the CSV file Select the Mailing List you would like to import to. Chose “CSV Spreadsheet” as the file type Line up Data with the columns in your spreadsheet Column 1 Column 2 Column 3 Note that the data in column 4 was not used, so it will be ignored upon import. Click on “Import Subscribers” and your data will be imported. Export will return data in CSV format "ID","Email Address","First Name","Last Name", ""169","me@here","Rob","Jones”,