Download
1 / 25
250 likes | 418 Vues
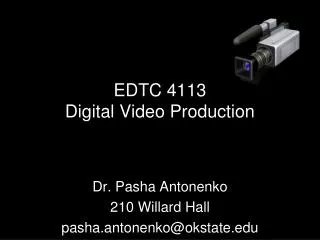
EDTC 4113 Digital Video Production. Dr. Pasha Antonenko 210 Willard Hall pasha.antonenko@okstate.edu. Why Use Video?. Engages the audience both auditorily and visually Provides a sensory experience of things we’d otherwise know nothing about

E N D
EDTC 4113Digital Video Production Dr. Pasha Antonenko 210 Willard Hall pasha.antonenko@okstate.edu
Why Use Video? • Engages the audience both auditorily and visually • Provides a sensory experience of things we’d otherwise know nothing about • Reduces cognitive load by conveying information via 2 perceptory channels • Good for teaching procedural knowledge – e.g. how to perform a dance move • Used for corrective purposes due to the ability of instant replay (sports, student teaching)
Hardware: Digital vs. Analog Digital signal with noise Binary: 0’s and 1’s Analog signal with noise Continuous waveform • Lines of resolution: 240 • Data rate: 117 GB an hour • Lines of resolution: 480-530 • Data rate: 13 GB an hour Effect on hard drive space and processor power
Digital Camcorders miniDV DVD HDD Canon Elura 100 Canon Ivis HR-10 Sony HDR SR-8
Digital Camcorders Resolution: Standard TV – 480 lines of resolution High Def TV – 1080 lines of resolution (full HDTV) Aspect Ratio: 4:3 (normal) 16:9 (widescreen) CCDs (convert light and color to a digital signal Charged Coupled Devices): 1 CCD 3 CCDs consumer prosumer
Focus Manual focus is usually better (and more expensive) - Make sure the camera is set to manual focus - Zoom in as tight as you can on the subject you wish to focus on - Adjust the focus ring until the picture is sharp. Turn the ring clockwise for closer focus, anti-clockwise for more distant focus - Zoom out to the required framing — the picture should stay nice and sharp Pull focus - Creative camera technique in which you change focus during a shot
Iris - Manual iris controls the amount of light coming through the lens (i.e., the "exposure"). - Practice is the only way to get exposure right. Record a number of shots in different light conditions, then play them back and see how good your exposure was. - Remember, if you're not sure about your exposure, try flicking the iris to auto and see what the camera thinks, then go back to manual. In time, you'll come to trust yourself more than the auto-iris. Auto iris Manual iris backlight
Lighting Manual iris is an expensive feature, so you may control exposure by controlling lighting 3-point lighting
Lighting • - Avoid strong nose shadows or any strong contrast on the face. Place the key light on the same side as the camera and fill the shadows. • - Avoid reflections from glasses. You may need to adjust the position of the subject and/or lights to do this. • Beware bald heads — they can reflect a lot of light and appear over-exposed. Camera mounted light Budget light ($10) Reduce light from window
White Balance - White balance basically means color balance. It gives the camera a reference to "true white" — it tells the camera what the color white looks like, so the camera will record it correctly. Since white light is the sum of all other colors, the camera will then display all colors correctly. • Incorrect white balance shows up as pictures with orange or blue tints: • Like iris and focus, manual white balance is an expensive feature Correct color balance Color balance too blue Color balance too orange
Viewfinder • The electronic viewfinder is WYSIWYG (What You See Is What You Get). This means that if the viewfinder image changes brightness, then the recorded signal changes brightness as well. • The messages which appear in the viewfinder can give you valuable information. Learn what they all mean. • If your viewfinder is fogging up, hold your eye slightly away from the eyepiece. Also, limit your intake of fluids - this reduces perspiration, which is what causes the fogging. • Many viewfinder eyepieces can be flipped open, allowing you to stand back from the camera. This can be useful if you have the camera mounted on a tripod, or if more than one person wants to look at the viewfinder. It can also help reduce eye fatigue.
Shutter Speed • A mechanical "door" between the camera lens and the film. • When a photo is taken, the door opens for an instant and the film is exposed to the incoming light. The speed at which the shutter opens and closes can be varied — the faster the speed, the shorter the period of time the shutter is open, and the less light falls on the film. Shutter off 1/120 second 1/500 second • Higher shutter speeds are common in sports coverage.
Zoom Optical zoom The lens moves you closer to the subject without sacrificing quality. The higher the optical zoom rating on a camera, the farther away you can be to take a photograph and still get a clear, close-up image.
Zoom Digital (Dynamic) zoom Digital zoom is not bringing you closer to the item. Rather, the camera crops the entire image, and then digitally enlarges to the size of the viewfinder the portion you want to zoom in on. This results in a loss of quality.
Features Worth Considering • Substantial optical zoom – at least 10X but more is better • Comfortable, accessible, logical controls • Easy-to-use viewfinder and LCD display • Optical image stabilization (instead of the less desirable electronic stabilization) • Input and output capabilities – IEEE 1394 (Firewire), USB 2.0, S-Video, composite, component, HDMI • An external mic plug and a headphone plug • High shutter speed settings – to capture crisp images of fast-moving objects • True anamorphic 16:9 widescreen mode – to give your movies a Hollywood feel
Features NOT Worth Considering • Digital zoom – all you get is chunky pixels • Titler, fade-in, fade-out, sepia tone, transitions, and other digital special video effects – your video-editing software will take care of these during post-production • Presets for special lighting conditions (portrait, sports, backlit etc.) – you need to use manual controls to more accurately handle these situations
Camcorders to Avoid Entirely • Digital 8 – uses the digital format but records to Hi-8 tapes. Bridge technology for videographers making the transition to DV, which is now obsolete • MicroDV – proprietary format from Sony that compresses video to MPEG-2 (lower quality than regular miniDV tape). Ok if you transfer videos directly to DVD but lousy for editing. • DVD camcorders – same reason as above. Plus the small DVD discs have smaller capacity
Activity • Your school is starting a program called “Spotlight” to encourage high-schoolers to interview their peers, community members, and teachers. You as the technology director have $500 to spend on a digital camera and other equipment for this project. Which camera will you choose? Why? • www.amazon.com • www.bestbuy.com • www.circuitcity.com
Camera Shot Types • Extreme Wide (Long) Shot • The view is so far from the subject that she isn't even visible. The point of this shot is to show the subject's surroundings. Often used as an establishing shot - the first shot of a new scene, designed to show the audience where the action is taking place. • Very Wide (Long) Shot • Much closer to the subject. The subject is (just) visible here, but the emphasis is very much on placing her in her environment. The VWS also allows plenty of room for action to take place, or for multiple subjects to appear on screen. • Wide (Long) Shot • Here the subject takes up the full frame. This is as close as we can get without losing any part of her. Focuses the viewers’ attention on the subject of the scene.
Camera Shot Types Medium Shot Shows some part of the subject in more detail. This is an approximation of how you would see a person "in the flesh" if you were having a casual conversation. You wouldn't be paying any attention to their lower body, so that part of the picture is unnecessary. Medium Close Up The medium close-up is half way between a mid shot and a close up. This shot shows the face more clearly, without getting uncomfortably close. Close Up Here a certain feature or part of the subject (e.g. face) takes up most of the frame. A close-up of a person emphasizes their emotional state. Whereas a mid-shot or wide-shot is more appropriate for delivering facts and general information, a close-up exaggerates facial expressions which convey emotion.
Camera Shot Types Extreme Close Up The ECU gets right in and shows extreme detail. You would normally need a specific reason to get this close. It is too close to show general reactions or emotion except in very dramatic scenes. Helps the editor assemble a longer sequence. Cutaway A shot of something other than the current action. It could be a different subject (e.g. this cat when the main subject is its owner). The cutaway is used as a "buffer" between shots (to help the editing process), or to add interest/information. Cut In Like a cutaway, but specifically refers to showing some part of the subject in detail. Can be used purely as an edit point, or to emphasise emotion. For example, hand movements can show enthusiasm, agitation, nervousness, etc.
Camera Shot Types Two Shot A shot of two people. Often used in interviews. Good for establishing a relationship between subjects. If you see two sports presenters standing side by side, you get the idea that they are the show's co-hosts. Equal prominence in the frame implies that they will provide equal input. Over the Shoulder Shot Looking from behind a person at the subject, cutting off the frame just behind the ear. The person facing the subject should occupy about 1/3 of the frame. This shot helps get the feel of looking at one person from the other's point of view. Noddy Shot Common in interviews, this is a shot of the person listening and reacting to the subject. It’s common to shoot the subject (using OSS and one-shots), then shoot some noddies of the interviewer once the interview is finished and edit them into the interview later.
Camera Shot Types Point of View Shot Shows a view from the subject's perspective. This shot is usually edited in such a way that it is obvious whose POV it is (see the example below). Weather Shot The subject is the fine day. The sky takes up at least 2/3 of the frame. This type of shot is common in television programs where the weather is of particular interest, e.g. sports shows. It is also useful as an establishing shot, for setting the general mood or for overlaying graphics.
Camera Shot Types on Youtube • http://www.youtube.com/watch?v=d1japIhKU9I • http://www.youtube.com/watch?v=TuGvRu5N9v4 • http://www.youtube.com/watch?v=t48GDxiwTdg • http://www.youtube.com/watch?v=3VS2iNhz180 • http://www.youtube.com/watch?v=SPK65xG3jFA
Camera Movement Dolly, tracking, or trucking A shot in which the camera is mounted on a cart which travels along tracks. Zoom A change in the lens focal length with gives the illusion of moving the camera closer or further away. Pan Horizontal movement, left and right. Follow The camera physically follows the subject at a more or less constant distance. Pedestal Moving the camera position vertically with respect to the subject. Tilt Vertical movement of the camera angle, i.e. pointing the camera up and down (as opposed to moving the whole camera up and down).