Surface Mount Device Soldering
340 likes | 416 Vues
Materials by Linz Craig. Surface Mount Device Soldering. Surface Mount Device Soldering. Soldering Iron. The main soldering tool U sed to melt solder. Solder. Metal “ glue ” used to join together metal parts Contains flux Made of Tin and Copper, sometimes Lead.

Surface Mount Device Soldering
E N D
Presentation Transcript
Materials by Linz Craig Surface Mount Device Soldering
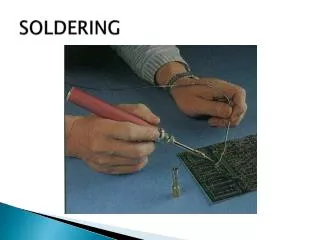
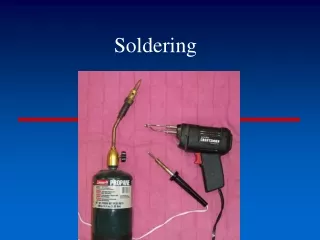
Soldering Iron The main soldering tool Used to melt solder
Solder Metal “glue” used to join together metal parts Contains flux Made of Tin and Copper, sometimes Lead
Tweezers, Clippers, & Pliers Tools used to handle components and PCBs
Sponge Used to clean off soldering iron tip Can be made of various materials Should be used every time before soldering a joint
Flux Makes solder melt easier Always use extra flux for rework
Solder Wick Use to remove solder Careful, it gets really hot!
PCB Printed Circuit Board Comprised mainly of fiberglass and copper foil
Pads and Leads Component and board parts that you will solder together
Pads These are the metal surfaces on the PCB that conduct electricity to the components
Leads These are the pieces of metal coming out of the components
Safety Goggles Wear them, you only have 2 eyes and solder is very, very hot! (Like this guy.)
What is oxidization? Oxidization is what happens when oxygen breaks down matter It impedes heat and electricity transfer As a result you must clean your iron tip constantly… really!
What is polarity? Some parts have to be attached in a very particular way due to polarity These parts will not work if you put them in incorrectly, pay attention Polarized parts are highlighted in yellow in your kit card Example of polarized LEDs
Cleaning your soldering iron Cleaning your soldering iron is one of the most important aspects of soldering. With SMD we suggest doing it after every joint If you can’t get the oxidization off using a sponge try tip tinner
Perfect solder joint, step 1 of 4 Hold the iron touching one of the pads for a count of one Make sure to touch the side of the iron tip to the pad, not the actual tip of the iron
Perfect solder joint, step 2 of 4 Feed a tiny bit of solder onto the pad while continuing to hold the iron to the pad Feed enough solder onto the pad to cover the pad, but no more
Perfect solder joint, step 3 of 4 Continue to hold the soldering iron on the pad and pick up your component using the tweezers with your other hand Make sure the tweezers are making contact only with the sides of the component that do not have leads, otherwise you may get your tweezers in the solder
Perfect solder joint, step 3 of 4 Continue to hold the soldering iron on the pad so the solder stays liquid Slide the component into the solder from the side while keeping the bottom of the component flat on the PCB Make sure you slide the component far enough into the pad so that the pad on the other side of the component is at least half exposed
Perfect solder joint, step 3 of 4 Continue to hold the component on the pad with your tweezers and remove the soldering iron, wait for the solder to solidify and then remove your tweezers
Oops. If you don’t slide the component in from the side you may wind up with a component that does not touch pads on both sides If this happens just reflow the solder on the first join and replace the component
Here’s How to Use Solder Wick Apply flux to the solder you want to remove Place the solder wick on top of the solder you want to remove Sandwich the solder wick between the solder and your iron until the heat sucks the solder into the wick
Here’s How to Use Solder Wick The solder will flow into your wick and the wick will turn silver with solder This may take a while, be patient and apply constant contact with the iron Try rolling the soldering iron along the wick if you’re really having trouble You might also want to try cleaning your iron if it isn’t working
ICs are Tricky! Tack down a corner lead of your IC onto the corner pad Do this just like your other components Don’t worry if you accidentally solder two leads (you can clean it up with wick later)
ICs are Tricky! The most important thing is to make sure that the IC is flat and all the leads line up with the pads
ICs are Tricky! To keep the IC in place next solder the lead on the bottom right corner (or the corner diagonal from your first solder joint)
ICs are Tricky! To keep the IC in place, next solder the lead on the bottom right corner (or the corner diagonal from your first solder joint) After that put solder on the rest of the leads and pads Don’t worry if you wind up with a lot of jumpers, you can clean them up later
Cleaning Up an IC Some people will create jumpers on the IC leads on purpose and clean them up with wick later You can also apply flux to the jumper and if there is not too much solder, push the iron tip between the IC leads. This will melt the jumper that is connecting the two leads
Cleaning Up an IC You can also use the solder’s tendency to be drawn towards heat to push or pull the solder along the IC leads to a corner lead and then use wick to remove the excess solder To do this you will need to touch at least two leads at once with your soldering iron, constantly clean your iron and use a lot of flux
More Info There is a whole bunch of info on SMD soldering, stenciling and rework here: http://www.sparkfun.com/tutorials/category/2 http://www.youtube.com/watch?v=wE4BoCNXRXA (Just Google “SMD Solder SparkFun Tony”)
www.sparkfun.com 6175 Longbow Drive, Suite 200 Boulder, Colorado 80301