Download
1 / 61
610 likes | 631 Vues
This guide explains how to set up categories and grading preferences in PowerTeacher Pro for middle school teachers. It also provides instructions for entering grades.

E N D
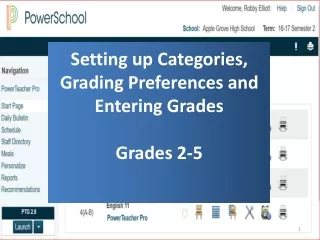
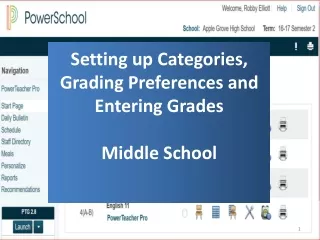
Setting up Categories, Grading Preferences and Entering Grades Middle School
When you first open PowerTeacher Pro, you MAY see a message offering to Migrate Data to PowerTeacher Pro. PLEASE, DO NOT MIGRATE THE DATA!
Before using the gradebook, Categories and Grading preferences must be setup.
Grading Preferences have been setup at the district level for Y1, S1 and S2. The teacher will need to setup R1, R2, R3 and R4. For those who only enter a Final Grade at the end of the terms (P.E., Gifted, etc), you will not need to do any Grade Preferences setup. No assignments are necessary, as you only enter the final grade for S1, S2 and Y1.
For those who have used PowerTeacher Gradebook in the past, this means that the setup for the terms are set at the district level (except for R1, R2, R3, and R4). Terms set at the district level are locked and they cannot be changed at the school level. Grade Setup Comparison Old PowerTeacher Gradebook New PowerTeacher Pro
PowerTeacher Pro is accessed from within the Power Teacher portal. There will no desktop shortcut, as PTP is now totally web based. Because of this, a right mouse click will not produce a gradebook related menu, as it did in PowerTeacher. Do not use the right click. • From within your browser, log in to the PowerTeacher portal at www.desotopowerschool.com/teachers • Enter your User name and Password issued by your PowerTeacher administrator and click Sign In.
You will be taken to the PowerTeacher portal screen. • You can access PowerTeacher Pro one of two ways: • Click PowerTeacher Pro on the Navigation bar/Menu OR • Click PowerTeacherPro under the ClassName.
When you first log in to PTP, there will be a Welcome message that introduces some of the features. Click Close once you have read the message. • To access the Welcome message again, click the Help icon and select Getting Started.
Some categories have been defined and weighted at the District level . • Categories are global and will appear in all classes that you teach. • PowerTeacher Pro will store gradebooks from previous years, so NEVER delete a category, as that would affect any previous gradebooks. • You can inactivate categories that you do not need.
Launch PowerTeacher Pro. By default, PowerTeacher Pro opens to the Assignments screen in the Grading Module. The first time you log in, you will not see any assignments, as you have not created any.Navigate to your first class by clicking the arrow to the left of the Class Name and selecting the first class period.
Categories and Weights • When setting up the gradebook, you will first create the Categories, setting the score type and weight.
Categories that have been set at the district level will appear here with beside the category name.
Click on A+ Grading and Choose Categories. • Check the category list to see if the categories you need are there. If they are, you do not need to create any. You may skip to slide 22 and set up Traditional Grading Calculations. • If you need to set up a Category, proceed to the next steps to create your categories.
To setup Categories, Click on the A+ Grading button from the Menu Bar on the left side of the screen. • Click on Categories under the Assignments set.
To Create a new Category, click on the Create button in the upper right corner, then click on Category.
Give the Category a name. • Assign it a color if you wish to color code your Categories. If you use a category that was set at the district level, you may not be able to change the color. • Make it active. • Give it a description, if you wish.
Select the classes in which you want this category to appear. Click the down arrow beside Select Classes.
Click the box to the right of the classes in which you wish these categories to be used. (Checking the box beside Other classes will select all of the other classes listed.) • Click the arrow beside Select Classes to close that window.
Click on the Assignment Defaults tab to set Score Type and Weight. • Select Percent.
Set the Points to 100 • Be sure Publish Assignment is checked. • Publish Scores and Count in Final Grade should be checked. • Click Save to Save when you are finished.
You can set when the assignment is to be published. Most teachers choose Immediately, but you do have several options. • Be sure to click Save to save the Category settings. • Continue this process until you have all of the categories set up that you need.
You can change the order of the Categories by clicking the up or down arrow to the left of the Category Name, under the Order Column.
You can Inactivate a Category that you do not plan to use so that it does not show in your Category list. • Click on the Pencil to the far right of the Category Name. • Click in the Inactive box to the right of Status. • This Category is now Inactive and will not show in your list of Categories.
To setup Traditional Grading Calculations, Click on the Settings button from the Navigation/Menu Bar on the left side of the screen. Click on Traditional Grade Calculations.
This Screen will show all of the classes that you teach.1. Verify that you are in the correct year/term. If you need to change this, click the arrow to the left of the Class and Term. This will open a new screen. Click the arrow beside the Term. A new box will appear where you can change to a different term.
2. Select the class to set up, by clicking the arrow to the left of the class name. This will expand that class so that you can view the Terms for the year. You can also collapse a class by clicking the down arrow to the left of the class name.3. You will see a message that A grade calculation formula has not been configured for R1, R2, R3 and R4.
. 4. Remember that Y1, S1, and S2 are set at the district level, so all you need to do is R1, R2, E1, R3 and R4, E2. 5. Click on the Pencil to the right of R1 to edit the settings.
Leave the Calculate Overall Class Grade checked. • Click the plus sign to add a Type, if there is not one there • already. • 8. By default, the Type is set to Total Points. • 9. Set the Type to Category Weighting. • 10. Set the Attribute to the appropriate category. • Set the Weight to the appropriateweight. • The Percent will be calculated for you as you add all of your categories.
Click the plus sign to add another Type, if there is not one there already. • Set the Type to Category Weighting. • 15. Set the Attribute to the appropriatecategory. • Set the Weight to the appropriate weight. • Click the plus sign to add another Type. • Continue adding categories as you need. • Note: Notice the percentages were calculated for you, adding up to 100%.
19. Once R1 is setup, copy that setup to R2, R3 and R4. 20. Click on the Setup icon and click Copy Traditional Grade Calculations.
21. Click the button to the right of Within a Class. 22. Select the class from which to copy the setup (the class you are working in). 23. Select the term from which copy the setup (R1). 24. Now select the Term to which you wish to copy the setup (R2). 25. Click Validate in the bottom right corner.
26. Verify that this is the action you wish to take, from R1 to R2 within the current class. 27. Click Copy in the bottom right corner.
28. Repeat these steps and copy the setup to R3 and R4 for this class.
Terms E1 and E2 can be left as Total Points , as this is the Exam Grade and no assignments are created here. Your setup for this class will look like below:
If you teach other classes that use this same setup, you can copy it to them. • 29. From the Traditional Grade Calculations screen • 30. Click on the Settings button, • 31. Click on Copy Traditional Grade Calculations.
32. Click on the button to the right of To Another Class. • 33. It asks you from which class do you wish to copy the setup. Choose the class you just set up. • 34. From the drop down, choose the term to copy to, if it is not already set. • 35. Click the drop down for the class and choose the class to which you wish to copy.
36. Check that all settings are correct. • 37. Click on Validate in the bottom right. • 37. Click on Copy in the bottom right of the next screen. • 39. Now, follow this same procedure to copy the setup to the other classes that you teach, if you use the same setup. • 40. If you use a different setup for another class, follow these same steps to set the Grade Preferences for that class.
41. Now, when you change to the other class periods to which you copied the setup and access the Traditional Grade Calculation screen, you will see that the setup has been copied to the other classes. 42.Once you have completed the setup for each of the classes that you teach, the grading rules are setup for the entire year. 43. You are now ready to create assignments within your classes and enter grades.
Creating Assignments • To display your Assignment list, Click on the A+ Grading. • Click on Assignment List. • This will show the assignments that have been created, if any have.
To create an assignment, click on the Create button in the upper right of the screen. • Click on Assignment. Assignments and Categories can be created from most any screen in PTP from this button. • From the Assignment tab, Select the Classes in which you want this assignment to appear. (This is an easy way to have an assignment appear in multiple classes without having to create it over and over.) • Once you have selected the classes, click the arrow beside Select Classes to close the window.
Give the assignment a name. • Select the Category for that assignment. • Set the Score Type to Percent. • Set the Points to 100. • Check Count in Final Grade. • Set the Due Date. • Enter a Description if you wish.
Click on the Students tab. • You can select all of the students in the class. • You can also Add or Remove students who are required or not required to complete this assignment.
Click on the Publish tab. • We recommend using Publish Immediately, but there are other choices. • Be sure Publish Scores is checked. All of this allows for the scores to show up immediately in Parent Portal. • Click Save and Close when you have finished.
To view the assignments in the scoresheet, click on A+ Grading then Scoresheet. • The scoresheet window looks similar to a traditional gradebook.
Continue to create Assignments by following these directions. • To see the Assignments, Click the A+ Grading button on the menu bar, then click Assignment List. • You can sort the assignments according column headings by clicking on that column name.
Student names show in the column on the left side of the scoresheet. • Assignments show in columns across the page.
Use the arrows to scroll left and right to view the assignments OR use the Page links at the bottom of the screen. • You can also set how many assignments you wish to appear on a page. If you set a higher number of assignments that you have, you will scroll through assignments on one page, not page to page.
To enter scores, click A+ Grading on the navigation bar and select Scoresheet. • Be sure that you are in the correct Reporting Period and the class in which you wish to work.
Click in the cell below the Assignment column and • to the right of the student name. (The Scoresheet functions • very much like a spreadsheet, with cells.) • The Score Inspector will appear on the right of the screen.
You can enter a grade one of several ways: • Click in the cell in the Score Inspector, key in the grade and click or hit Enter. • OR • Click on the number buttons in the Score Inspector and click or hit Enter. • OR • Key the score directly into the cell to the right of the student name and under the Term and hit Enter.