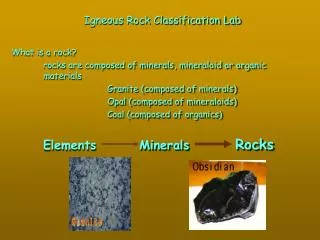
Rock Lab
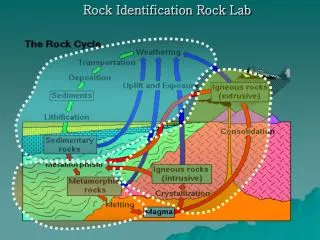
Rock Lab. Objective - weathering. Compare and contrast mechanical and chemical weathering. . Weathering – part 1. Method- Have a 30cm x 30 cm wax paper.

Rock Lab
E N D
Presentation Transcript
Objective- weathering. Compare and contrast mechanical and chemical weathering. Weathering – part 1
Method- • Have a 30cm x 30 cm wax paper. • Using hand held pencil sharpener, shave, and pile four full sized crayons of the same color on your wax paper. You are “weathering the rock material.” Observe the size and shape of the fragments. • Answer the Part 1 questions. • Fold the wax paper around the fragments. Put the wax paper packet into an envelope and put your name on it. Weathering
Examine the “weathered rock fragments” in your pile. Do they have the same size? Why or why not? • Think about when you were outside in the nature. What can you say about the size of rocks in nature? • In your pile, where did the “rock fragments” tend to move and collect? • Where does weathering take place? • Which type of weathering process does this activity represent? • How can a tree or water be an agent of mechanical weathering? • What kind of a climate is where chemical weathering occurs rapidly? What kind of a climate facilitates mechanical weathering? Explain your answers. Questions for Weathering
Students will work in groups of 4. • Fold one sheet (45 cm x 45 cm) of aluminum foil in half and place it on the working area. • Students open their envelope to take out the “rock fragments” from the wax paper. • The first student will transfer one color of shaved crayon onto the middle of the aluminum foil. The second student will pile his/her shaved crayon on the first pile. The other students will do the same. Explain the process of deposition. • Carefully fold the foil over the fragments. Allow one cm between the fragments and each of the four foil folds. (Otherwise it would burst out when you squeeze it) You created a nicely wrapped rectangular shape package with shaved crayon in it. Label the foil with your group. Method
Objective • Observation of sedimentary rock formation and characteristics Sedimentary rock Formation-part 3
Place the group’s folded foil package between two wood board (20 cm x 20 cm ) and place the “sandwich” in a vise of two C clamps. Apply light pressure to the two boards so the “rock” fragments are slightly compressed. • Remove the package form the vise of the C clamps. Carefully open it and observe the new product. Look specifically at the center region and the outer edges. • Carefully break this “sedimentary rock” into tow parts and examine the broken edges. • Answer questions on the next slide. Method
Which segments held together better, those on the outer edges or those in the central region? Why? • Describe the layer thickness now compared with its thickness when the crayon fragments were initially deposited on the foil. • What happened to the spaces between the “rock” fragments? • Explain the differences between compaction and cementation. Questions