Download

1 / 19
190 likes | 292 Vues
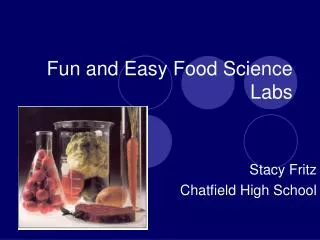
Fun and Easy Food Science Labs For the Busy Ag Teacher. Why Food Science?. Expanding value added products industry Ties into multiple subject area standards Ties concepts into things students relate to Adds excitement to your lessons Labs can be easily adapted to basic or complex curriculum.

E N D
Why Food Science? • Expanding value added products industry • Ties into multiple subject area standards • Ties concepts into things students relate to • Adds excitement to your lessons • Labs can be easily adapted to basic or complex curriculum
DNA Extraction Lab - Materials • Material with DNA • Detergent (ie. Dish soap) • Enzymes (Meat Tenderizer, Pineapple Juice or Contact Lens Solution) • Isopropyl Alcohol (70 or 95%) • Cold Water
DNA Extraction Lab - Materials • Ziploc Bags • Test tubes • Wooden Sticks • Pipettes or eyedroppers • Measuring cups/spoons • Coffee filters and cups • Salt
DNA Extraction - Procedure • Step 1 – Measure out a ¼ cup of your chosen material • Step 2 – Place material in ziploc bag and completely crush • Step 3 – Add up to a ½ cup cold water
DNA Extraction - Procedure • Step 4 – Mix thoroughly • Step 5 – Strain through coffee filter into a cup • Step 6 – Add about 2 T of detergent and a pinch of salt (swirl gently)– let sit for a minimum of 10 min
Gum Drop Lab - Materials • Jello • Sugar • Water • Pipettes or eyedroppers • Plates • Spoons
Gum Drop Lab - Procedure • Step 1 – Measure out a portion of Jello powder on your spoon – Place on plate • Step 2 – Using pipetter add a few drops of water while mixing it into your jello • Step 3 – Add more water or Jello mix as needed
Gum Drop Lab - Procedure • Step 4 - Form gum drop into desired shape • Step 5 – Roll in sugar • Step 6 – Enjoy!
DNA Extraction Procedure • Step 7 – Add a pinch of meat tenderizer into test tube • Step 8 - Fill test tube 1/3 full of DNA/Detergent solution – (mix gently) • Step 9 – Hold test tube at a 45° angle
DNA Extraction Procedure • Step 10 – Slowly fill test tube with an equal amount of alcohol • Step 11 – After the DNA has begun clumping harvest it with your wooden stick • DNA can be preserved in an alcohol solution for long term storage
Sensory Lab #1 - Procedure • Step 1 – Obtain a small sample of each Kool Aid in a small cup for sampling • Step 2 – With your lab partner taste your first sample and try to determine what flavor it is. Record your observations and flavor guess
Sensory Lab #1 - Procedure • Step 3 – Cleanse your tasting palette with water • Repeat steps 2 and 3 for each sample of Kool Aid
Plastic From Corn Lab - Materials • Corn Starch • Water • Cups • Spoons • Optional – corn oil and microwave
Plastic From Corn Lab - Procedure • Step 1 - Add a spoonful of cornstarch to your cup • Step 2 – Add an equal amount of water to your cornstarch and mix • Plastic should be the consistency of thick glue • Step 3 – Add more water or cornstarch as needed
Plastic From Corn - Procedure • Step 4 – Check the surface tension of the mixture • Step 5 – Pour mixture into your hand and try to form it into a ball – Once formed observe how it reacts to the heat of your hand • Step 6 – Have fun with your plastic carefully observing how it moves between a liquid and a solid
Sensory Lab # 2 - Materials • Glass or Plastic Vials • Various samples of food extracts and spices taken from the Food Science and Technology CDE list
Sensory Lab #2 - Procedure • Step 1 – Obtain a sensory sample set for your group • Step 2 – Take sample #1 and record its color, texture and what you think the sample is made of • Step 3 – Continue until all samples are observed
Cinnamon Maple Lemon Vanilla Cherry Butter Garlic Nutmeg Lilac Licorice (anise) Molasses Strawberry Oregano Lime Almond Menthol Peppermint Ginger Banana Basil Orange Onion Clove Pine Possibilities