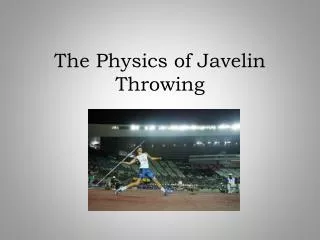
Javelin
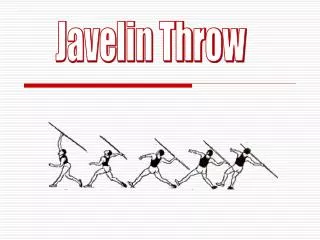
Javelin USA Track & Field Level 1 Coaching School Basic Technique Grip Carry Approach Run Withdrawal Pre-Throwing Stride (Cross Steps) Throwing Action The Grip Three Basic Types Finnish Fork American The grip is relaxed to lessen the tension in the arm and the shoulders

Javelin
E N D
Presentation Transcript
Javelin USA Track & Field Level 1 Coaching School
Basic Technique • Grip • Carry • Approach Run • Withdrawal • Pre-Throwing Stride (Cross Steps) • Throwing Action
The Grip • Three Basic Types • Finnish • Fork • American • The grip is relaxed to lessen the tension in the arm and the shoulders
Finnish Grip • The most popular grip • Javelin is held horizontally across the palm of the hand • Index finger is rolled around the javelin above the binding • Second finger is wrapped behind the binding of the javelin • Other fingers are wrapped around the binding
Fork Grip • Javelin is held horizontally across the palm of the hand • Javelin rests between the index finger and the second finger • The other fingers are wrapped around the binding
American Grip • Javelin is held horizontally across the palm of the hand • Index finger is wrapped around behind the binding of the javelin • The other fingers are wrapped around the binding
Carry • Javelin is held horizontally with the palm up in an over the shoulder position above the head • Point of the javelin is usually level but this can vary
Approach Run • Athlete is in an erect position at a check mark on the runway taking initial steps similar to the approach of a jumper • Athlete builds acceleration while running to a second check mark on the runway • Approach run can vary from 6 to 12 strides • Beginner starts with fewer strides
Withdrawal • As the thrower hits his check mark with the left foot the thrower takes the javelin backward • Extend the throwing arm backwards keeping the palm up and keeping the implement aligned with the shoulder • Run away from the implement • This is referred to as the transition phase • Point of the javelin is near the head
Pre-Throwing Stride (Cross Steps) • Following the withdrawal the thrower will begin the step pattern of the javelin • As the thrower completes the withdrawal, they will be on the right leg • The hip position is variable based on the flexibility of the athlete • For orientation in feeling torque we will say the hips will face the right side and the javelin will face the throwing direction
Performing the Pre-throwing Stride • In a rhythmic manner, the legs move out ahead of the hips with the right leg stepping in front of the left leg • There is a tilted axis • The right leg is picked up high similar to a triple jump bound
Performing the Pre-throwing Stride (con’t) • Upon touching the ground the right leg will bend, as in a ‘soft step’ to allow the COG to continue moving • The left leg should swing through prior to the right leg touchdown • Starting with the left count each step: 1--2--3--4-5 • the space between the final two steps is smaller as this is the plant
Power Position • The power position of the javelin differs slightly from the shot put and discus • The right leg faces the throwing direction at 45 degrees • The left leg is extended landing heel first with a slight flex
Throwing Action • Initiating the throw • The arm action • The release
Initiating the Throw • As the COG passes over the right foot there is push/rotation with the right foot • The right leg drive precedes a firm planting of the left leg
Arm Action • The palm is up as the elbow comes through high over the shoulder line • The throwing shoulder is like a whip handle • The release occurs near the front, as high as possible
Release • The release angle is approximately 27-35 degrees • The throwing hand rotates right after the release achieving a thumb down position • Avoid the ‘baseball follow through’
Teaching Progressions for the Javelin Throw • Grip • Arm Action • Power Position • 3 and 5 Step Throws • Walk-in Throws • Full Approach
Teaching the Grip • The javelin should rest across the palm • The javelin should be held like a wet bar of soap • Experiment with the different grips by walking the field • Remember the Finnish grip is preferred
Teaching the Arm Action • Have the athlete take the implement overhead and throw into the ground about 3 to 5 feet in front of the athlete • Keep the throws short emphasizing pulling through the point of the implement
Teaching the Arm Action (con’t) • As the athlete progresses draw the javelin back and perform short throws of 10 to 15 feet into the ground • Stress keeping the elbow high and following through over the head
Teaching the Power Position • Assume the power position with the right leg at 45 degrees facing the direction of the throw • The javelin is drawn back with the palm up, the head facing the front and the hips and shoulders to the side
The Standing Throw • Keeping the weight on the right, initiate the action by slightly lifting the left leg • Drive the right leg by pivoting on the ball of the foot and then block the left foot • The hips will rotate to the front with the shoulder, arm and hand to follow
Three Step Throws • Start with the right leg crossed over the left, with the javelin drawn back and with most of the weight on the left foot • Starting with the left, the foot pattern is left-right-left • This short approach throw helps emphasize the plant and the power position
Five Step Throws • Start with right leg crossed over the left, with the javelin drawn back and with most of the weight on the left foot • Starting with the left, the foot pattern is left-right-left-right-left or 1--2--3--4-5 • This is the best way to teach pre-throwing strides
Walk-in Throws • With the implement drawn back the athlete performs walking cross over steps to a check point • At the check point the athlete accelerates into a five step throw
Training Drills • The javelin thrower is like a baseball pitcher - REST is essential • Training drills are the dominant part of the training program • Athletes should only throw 2 to 3 times per week
Medicine Balls (General) • These drills are designed to increase shoulder and torso flexibility and strength • Examples: • overhead throws • seated side throws • v-up throw • fish out of water
Medicine Balls (Specific) • These drills are preformed with the medicine ball held in both hands overhead and can be done against a wall or net • Examples: • Standing Throws • 3 step Throws • 5 step Throws • 5 to 10 repetitions at first then increase
Weighted Balls • Keep four pounds and under • Watch technique (avoid side arm)
Exercises with the Javelin • Hip pops with partner holding the tail of the javelin • Flexibility drills with the javelin • Examples • Dislocates • rotator cough flexibility, twisting
Running Drills • Javelin carries • perform 30m accelerations carrying the javelin • Withdrawal drill • perform 40m accelerations carrying and withdrawing the javelin • Crossover Drill • 30m crossovers with javelin withdrawn • Pay attention to the lower body action and keeping the throwing arm long