SKETCHING and LETTERING
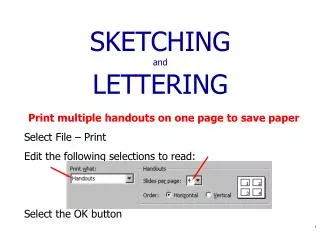
SKETCHING and LETTERING Print multiple handouts on one page to save paper Select File – Print Edit the following selections to read: Select the OK button Example Freehand Sketch for Concept Development Supplies Required HB lead in a 0.7mm pencil (medium grade) Eraser

SKETCHING and LETTERING
E N D
Presentation Transcript
SKETCHINGandLETTERING Print multiple handouts on one page to save paper Select File – Print Edit the following selections to read: Select the OK button
Supplies • Required • HB lead in a 0.7mm pencil (medium grade) • Eraser • 8.5” x 11” Engineering Paper (Green) • Five blocks per inch • Recommended • 6H wooden pencil for light lines, i.e., construction lines
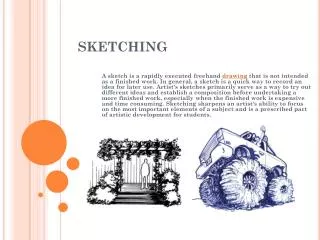
Why is Sketching Important? • Fast way to get from mental image to hard copy so ideas can be shared. • Most designs start with numerous sketches as part of the iterative process. • May be situations where its crucial to be able to produce neat accurate sketches (I.e. meetings, business dinners) no computer available!
Objectives of Sketching • Freehand sketches are used to communicate with others, so they should be neat and correctly prepared. • Legibility • must be able to read and interpret • Accuracy • valid and convey proper size or shape • Neatness • no smudges, rips, etc... • Fast • time is money • Economical
Exercise • On the back of this packet, sketch the following: • Horizontal line • Vertical line • Angled line • Circle • Sketch several more lines making some darker than others. • Looking at the lines you just sketched, answer the following questions: • How horizontal is the horizontal line? • How vertical is the vertical line? • How straight is the angled line? • How round is the circle? • How did you do creating some lines darker than others?
Good Sketching Techniques • Communicate subject clearly. • Sketches should be proportional (scale not as important). • Use different line weights (thicknesses) to show the relative importance of different lines. • Correct grade of lead helps to create good quality sketches. • Object lines should be thick and black, so they stand out from the dimensions, notes, and other lines. • However, it is best to sketch lightly to get proper size and proportions before darkening the lines. (Having trouble, try a 6H wooden pencil.) • Use two different diameter pencils (0.7mm vs. 0.3mm) • Lean pencil to achieve different line thickness • Use short overlapping strokes
Sketching Lines • Great descriptions and examples on page 57 (MGC) – Practical Tips Drawing freehand lines
Problems? • Check out • Practical Tips Freehand lines, page 56. • Figure 3.7 Technique of Lines, page 59 • Figure 3.8 Contrast of Lines, page 59
Exercise • On a piece of engineering graph paper, using short overlapping strokes sketch the following: • Horizontal line • Vertical line • Angled line • Sketch several more lines making some darker than others. • Looking at the lines you just sketched, answer the following questions: • How horizontal is the horizontal line? • How vertical is the vertical line? • How straight is the angled line? • How did you do creating some lines darker than others? • Which method did you have more control over – solid line or a line consisting of short overlapping strokes?
Sketching Circles and Arcs • Circles • MGC: Step by Step 3.1, page 60 • Use Method A, B or C • Use light pencil strokes for construction and darken when you are satisfied with appearance • Instructor must be able to see LIGHT construction lines • Arcs • MGC: Step by Step 3.3, page 62 • Carefully locate tangencies • Sketch curves first and then add straight lines tangent to them. This is easier than trying to make a curve tangent to straight lines.
Sketching Lines Tangent to an Arc • Locate the center of a lightly sketched circle or arc. • Lightly sketch in the lines to which the arc is tangent. • Lightly sketch a line perpendicular to each line through the center of the arc or circle. • Lightly sketch circle through tangent points • Darken arc and lines.
Exercise • On a piece of engineering graph paper, using short overlapping strokes sketch several circles and arcs. • Looking at the circles and arcs you just sketched, how round are the circles and arcs? • Which method did you have more control over – solid or a circle/arc consisting of short overlapping strokes? • Connect several circles with lines and locate the tangent points. • Darken appropriately.
Alphabet of Lines • Line patterns communicate what the line represents in the drawing • Line patterns tell you information such as whether the line is hidden, visible, or a centerline (Figure 3.6 page 58 MGC)
Alphabet of Lines Thick Thin Thin Thin Thin Thick Thin Thin Thick Thin
Appropriate Line Weights Incorrect Correct
Contrast of Lines Figure 3.8 Contrast of Lines
Technique of Lines Figure 3.7 Technique of Lines
Scale • Sketches are not usually made to a particular scale. • It is important to keep the sketch in proportion • Use grid paper or estimate proportions by comparison
Sketch Large Features,Then Add Small Details • Look at overall dimensions and lightly block in. • Block in secondary details lightly. • Add final details • Darken sketch.
Develop Sketch by Blocking In 1. 2. 3. 4.
Enlarging Proportions • Lay a grid over existing picture • Draw larger grid • Look at each portion of the object. How does it enter and exit each grid box. • Sketch in lightly in enlarged boxes
Additional Practice • Worksheet 3.3 at back of text.
Sketching Summary • Almost all engineering designs start with simple sketches! • Quality is one of the most important aspects of sketching. • Sketched lines should be bold freehand lines. Do NOT use a straight edge. • The subject of the sketch should stand out clearly. • Using the correct lead grades and good techniques for sketching will help your sketches look their best.
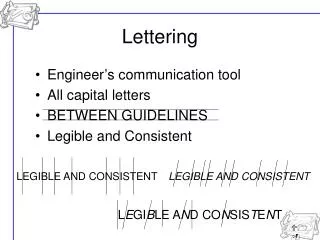
Lettering • Neat legible lettering is used to add dimensions and notes to sketches. • Poor lettering can ruin an otherwise good sketch. • Engineering lettering is usually drawn with HB or other relatively soft lead. • Use 1/8” uppercase Gothic single-stroke letters