
Uploaded by
jania
0 SLIDES
177 VUES
0LIKES
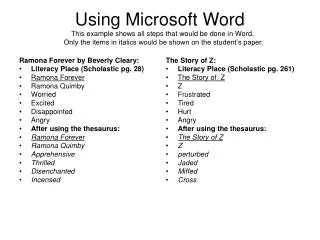
Creating a Thesis Using Microsoft Word 2007
DESCRIPTION
Creating a Thesis Using Microsoft Word 2007. ITS Training ISU Information Technology Services Last Revised October 23, 2007 Jeff Balvanz (jbalvanz@iastate.edu). Creating a Thesis with MS Word . General Settings (Margins, Fonts, Spacing, Numbering) Use of Styles for Section Headings
Download

1 / 0
Télécharger la présentation 
Creating a Thesis Using Microsoft Word 2007
An Image/Link below is provided (as is) to download presentation
Download Policy: Content on the Website is provided to you AS IS for your information and personal use and may not be sold / licensed / shared on other websites without getting consent from its author.
Content is provided to you AS IS for your information and personal use only.
Download presentation by click this link.
While downloading, if for some reason you are not able to download a presentation, the publisher may have deleted the file from their server.
During download, if you can't get a presentation, the file might be deleted by the publisher.
E N D
Presentation Transcript
- Creating a Thesis Using Microsoft Word 2007 ITS Training ISU Information Technology Services Last Revised October 23, 2007 Jeff Balvanz (jbalvanz@iastate.edu)
- Creating a Thesis with MS Word General Settings (Margins, Fonts, Spacing, Numbering) Use of Styles for Section Headings Tables of Contents and Figures Inserting Figures and Tables Master Documents Landscape Pages
- Margins MINIMUM margins (larger values are acceptable) Set with Page Layout -> Margins -> Custom Margins Top 1.25”, Bottom 1”, Left 1.25”, Right 1” Make sure that “Apply to:” is “Whole document” Do not use mirror margins; theses are not to be duplexed
- Modifying a Style Select Home Click on the right end of the Styles button or press {Ctrl/Alt/Shift/S}. Right-click on the style to change and select Modify Click Format, choose a Format menu, make changes, then click OK.
- Modifying a Style, page 2 Repeat the previous step until all settings are made When finished changing, click OK. Quick way to modify a style: Right-click on the style in Quick Styles Click “Modify”
- Fonts Set in Modify Style with Format > Font Any standard proportional font (Ariel, Times New Roman or similar) is acceptable (NO Comic Sans MS) 10 – 12 point Must be uniform within document Must be embedded when you create the PDF
- More on Fonts Heading, captions, etc. may be in a different font than body text, but you must be consistent throughout the document Headings may be no larger than 14 points No text may be smaller than 10 pts except in tables
- Text Spacing 1.5 - or double-space 0.25” or 0.5” indent for first line of each paragraph No additional space between paragraphs Block quotes and tables may be single-spaced
- Text Spacing, page 2 Click Format -> Paragraph Set Line Spacing to either “1.5 lines” or “Double” Under Indentation, set Special to First Line with a 0.25 or 0.5 inch indent Click OK Click OK again to close the modify style dialog.
- Page Numbering Uniform font and position at top of page Either centered or in upper right-hand corner At least 0.75” from page edge
- Page Numbering, page 2 Select Insert -> Page Numbers -> Top of Page Select either Plain Number 2 (centered) or Plain Number 3 (right) Header and Footer Tools appear. Select as follows: Header from top: 0.75” If including title page in this document, turn on “Different first page” Click “Close Header and Footer”.
- Preliminary Numbering Preliminary pages numbered “i, ii, iii” Put cursor at the end of the preliminary pages Select Page Layout > Breaks > Section Break Next Page With cursor before break, select Insert > Page Number > Format Page Numbers Choose the “i, ii, iii…” numbering format Click OK
- Subsequent Numbering Remaining pages number with Arabic numerals starting with “1” Move cursor after break and select Insert > Page Number -> Format Page Numbers Click Format Choose the “1, 2, 3…” numbering format Choose “Start at” and enter the number 1 Click OK.
- Subsequent Numbering, p. 2 Restore page number to first page of second section Choose Page Layout and click right end of Page Setup button. Click Layout Turn off “Different First Page” Click OK.
- Paragraph Styles and Headings Thesis permits Main headings, Major Divisions, Major Subdivisions and Minor Subdivisions There are also paragraph headings, but those are just boldfaced text at the beginning of the paragraph. Use Heading 1 – Heading 4 styles to establish divisions
- Styles and Headings, page 2 Using “Heading n” styles will also facilitate automatically creating the table of contents The heading should have at least one line of text following it, or it should move to the next page.
- Styles and Headings, page 3 Click Home Click the right end of the Styles button. If the style you want to change doesn’t appear: Click Options Under “Select styles to show” choose “All styles” Click OK. Right-click on a heading style and select Modify
- Styles and Headings, page 4 Make sure text color is black or Automatic Click Format > Paragraph Set Special indentation to none Under Line and Page Breaks, turn on “Widow/Orphan Control” and “Keep with next” For Heading 1, turn on “Page break before” Click OK.
- Moving a Style to Quick Styles To move a style into Quick Styles Click Home Click the right end of the Styles button. Click Options… Under “Select styles to show” choose “All Styles” Right-click the name of a style and choose “Add to Quick Style gallery”
- Main Headings Type main (first level) headings in uppercase You can’t use the All Caps style in Table of Contents styles because lowercase Roman numerals in the page numbers will be printed uppercase
- Saving a Template Create a template so you don’t have to save all those changes again. Select Office -> Save As... -> Word Template Click “Trusted Templates” at left Give the template a meaningful name It will appear under “My Templates”whenever you select File > New.
- Table of Contents Position cursor after the heading. Insert with References -> Table of Contents -> Insert Table of Contents. Make sure “Show levels” is set to 4 Tab leaders are optional, but you must reset them each time you regenerate the table of contents. Choose References -> Update Table.
- Figures Insert figures using Copy & Paste (graphics in other applications) Insert -> Picture (pictures from files) Insert -> SmartArt (organization charts, matrices, process charts, etc.) Insert -> Chart (embedded Excel charts)
- Figures, page 2 Before inserting a picture: Create two blank paragraphs Move to the first blank paragraph Choose Home Click the right end of the Paragraph button Set line spacing to Single. Set Special indentation to None.
- Figure Captions For the “Figure n” label, use the Caption feature Right-click on image Select Insert -> Reference -> Caption Type Caption name after “Figure n.” Select “Below selected item” for Position Captions are independent of the images; if you move the picture, the caption may have to be moved manually.
- Chapter Numbers in Labels Word wants to include chapter numbers in caption labels by default. If you don’t want a chapter number, then do this while inserting a caption: Click “Numbering” Turn off “Include chapter number” Click OK.
- Chapter Numbers in Labels, p. 2 If you do want chapter numbers in labels, you must number the chapters. Instead of typing numbers in the headings, do this: Put cursor in the header. Click Home, then right end of Style button Right-click on Heading 1, then Modify Click Format -> Numbering Click “Define a new number format”
- Chapter Numbers in Labels, p. 3 Under number format, click before the number and type “CHAPTER “ Click after the number and type a space. Click OK twice. When entering a caption Click “Numbering” Make sure “Include chapter number” is on Click OK.
- Chapter Numbers in Labels, p. 4 Use Heading 1 for section headers as before, but when you create a header for a section that should not be numbered (like APPENDIX or TABLE OF FIGURES) click off the “Numbered List” button so no number appears in the Table of Contents. Don’t put figures, etc. in unnumbered sections as they will appear as “Figure 0.2” in the caption.
- List of Figures Use the Caption feature to create List of Figures entries in your thesis Position the cursor where you want the list, then select References > Insert Table of Figures Set Caption Label to “Figure” Set Tab leader to “None” (optional) Click “OK”
- Tables Tables are inserted with Insert -> Table. Tables must fit within the margins. Table fonts can be smaller than body text but must be “viewable” To split a table, highlight a row and select Table Tools -> Layout -> Split Table.
- Table Gridlines and Captions Use Design > Borders -> Borders and Shading to change the table gridlines Click on the lines in the Preview area to turn lines on or off; Select different line styles from the Style menu; To shade or border an area differently than the rest, highlight just that area of the table.
- Table Captions Highlight the table or use Layout -> Select -> Select Table Select References -> Insert Caption Select “Table” for Label Select “Above selected item” for Position Type Caption name after “Table n.” Captions are independent of the tables; if you move the table, the caption will have to be moved separately.
- List of Tables Works just like the List of Figures Position cursor on List of Tables page Select References-> Insert Table of Figures Set Caption label to “Table” Set tab leader to “None” (optional) Click “OK”
- Aligning numerical data in tables, number of decimal points varies Highlight cells in column Choose View, make sure “Ruler” is on Select a decimal aligning tab at left end of ruler Click in ruler where you want the decimal point to appear Drag the tab marker until numbers line up correctly
- Master Documents Used to organize multiple files into a single document. Separate parts of the thesis can be stored in separate files, then organized into a single document through the use of a master document.
- Creating a Master Document This assumes that the parts of your thesis already exist as separate Word documents Create a new document from your thesis template, or create the document and make the appropriate margin, font, etc. settings Select View > Outline In the Master Document area of the Outlining ribbon, click “Show Document”
- Create Master Doc, page 2 Position cursor after the first heading Click Insert Subdocument on the Outlining toolbar and select the first file to be inserted Repeat the previous step until all of the documents have been inserted To modify part of the thesis, edit that document To print, open and print the master document
- Creating a PDF File You need Adobe Acrobat Professional (available in most ISU computer labs). Choose Office -> Print Select “Adobe PDF” as the printer. Choose “Print Optimized” under job options. Enter a name and location for the PDF file. Click OK.
- Backup If you are writing your thesis in Microsoft Word, you are responsible for backing up your files. If something happens to the disk your only copy is on, you will lose your work. Neither hard disks, Zip disks, floppy disks, CD-Rs, CD-RWs, DVDs or USB keys are indestructible. You have been warned.
- Rolling Backups With a rolling backup, you have lost at most one day’s work. Each day, copy your working files to a different disk (i.e., Monday, Tuesday, Wednesday, Thursday, Friday, etc.) The working files can stay on your hard disk; the disk copies are just insurance.
- Off-site Backup What if a fire, flood, tornado or other disaster trashes your entire apartment/house/office? All the backup copies in your office won’t help then… Periodically, make a copy of your work and put it somewhere safe: Safe deposit box Copy at home or in the office Mail to a relative
- AFS Space Each ISU NetID gets 1 GB of free online storage (more can be rented for $0.056/GB/day); also used by WebMail The space can be accessed through: An AFS client (OpenAFS) A Kerberized ftp client like FileZilla or Fetch (ftp to isua.iastate.edu with your NetID and password) The ASW File Manager (http://asw.iastate.edu) This space is backed up daily; restores from yesterday are free, from the previous week is $10
- Landscape Pages For tables and figures too wide to appear correctly in portrait mode Complicated by the fact that the margins and page numbers must appear identical to normal, portrait pages (which Word doesn’t do well on landscaped pages)
- Landscape Figures For ease of positioning, select Office > Word Options > Advanced and turn “Show Text Boundaries” on Use Insert > Page Break to create a blank page. Use Edit > Paste Special to insert the figure as a Picture or “Picture (Enhanced Metafile)”
- Landscape Figures, page 2 Highlight the picture Choose Format -> Text Wrapping and set the wrapping to Square Click, hold and drag the picture to the middle of the page Choose Format > Rotate Picture > Rotate Left 90º
- Landscape Figures, page 3 Drag the corners of the picture until it is an appropriate size and position (the corners preserve the aspect ratio, especially important with bitmap images) Highlight the picture and use Insert > Reference > Caption to create a caption Click Format -> Text Direction until the text faces the right direction
- Landscape Figures, page 4 Resize the text box to match the caption and the full-page picture Select Format -> Text Wrapping -> More Layout Options Horizontal: Right relative to Margin Vertical: Bottom relative to Margin Click OK. Click and set “Shape Fill” to No Fill and “Shape Outline” to No Line
- Tables Using a Landscape Page Select Page Layout > Section Break Next Page to start a new section on a new page Immediately select Page Layout > Section Break Next Page again to start another section With cursor in second new section, select Insert -> Header -> Edit Header Turn off Link to Previous in Header & Footer toolbar
- Landscape Page Table, page 2 In Header & Footer Tools area of the Ribbon, click Previous Section button Turn off Link to Previous here also Edit the header to remove the page number
- Landscape Page Table, page 3 Select Page Layout -> Orientation -> Landscape Select Insert > Page Numbers -> Format Page Numbers Select Continue from previous section Click OK
- Landscape Page Table, page 4 Select Insert > Text Box -> Simple Text Box Rotate the text box with Text Direction so the text faces top right Set the text box font and size to match your main text If page number at right, set paragraph alignment to right, no indentation Replace the sample text with a number
- Landscape Page Table, page 5 Select Format > Position > More Layout Options Click Picture Position Set the absolute horizontal position to 9.87” right of page Set the vertical position to Centered relative to page or Bottom relative to margin
- Landscape Page Table, page 6 Click Format; set Shape Fill to No Fill, Shape Outline to No Outline Highlight the number we typed earlier Select Insert > Quick Parts > Field and choose Page from the field names list; click OK. Move the cursor to the next page
- Landscape Page Table, page 7 Select Insert > Page Numbers and click Format Page Numbers Select Continue from previous section Click OK Now go to the landscaped page and build your table
- Landscaping just the table Prepare a blank page in your thesis document using Insert > Page Break Open a new document Select Page Layout > Margins > Custom Margins, set the margins to the same as your thesis and set the orientation to Landscape
- Landscaped Table, p. 2 Build the table on the landscaped page, making sure to use the same font as your thesis text Put a blank line at the top of the landscaped page to reserve space for the caption Highlight the top row of the table; use Format > Borders and Shading to add appropriate lines top and bottom Repeat for the bottom row
- Landscaped Table, p. 3 Save the table’s document with a descriptive name; you may need it again if you must make changes to the table Highlight the entire table and select Edit > Copy Return to the blank page in your thesis document, position the cursor on that page, and select Home > Paste > Paste Special > Picture (Enhanced Metafile)
- Landscaped Table, p. 4 Highlight the picture Right-click, choose Size and Click Reset Set Rotation to 270º Click Close Select Format > Text Wrapping > Square
- Landscaped Table, p. 5 Select Format > Text Wrapping > More Layout Options Choose Horizontal Alignment > Absolute: 0” to right of Page Choose Vertical Alignment > Top relative to Margin Click OK
- Landscaped Table, p. 6 Create a caption normally, but be sure to change the label to Table and put the caption above the table (Word thinks this is a figure) The caption appears in a text box Stretch the text box to cover the margins
- Landscaped Table, p. 7 Rotate the text in the text box to match the table text Resize the text box so it fits between the left margin and the table Set Format -> Shape Fill to “No Fill” Set Format -> Shape Outline to “No Line”


More Related
Audio
Live Player