Scanning Directly to the Flash Drive
220 likes | 532 Vues
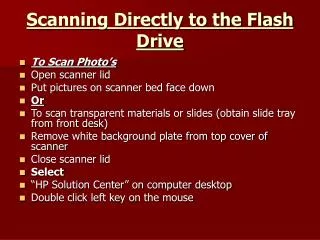
Scanning Directly to the Flash Drive. To Scan Photo’s Open scanner lid Put pictures on scanner bed face down Or To scan transparent materials or slides (obtain slide tray from front desk) Remove white background plate from top cover of scanner Close scanner lid Select

Scanning Directly to the Flash Drive
E N D
Presentation Transcript
Scanning Directly to the Flash Drive • To Scan Photo’s • Open scanner lid • Put pictures on scanner bed face down • Or • To scan transparent materials or slides (obtain slide tray from front desk) • Remove white background plate from top cover of scanner • Close scanner lid • Select • “HP Solution Center” on computer desktop • Double click left key on the mouse
Select • “HP Solution Center” on computer desktop • Double click left key on the mouse • Select • “Scan Picture” or “Scan Document” or “Scan Film” • Click left key on the mouse • Or • Press one of the switches on the scanner lid
What are you scanning DocumentColor Select Color
What are you scanning DocumentGrayscale Select Grayscale
What are you scanning DocumentBlack & White Select Black & White
What are you scanning PictureScan original from glass Scan Original From Glass
What are you scanning PictureScan the negatives using the Transparent Materials Adapter (TMA) Scan the negatives using the Transparent Materials Adapter (TMA)
What are you scanning PictureScan Positives, including 35 mm slides, using the TMA Scan Positives, including 35 mm slides, using the TMA
SelectWhere do you want to sent the scanned image(s) Scan to: (save to file) File Type: (jpeg image (*.jpg) Scan to: (save to file)
SelectWhere do you want to sent the scanned image(s)Scan to: (save to file)
SelectWhere do you want to send the scanned image(s)File Type: (jpeg image (*.jpg) File Type: (jpeg image (*.jpg) Click Scan
Select File Type (jpeg image) Make Sure File type Is .jpg
Base File Name: Type in the file name you approve of Type in Your selected name for the file
Save Location: Select “Browse” Click on Browse
Locate and highlight your Flash Drive Folder Click on Your Flash Drive Folder
Locate Folder on Flash Drive Select Your Scanned Picture Folder
The Location will show the path to your folder on your flash driveThen Click “OK” The Location will show the path to your folder on your flash drive Click “OK”
SelectYes(if you have additional pictures to scan)No(if you want your images transferred to your Flash Drive)