Download
1 / 24
300 likes | 650 Vues
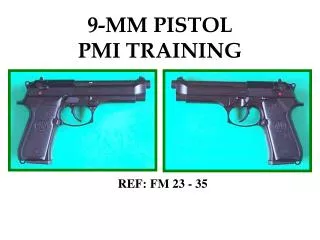
Task: Maintain an M9 Pistol Number: 071-004-0001. SSG Dow. Safety considerations. Safety considerations: TREAT EVERY WEAPON AS IF IT WERE LOADED Risk Assessment Level: I, A, High Mitigated to IV, D, Low Environmental considerations: None Evaluation: Student checks.

E N D
Safety considerations • Safety considerations: TREAT EVERY WEAPON AS IF IT WERE LOADED • Risk Assessment Level: I, A, High Mitigated to IV, D, Low • Environmental considerations: None • Evaluation: Student checks
Conditions and Standards • Conditions: Given an M9 pistol with components (M12 or M7 holster, magazine, and ammunition pocket), 9-mm ammunition, cleaner lubricant preservative (CLP), lubricating oil arctic weather (LAW),lubricating oil semifluid (LSA), bore brush, wiping rags, M4 cleaning rod (a one-section handle and a swabholder), and small-arms cleaning swabs. • Standards: Clean and lubricate M9 pistol and magazine; inspect parts; turn in unserviceable parts for maintenance; assemble pistol; ensure pistol is operational; clean and inspect ammunition forserviceability; and turn in unserviceable ammunition.
Evaluation Preparation SETUP: At the test site, provide a field table with all the equipment given in the task condition statement. BRIEF SOLDIER: Tell the Soldier to clear, disassemble, clean, inspect, lubricate, assemble, and perform a function check on the weapon. Performance Measures GO NO GO 1. Cleared the pistol. _____ _____ 2. Disassembled the pistol and magazine without damaging any parts. _____ _____ 3. Cleaned the pistol, components, and ammunition. _____ _____ 4. Inspected the pistol, components, and ammunition for defects. _____ _____ 5. Correctly lubricated pistol and magazine. _____ _____ 6. Assembled pistol and magazine in correct sequence. _____ _____ 7. Performed a function check. _____ _____ Evaluation Guidance: Score the Soldier GO if all performance measures are passed. Score the Soldier NO-GO if any performance measure is failed. If the Soldier scores NO-GO, show the Soldier what was done wrong and how to do it correctly. References: TM 9-1005-317-10 N OPERATOR'S MANUAL FOR PISTOL, SEMIAUTOMATIC, 9MM, M9
Clear the pistol. a. Place the safety lever in SAFE position. b. Hold the pistol in the raised pistol position. c. Depress the magazine release button; remove the magazine from the pistol. d. Pull the slide to the rear; remove any chambered round. e. Push the slide stop up, locking the slide to the rear. f. Look into the chamber to ensure that it is empty.
Disassemble the pistol and magazine. a. Depress the slide stop and let the slide go forward. b. With your right hand, hold the pistol with the muzzle slightly raised. c. With your forefinger, press the disassembly lever button. d. Rotate the disassembly lever downward until it stops. e. Pull the slide and barrel assembly forward, and remove it from the receiver. f. Slightly compress the recoil spring and spring guide. At the same time, lift them up and remove them, allowing the recoil spring to stretch slowly. g. Separate the recoil spring from the spring guide. h. Push in on the locking block plunger while pushing the barrel forward slightly. Lift and remove the locking block and barrel assembly from the slide.
Disassemble the magazine (1) Grasp the magazine firmly, with the floor plate up and the back of the magazine tube against the palm of your hand. (2) Depress the locking block to make the locking block plunger protrude. (3) Using the locking block plunger, push down on the floor plate retainer stud. (4) Slide the floor plate slightly forward with your thumb. (5) While removing the floor plate, use your thumb to keep pressure on the magazine spring. (6) Remove the floor plate retainer, the magazine spring, and the follower from the magazine tube. (7) Remove the magazine spring from the follower. (8) Remove the floor plate retainer from the magazine spring.
Clean the pistol and magazine. CAUTION Use the bore brush to clean only the bore. Using it on any other part of the pistol will cause damage. a. Slide assembly. (1) Clean slide assembly with a cloth. Use CLP on a soft brush to remove excess dirt and carbon. (2) Wipe dry with a clean cloth. b. Barrel assembly. (1) Attach a bore brush to a cleaning rod. Moisten the bore brush with CLP and insert it into the chamber end of the barrel. Make sure the brush completely clears the muzzle before you pull it back through the bore. Repeat this procedure several times to loosen carbon deposits. (2) To clean and dry the barrel, push a clean swab through the bore. Repeat as necessary with fresh swabs until a swab comes out clean. (3) Clean locking block with a soft brush. (4) Clean the recoil spring and spring guide with CLP and a soft brush or cloth.
Clean the pistol and magazine. c. Receiver assembly. Wipe the receiver assembly clean with a cloth and, if needed, a soft brush. (1) Wipe the magazine tube and the follower with CLP, a cloth, and a soft brush. (2) Clean the magazine spring, floor plate retainer, and floor plate with a clean cloth. e. Holster. Remove dirt from exterior with stiff brush. Wipe interior with clean cloth. f. Ammunition. If ammunition gets wet or dirty, clean it and remove corrosion from it at once using a dry cloth.
Inspect for serviceability a. Slide assembly. (1) Check to ensure the ambidextrous safety moves freely. (2) Check the firing block for damage. (3) Check the rear sight for looseness. b. Barrel assembly. (1) Inspect the bore and chamber for pitting or obstructions. (2) Check the locking block plunger to ensure the locking block moves freely. (3) Inspect the locking lugs for cracks and burrs. c. Recoil spring and recoil spring guide. (1) Check recoil spring to ensure it is not bent or damaged. (2) Check recoil spring to ensure it is straight and free of cracks and burrs. d. Receiver assembly. (1) Check for bends, chips, and cracks. (2) Check to ensure the slide stop and magazine stop move freely. (3) Check the guide rails for excessive wear, burr, cracks, or chips.
Magazine assembly and Ammunition check (1) Check for damage to the spring and follower. (2) Inspect magazine lips to ensure they are not bent excessively and to ensure they have no cracks and burrs. (3) Check to ensure the magazine tube is not bent. f. Ammunition. (1) Check for damaged or corroded ammunition. Turn in heavily corroded or damaged ammunition. (2) Check to ensure ammunition is free of oil and grease.
Lubricate the pistol and magazine. NOTES: • CLP, LSA, and LAW are the only lubricants authorized for this pistol. • You can use CLP and LSA interchangeably. • Before firing, remove excess lubricant from the bore. a. Lubricate all parts with a light coat of LSA or CLP at temperatures above -10 degrees Fahrenheit, or LAW at temperatures below +10 degrees Fahrenheit. b. Do not mix LAW with other lubricants.
Assemble the pistol a. Grasp the slide with the bottom facing up. b. With the other hand, grasp the barrel assembly with the locking block facing up. c. Insert the muzzle into the forward end of the slide. At the same time, lower the rear of the barrel assembly by moving the barrel slightly downward with light thumb pressure. The barrel will fall into place. d. Insert the recoil spring guide into the recoil spring (Figure 6). e. Insert the end of the recoil spring and the recoil spring guide into the recoil spring housing. At the same time, compress the recoil spring and lower the spring guide until it is fully seated on the locking block cutaway (Figure 7). CAUTION Be sure that the hammer is uncocked and firing pin block lever is in the down position. If the hammer is cocked, carefully and manually lower the hammer. Do not pull the trigger while placing the slide onto the receiver. f. Push the firing pin block lever down. Grasp the slide and barrel assembly with the sights up, and align the slide on the receiver assembly guide rails (Figure 8).
Figure 5 Figure 6 Figure 7
Assemble the pistol WARNING Make sure the pistol is clear and unloaded. g. Push until the rear of the slide is a short distance beyond the rear of the receiver assembly and hold. At the same time, rotate the disassembly latch lever upward. A click indicates a positive lock (Figure 8). h. Assemble the magazine. (1) Insert the follower into the top coil of the magazine spring. Make sure the notches on the follower and magazine tube are on the same side. (2) Insert the magazine spring with follower into magazine tube. (3) Turn the magazine bottom up, with its backside against the palm of the hand. Attach and center the floor plate retainer on the bottom spring coil. CAUTION After inserting the magazine spring, keep tension on it with your thumb. Be careful not to place the lips of the magazine tube on a hard surface while you reassemble the magazine. (4) Push and hold the magazine spring and floor plate retainer down. At the same time,slide the floor plate over the sidewalls until it seats fully. (5) Carefully insert the magazine into the pistol well. You will hear a click when it locks into position. 7. Perform a function check.
Evaluation Preparation SETUP: At the test site, provide a field table with all the equipment given in the task condition statement. BRIEF SOLDIER: Tell the Soldier to clear, disassemble, clean, inspect, lubricate, assemble, and perform a function check on the weapon. Performance Measures GO NO GO 1. Cleared the pistol. _____ _____ 2. Disassembled the pistol and magazine without damaging any parts. _____ _____ 3. Cleaned the pistol, components, and ammunition. _____ _____ 4. Inspected the pistol, components, and ammunition for defects. _____ _____ 5. Correctly lubricated pistol and magazine. _____ _____ 6. Assembled pistol and magazine in correct sequence. _____ _____ 7. Performed a function check. _____ _____ Evaluation Guidance: Score the Soldier GO if all performance measures are passed. Score the Soldier NO-GO if any performance measure is failed. If the Soldier scores NO-GO, show the Soldier what was done wrong and how to do it correctly. References: TM 9-1005-317-10 N OPERATOR'S MANUAL FOR PISTOL, SEMIAUTOMATIC, 9MM, M9
Task: Load an M9 Pistol Number: 071-004-0003 Conditions: Given an unloaded M9 pistol and a separate magazine loaded with M9 ammunition. Standards: Correctly load the magazine and ammunition into the pistol; ensure the safety lever is in the safe position.
Performance Steps WARNING: The M9 pistol has single- and double-action firing modes. When the safety is set to FIRE, squeezing the trigger will automatically cock and fire the pistol (this is the double-action mode). Keep your finger away from the trigger until you intend to fire. 1. Place safety lever in SAFE position. 2. Insert the loaded magazine into the pistol's magazine well until you hear a click when the magazine seats fully. 3. Point the pistol in a safe direction (usually at the target or skyward). 4. Retract the slide fully and release it. This strips a cartridge from the magazine and chambers it.
Evaluation Preparation: SETUP: At the test site, provide the equipment listed in the task condition statement. Use dummy rounds to evaluate this task. BRIEF SOLDIER: Tell the Soldier to load the M9 pistol so it will fire a round when he squeezes the trigger. Performance Measures GO NO GO 1. Placed the safety lever in SAFE position. ____ ____ 2. Inserted the loaded magazine into the magazine well. ____ ____ 3. Pointed the pistol in a safe direction (usually at the target or skyward). ____ ____ 4. Retracted /released the slide to chamber a cartridge from the magazine. ____ ____ Evaluation Guidance: Score the Soldier GO if all performance measures are passed. Score the Soldier NO-GO if any performance measure is failed. If the Soldier scores NO-GO, show the Soldier what was done wrong and how to do it correctly.
Task: Unload an M9 Pistol Number: 071-004-0004 Conditions: Given an M9 pistol loaded with rounds. Standards: Correctly remove magazine and ammunition from the pistol; remove all rounds from the magazine; and ensure the pistol safety lever is in the SAFE position.
WARNING: The M9 pistol will fire in the single- or double-action mode. With the safety in the FIRE position, squeezing the trigger automatically cocks and fires the pistol. This is the double-action mode of firing the pistol. Keep your finger away from the trigger unless you intend to fire. 1. Remove the magazine and the ammunition from the pistol. a. Place the safety lever in the SAFE position. b. Depress the magazine release button, and remove the magazine from the pistol. c. Point the pistol in a safe direction (usually at the target or skyward). d. Retract the slide fully to remove the chambered cartridge. e. Lock the slide to the rear using the slide stop. Visually inspect the chamber to make sure it is empty. f. Release the slide. Ensure the safety lever is in the SAFE position. 2. Remove the ammunition from the magazine. a. With one hand, hold the magazine upright, front end forward. With your thumb, firmly press down on the cartridge rim, and push forward. As the cartridge moves forward, tip the forward end of it up and out with your index finger. b. Repeat the above steps until the magazine is empty.
Evaluation Preparation: SETUP: At the test site, provide the equipment listed in the task condition statement. Use dummy rounds to evaluate this task.BRIEF SOLDIER: Tell the Soldier to unload the M9 pistol and remove all ammunition from the magazine. Performance MeasuresGONO GO 1. Removed magazine and ammunition from the pistol. _____ _____ 2. Removed ammunition from magazine. _____ _____ Evaluation Guidance: Score the Soldier GO if all performance measures are passed. Score the Soldier NO-GO if any performance measure is failed. If the Soldier scores NO-GO, show the Soldier what was done wrong and how to do it correctly.