Download
1 / 30
300 likes | 323 Vues
Students will learn and apply geometric and organic shapes to create an abstract slab sculpture, focusing on contrasts between straight-edge and curved shapes. They will practice techniques for working with clay, connecting slabs, and storing materials properly. The objective is to understand shape concepts and build foundational skills for sculpting. Featured artists include Fletcher Benton, Tina Vlassopulos, and Henri Matisse. Join this creative journey to discover the beauty of form and structure in sculpture.

E N D
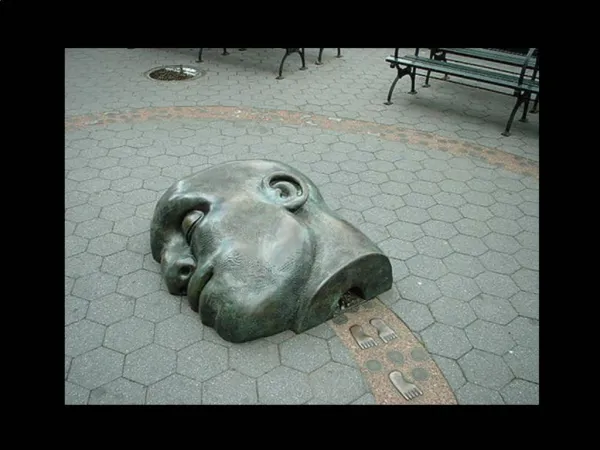
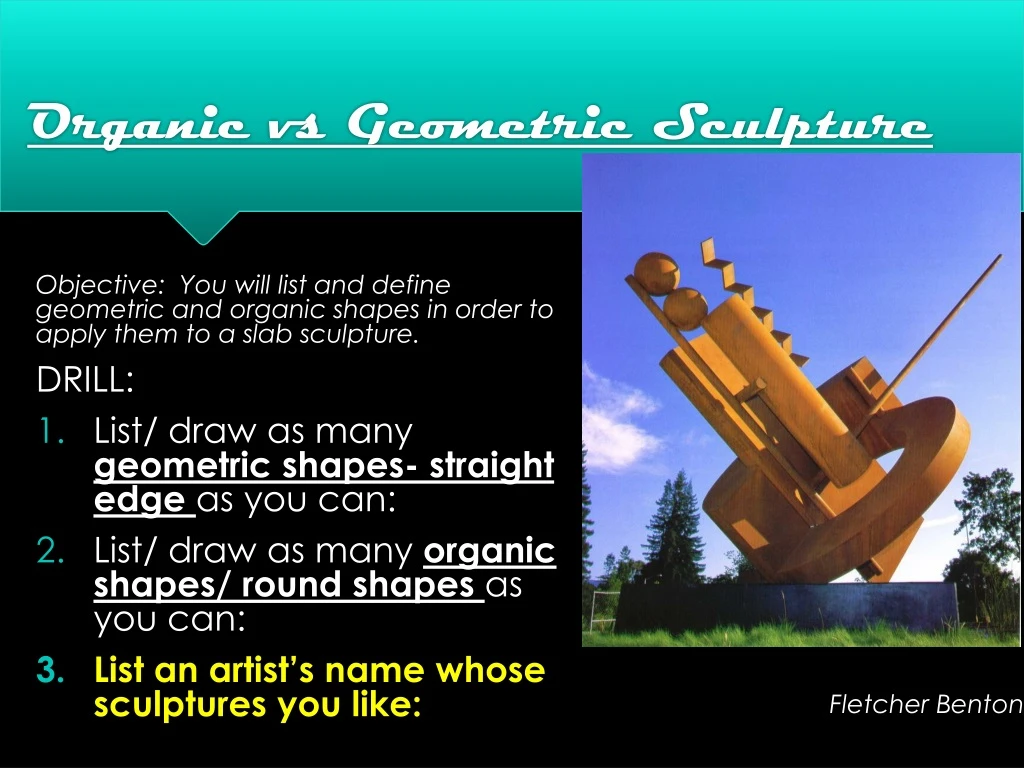
Organic vs Geometric Sculpture Objective: You will list and define geometric and organic shapes in order to apply them to a slab sculpture. DRILL: • List/ draw as many geometric shapes- straight edge as you can: • List/ draw as many organic shapes/ round shapes as you can: • List an artist’s name whose sculptures you like: Fletcher Benton
Geometric vs Organic Contrast • Lets think about straight edge vs curved.
Fletcher Benton Create an abstract slab sculpture: • Must stand up. • Have 5+ forms. • Contrast round vs. straight edge shapes. • At least one of each. (Can be more of one) • Be original. Objective: You will list and define geometric and organic shapes in order to create a plan for the first sculpture.
Move to front table to watch demonstration. Objective: You will describe procedures for working clay in order to connect two slabs together.
How to roll a Slab of Clay: Get supplies- clay and rolling pin Wedge clay Flatten clay. Roll forward only. 3 times, then flip!!! Roll 3 times. Flip it. When desired thickness, cut shape with knife.
Joining Clay 1. Score with knife to create teeth on both parts. 2. Add slip (clay and water)- acts like glue. 3. Join to create bridge to connect pieces.
Supplies that you need: • Clay base • Rolling pin Knife • Wooden tool (for joining) • Slip • Clay • Stylus (Scoring tool) Objective: You will describe procedures for working clay in order to connect two slabs together.
How to Store clay: My Clay piece- • Put on cardboard base • Wrap in damp newspaper • Cover in grocery bag completely. • Put tape on the bag with your name on it. • Store in designated spot. • *Always close the clay bag up or the clay will dry out!!!
How to clean up and store clay: My Table- • Scrape table with tool • Place dried clay in bin • Put extra clay away • Put tools back in the correct spot (organized), • Wash with wet sponge • Dry with newspaper. • *Always close the clay bag up or the clay will dry out!!!
Review: • What are the steps for rolling a slab? • How do you join clay? • What type of shapes did you cut? • Geometric or Organic?
Organic vs Geometric Sculpture *Students in clay class identified and defined geometric and organic shapes. *They built sculptures with paper to show a contrast of the two types of shapes. *They practiced attaching pieces together and getting the sculpture to stand. *This is practice for their first clay sculpture that will be the same concept using slabs of clay.