Live CDs
By: Lawrence Wellman. Live CDs. What is a Live CD. A Live CD is a computer operating system that is executed upon boot, without installation to a hard disk drive.

Live CDs
E N D
Presentation Transcript
By: Lawrence Wellman Live CDs
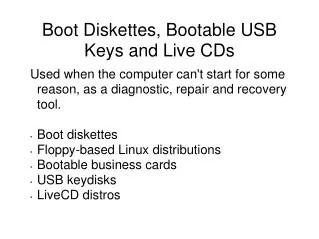
What is a Live CD • A Live CD is a computer operating system that is executed upon boot, without installation to a hard disk drive. • The concept of a Live CD can be applied across many mediums: Floppy, CD, DVD, USB, all which can be used to boot from, without installing on your hard drive.
Testing a new version or flavor of Linux Determine compatibility of a particular hardware configuration. System repair and restoration (Rescue Windows) Network security testing A fall back when a hard drive fails Password Recovery Reasons to use a Live CD
Creating a Linux Live multiboot DVD • Pointers: • You will need aprox 10 GB free • Use a virtual machine to test DVDs (makes mistakes much cheaper)
First Obtain Your Desired Live CDs • *Backtrack • *nUbuntu • Slax • Knoppix • *Helix • Fedora • F.I.R.E • *Insert • Operator • *Ophcrack • Kanotix • PCLinuxOS • Damn Small Linux • Puppy Linux • Gentoo • Kaella • Morphix • Sabayon • Clusterix www.frozentech.com/content/livecd.php
Create the folder structure • dvdroot • isolinux • A folder for each distro (BT, ubuntu)
Mount the iso’s mount –o loop /home/mouse/Desktop/bt2final.iso /home/mouse/Desktop/backtrack/ • Note: It is generally best to work through the whole process with one distro and then add distros as you get the previous version working. • Caution: If you are doing more than 8 iso’s at one time you will need to increase your number of loopbacks.
Add a folder in dvdroot for each distro. We will then copy all the main file system images for each live distro. • Note: It will make life easier if you can keep the same name as on the iso although generally not possible.
Now we need to setup our DVD • In the isolinux folder we need the following files. (Which will be pulled from one of the live CDs and modified to meet our needs) We will take these files unaltered: • isolinux.bin - boot loader for no-emulation boot • isolinux.boot - required for isolinux We will edit these files • boot.msg - contains a message displayed on boot • isolinux.cfg - configuration file • vmlinuz (from each distro) - is the name of the Linux kernel executable • .gz file (from each distro) - contains info of where to find linux files
vmlinuz file from each distro • Vmlinuz is a compressed bootable Linux kernel • We need the vmlinuz from each distro we will rename each to have an extentions(no more than 3 characters) • ex. vmlinuz.bt – for Backtrack vmlinuz.nu – for nUbuntu
.gz file from each distro • If you renamed the folder in dvdroot that contains the file system image we will need to open and modify the linuxrc file. If not you can copy the initrd.gz file over and rename it to keep name different and make it easer to recognize make sure not to exceed 8 characters.
Editing the initrd.gz file • Commands needed to open and modify linuxrc • gunzip initrd.gz • mkdir /testmount • mount -o loop initrd /testmount/ • Now go to the /testmount folder there should be a file probably linuxrc that will declare the dir to be the name of the folder that we changed, which will need to be changed to the new name. (ex. KNOPPIX_DIR = ‘KNOPIX’ change to KNOPPIX_DIR = ‘helix’) • Then recreate gz file • umount /testmount • gzip initrd
isolinux.cfg • Basic Commands: • # - Comment • DEFAULT – Specifies what will be boot after boot timeout or if user just hist ENTER • TIMEOUT {x} – sets timeout in 1/10 sec • DISPLAY {filename} – Displays text contained with in file (boot.msg) • LABEL {label name} – Explains boot options for {label name} (aka if the user types {label name} it will boot with options declared after declaration) • KERNEL – kernel to use when {label name} is typed • APPEND – declares additional parameters to the kernel declaration • Note: Things work best if you copy the label out of the isolinux.cfg file each distro.
boot.msg • Contains an introduction message displayed on boot.
Now to create the iso sudo mkisofs -r -ldots -J -V “Multiboot DVD” -b isolinux/isolinux.bin -c isolinux/boot.cat -no-emul-boot -boot -load-size 4 -boot-info-table -x lost+found -o /multiboot.iso .
A little explanation of mkisofs • sudo Allows us to excute the command as root • mkisofs create a hybrid ISO9660/JOLIET/HFS filesystem • -r uses naming conventions for compatibility and makes all files publicly readable • -ldots *Allow ISO9960 filenames to begin with a period. • -J uses Joliet naming records, for Windows compatibility • -V “Multiboot DVD” provides a volume ID, this is the disk name that shows up in Window’s Explorer • -b isolinux/isolinux.bin Specifies the path and filename of the boot image to be used when making a bootable cd. • -c isolinux/boot.cat Specifies the path and filename of the boot catalog to be used when making a bootable cd. • -no-emul-boot Specifies that it is not a image of a floppy • -boot-load-size 4 Specifies the number of “virtual” sectors to load in no-emulation mode. • -boot-info-table Specifies that a 56-byte table with info of the CD-ROM layout will be patched in at offset 8 in the boot file • -x lost+found exclude path from being written to CDROM • -o /multiboot.iso names the new .iso image file • . Specifies the path to the source for the image
Finished or So We Hope • Now we have the iso boot it in a virtual machine to make sure all works as expected. • If not trouble shoot. • Burn iso to DVD using favorite burning program.
Some Problems you may run into • Some distros (Mandriva) codes the name of the cd into initrd which you will need to change with a hex editor. Others like Fedora declare the cdlabel in the isolinux.cfg • Every distro and live CD is setup a little differently, so if your having trouble finding the boot files, boot the live CD in a virtual machine and watch as it boots to see what files it requires, or consult google.
References & Further Reading • Wiki • linux.about.com • members.chello.at/bobby100/ILpart1.htm • pcquest.ciol.com/content/enterprise/2005/105070101.asp • Linux.com • http://linuxgazette.net/issue85/sipos.html • http://www.linuxjournal.com/article/7246