Download
1 / 66
680 likes | 2.1k Vues
Plant Propagation by Stem Cuttings. Created by Ms. Holli Bowman and Dr. Frank Flanders Georgia Agriculture Education Curriculum Office May 2002. Note to the teacher: Click HERE to go to slides containing teacher notes or turn on ‘Notes/Normal View’ for additional notes on each slide. 1.

E N D
Plant Propagationby Stem Cuttings Created by Ms. Holli Bowman and Dr. Frank Flanders Georgia Agriculture Education Curriculum Office May 2002 Note to the teacher: Click HERE to go to slides containing teacher notes or turn on ‘Notes/Normal View’ for additional notes on each slide. 1 Click HERE to meet the authors.
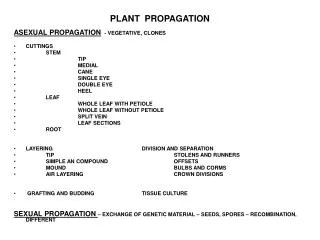
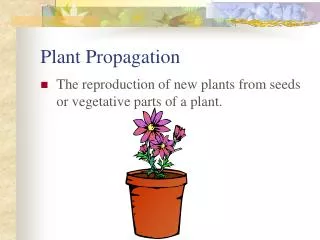
Cutting - Defined Any detached plant part which, when placed under favorable conditions, will produce a new plant identical to the parent plant. 2
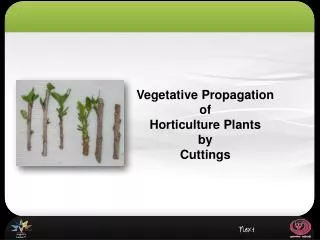
Types of Stem Cuttings Segments of stems containing buds are used to produce new plants. There are several types: • Softwood • Semi-hardwood • Hardwood • Herbaceous 3
Types of Stem Cuttings (continued) Softwood cuttings are taken from woody plants when growth is still relatively soft and succulent before tissues have matured and become woody. 4
Types of Stem Cuttings (continued) Semi-hardwood cuttings differ from softwood cuttings only in the maturity of the wood. They are collected later in the growing season when the lower portion of the cutting has become lignified (woody). 5
Types of Stem Cuttings (continued) Hardwood cuttings are taken in the dormant season when tissues are fully matured and lignified through their entire length. This may be after leaves have dropped in deciduous species. 6
Types of Stem Cuttings (continued) Herbaceous cuttings are made from succulent, herbaceous (non-woody) plants such as geraniums, chrysanthemums, coleus, and carnations. 7
Procedure • Gather Materials • Prepare Rooting Media • Remove Cuttings from Stock • Prepare Cuttings • Apply Rooting Hormone • Place Cuttings in Media • Label Cuttings • Follow Proper Safety and Sanitation Procedures 8
Materials Rooting Medium Cutting Stock Rooting Hormone Non-Water Soluble Marking Utensil Labels Liquid Rooting Hormone Cup Spoon Pruning Shears 9
Many types of media may be used for rooting beds including sand, perlite, pine bark and vermiculite or a combination of these products. Vermiculite, shown here, makes a good rooting media because of its coarse texture, sterile nature and water and air holding capacities. 11
Rooting media should be firmed so cuttings make good contact with the media and to eliminate large air pockets. Firming can be accomplished with clean hands, a piece of wood or by tapping the container on the bench. The media should also be thoroughly moistened. 12
Vermiculite is a mineral that has been exposed to high heat and expanded – sort of like popcorn. Its coarse structure is an asset. Be careful not to pack it or crush it, thus destroying its structure. 13
Many propagators take large pieces of stock from the field and move to an indoor location for final cutting preparation and sticking. In this case, place cuttings in a plastic bag and keep the cuttings out of the sunlight. 15
Keep cuttings cool and moist if they are not used immediately. An ice chest with a small amount of ice performs this function well. 16
Select quality stock. Avoid stems with flowers and berries. 17
Make maximum use of stock provided by taking multiple cuttings from one branch. The top cuts are sometimes called stem-tip cuttings while the cuttings made below the top are called medial cuttings. 19
Cuttings should be 3” to 6” long, and uniform in size, although larger or smaller cuttings are used in certain situations. Cutting size is limited because the top of the cutting must be supported by the limited amount of moisture that can be absorbed through the base until rooting takes place. 20
Uniformity of a nursery crop is very important from a marketing standpoint as well as obtaining a uniform, healthy look when plants are installed in the landscape. Uniformity begins in the propagation bed. 21
Remove the bottom leaves from the cuttings. Leaves placed under the soil or in direct contact with the media may rot and cause disease. 23
Cuttings of harder-to-root plants are often wounded to expose more cambium and increase the chances of rooting while decreasing the time required to root. 24
Identify the tops of deciduous cuttings so that the cuttings are not turned upside down in the rooting media. Often times this is done by cutting the top of the cutting at a 90 degree angle and the bottom of the cutting at a 45 degree angle. This allows polarity to be observed. Top Bottom 25
The leaves of large-leaved cuttings may be trimmed before sticking to conserve propagation space. 26
The application of rooting hormone often promotes production of a new root system. 28
Measure a small amount of powder into a separate container to avoid contamination of the entire supply. 29
Tap off the excess hormone powder. Be sure that the portion of the stem that will be under the media is coated. 31
If using liquid hormone, hold cuttings in liquid for a full 5 seconds. (Count 1001, 1002, 1003, 1004, 1005.) 32
Make holes in the growing media with a label or other clean tool. 34
Cutting a furrow in the growing media is also acceptable. 35
Place cuttings into the media 1 to 2 inches deep. Hold each cutting with your fingers at the desired depth and push the cutting into the prepared hole or furrow until the desired depth is reached. Placing all cutting at the same depth helps in establishing uniformity. 36
Gently firm the soil around the base of the cutting to hold the cutting in place, to eliminate air pockets, and make sure the base is in good contact with the moist media. 37
The cuttings can also be firmed using a label or other clean tool. 38
To test for proper firmness of the media around the base of the cutting, give a light tug on the cutting. If the cutting slips easily from the media with little resistance, the cutting was not firmed properly. 39
Cuttings should be spaced in the rooting media to allow for efficient use of propagation space. 40
Rows should be evenly spaced with little overlap of leaves to help prevent disease. 41
Cuttings placed too close together, with overlapping leaves, hold moisture and prevent air circulation, allowing disease organisms to thrive. 42
Using a non-water soluble marker, prepare a label with scientific name, cultivar, common name and date. Additional information for the label may include hormone treatment and name of the propagator. 44
Place the label in the container with the plant name facing out for easy identification. 45
One final step is to water-in the cuttings to settle the rooting medium around the base of the cuttings. Following watering, the cuttings should be placed on a mist bed to ensure proper moisture levels are maintained. 46
Proper sanitation is essential to prevent disease. Alcohol or a 10% bleach solution may be used. 50