Creating Custom Commands with Arxterra Control Panel & Android App
Learn how to implement custom commands and expand your robot's capabilities with Arxterra's custom command menu and interface implementation example. Follow the tutorial for step-by-step guidance.

Creating Custom Commands with Arxterra Control Panel & Android App
E N D
Presentation Transcript
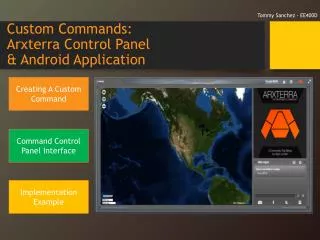
Tommy Sanchez - EE400D Custom Commands: Arxterra Control Panel & Android Application Creating A Custom Command Command Control Panel Interface Implementation Example
Custom Command Menu:Arxterra App Custom commands will allow you to expand the capabilities of your robot. In order to reach the custom menu, please press “Custom”. If you don’t know how to connect to the app or don’t have the app, see the Getting Started tutorial.http://arxterra.com/get-up-and-running-with-the-arxterra-control-panel-android-applications/
Custom Command Menu:Arxterra App Press and hold the yellow icon on any page for contextual help As this is your first time accessing the Custom command Definitions window, you will not have any active commands. To add a new command press the plus (+) button. Note: Pressing “Done” on this page will take you out of the command menu
Custom Command Menu:Arxterra App • The following command types will appear after pressing the plus (+) button: • Boolean • Select • Byte • Unsigned Byte • Short • Unsigned Short • Heading/Separator
Custom Command Menu:Arxterra App Move Up or Down Pressing on any command type will add them to the window space. Selecting an added command in the windows space will allow you to: delete, move up or down, or edit the command properties. Each command’s properties window has a “Command ID” button. This will be explored first before moving on to the command types. Delete Edit
Custom Command Menu:Arxterra App Command ID is used to assign a Hex value to the command. This value is used in your Arduino IDE sketch so the microcontroller can identify what instruction it’s receiving. Pressing the “Command ID:” button on any command type properties window will give you the option to choose from 32 custom command IDs. The range is from 0x40(64) to 0x5F(95). Command types also have 1 or 2 value bytes associated with the command. This will be addressed on the next slides as each command type is covered. (Slide 33-37 explores the byte arrays received from commands)
Custom Command Menu:Arxterra App To get started with a Boolean command choose Boolean. Once the command is added to the window space, select it and press the edit button.
Custom Command Menu:Arxterra App • Properties for Boolean Command: • Give the command an ID (In HEX) • Give the command a Label (Name) • Include a hover over Tip for the control panel if desired • Choose a Default Value for the selector switch (On or Off) • The command’s associated value (1 byte) comes from the selector switch position. On being [0x01] and Off being [0x00].
Command Control Panel Interface The Interface for Boolean command on the Control Panel Label: Boolean Tip: On or Off
Custom Command Menu:Arxterra App To get started with a select command choose Select. To the left you will see the new command, and to the right the “Options for Select Command”. Pressing the (+) on the right adds more options (choices). Choose an option and press the edit button.
Custom Command Menu:Arxterra App • Option Properties: • Give the option an ID (In HEX) • Give the option a Label (Name) • Include a hover over Tip for the control panel if desired • Press the “back” button to return to the main page to do the same for all your options. • Once you have made the option changes desired it’s time to edit the Select command properties.
Custom Command Menu:Arxterra App With the Select command chosen, press the edit button on the left to go to the Select command properties.
Custom Command Menu:Arxterra App • Properties for Select Command: • Give the command an ID (In HEX) • Give the command a Label (Name) • Include a hover over Tip for the control panel if desired • Choose a default Option from the ones created earlier. (Default Value) • Choose widget type • In this instance, the command’s associated value (1 byte) will be the selected option’s ID • Widget Types: • Radio Buttons • Select List
Command Control Panel Interface The Interface for Select command on the Control Panel (Two select commands for illustrative purposes) Widget Types: Boolean & List Default Value: New Option 0 Tip: Make a Selection Label: New Select
Custom Command Menu:Arxterra App To get started with a Byte command choose Byte. Once the command is added to the window space, select it and press the edit button.
Custom Command Menu:Arxterra App • Properties for Byte Command: • Give the command an ID (In HEX) • Give the command a Label (Name) • Include a hover over Tip for the control panel if desired • Choose a default value(can be negative) • Choose a minimum and maximum(can be negative) • Choose a step size value • Choose widget type • The command’s associated value (1 byte) comes from slider position or stepper value. • Widget Types: • Slider • Stepper
Command Control Panel Interface The Interface for Byte command on the Control Panel (Two Byte commands for illustrative purposes) Widget Types: Slider & StepperDefault Value: 0 Tip: Change value Label: New Byte Maximum: 127 Minimum:-128 Step:1 Note: Values can be negative for Byte command
Custom Command Menu:Arxterra App To get started with an Unsigned Byte command choose Unsigned Byte. Once the command is added to the window space, select it and press the edit button.
Custom Command Menu:Arxterra App • Properties for Unsigned Byte Command: • The Unsigned Byte command has all the same properties as a Byte Command but considering it is unsigned the minimum, maximum, and default value cannot be negative. • The command’s associated value (1 byte) comes from slider position or stepper value. • Widget Types: • Slider • Stepper
Command Control Panel Interface The Interface for Unsigned Byte command on the Control Panel (Two Unsigned Byte commands for illustrative purposes) Widget Types: Slider & StepperDefault Value: 0 Tip: Change value Label: New Unsigned Byte Maximum: 255 Minimum: 0 Step:1 Note: Values cannot be negative in Unsigned Byte command.
Custom Command Menu:Arxterra App To get started with a Short command choose Short. Once the command is added to the window space, select it and press the edit button.
Custom Command Menu:Arxterra App • Properties for Short Command: • Give the command an ID (In HEX) • Give the command a Label (Name) • Include a hover over Tip for the control panel if desired • Choose a default value(can be negative) • Choose a minimum and maximum(can be negative) • Choose a step size value • Choose widget type • The command’s associated value (2 bytes) comes from slider position or stepper value. • Widget Types: • Slider • Stepper
Command Control Panel Interface The Interface for Short command on the Control Panel (Two Short commands for illustrative purposes) Widget Types: Slider & StepperDefault Value: 0 Tip: Change value Label: New Short Maximum: 32767 Minimum: -32768 Step:1 Note: Values can be negative for Short command.
Custom Command Menu:Arxterra App To get started with an Unsigned Short command choose Unsigned Short. Once the command is added to the window space, select it and press the edit button.
Custom Command Menu:Arxterra App • Properties for Unsigned Short Command: • The Unsigned Short command has all the same properties as a Short Command but considering it is unsigned the minimum, maximum, and default value cannot be negative. • The command’s associated value (2 bytes) comes from slider position or stepper value. • Widget Types: • Slider • Stepper
Command Control Panel Interface The Interface for Unsigned Short command on the Control Panel (Two Unsigned Short commands for illustrative purposes) Widget Types: Slider & StepperDefault Value: 0 Tip: Change value Label: New Unsigned Short Maximum: 65535 Minimum: 0 Step:1 Note: Values cannot be negative for Unsigned Short command.
Custom Command Menu:Arxterra App To get started with a adding a command Separator or heading in the control panel choose Heading /Separator. Once the command is added to the window space, select it and press the edit button.
Custom Command Menu:Arxterra App • Properties for Heading/ Separator Command: • Give the command a Label (Name) • Include a hover over Tip for the control panel if desired • An empty label will cause the heading to function as an unlabeled Separator.
Command Control Panel Interface The Interface for New Heading/Separator command on the Control Panel (Two Separator commands for illustrative purposes) Tip: Separator Label: New Heading/Separator Tip: Separator Label: (Was left blank)
Implementation Examples:Overview Byte Arrays Robot Types Covered Spiderbot/Hexapod Example illustrates: Robot’s sleep mode, walking motion(Gait), stance modes like arched, variable leg motion for defensive leg jabbing, and leg servo speed for quick adjustment to outrun another robot. Rover Example illustrates: Robot’s motor status, special trick movements like weaving, and variable speed for quick adjustment to motors. Biped Example illustrates: Robot’s leg status, walking mode speed, and leg balance options Byte array examples will cover how byte arrays are sent to the microcontroller based on the custom command used. Also, byte array information going from the microcontroller back to the Android phone will be explored.
Implementation Example:A Spiderbot/Hexapod Here is an example of possible custom commands that can be used with a Spiderbot/Hexapod. It will depend on the programmer to choose what best fits their application. If for example you want a variable value command but don’t need negative values to be sent to the microcontroller, you can choose Unsigned when adding a Byte or Short command.
Implementation Example:A Rover Here is an example of possible custom commands that can be used with a Rover It will depend on the programmer to choose what best fits their application.
Implementation Example:A Biped Here is an example of possible custom commands that can be used with a Biped It will depend on the programmer to choose what best fits their application.
Byte Array Explored: Using the Spider/Hexapod example. Each command type’s byte array will be covered. Sleep Mode: This is a Boolean command.It has a Command ID byte and an associated value (1 byte). On and Off provides the associated byte and is represented by 0x01 and 0x00 respectively. Arbitrarily choose the Boolean Command ID to be 0x40. The byte array sent to the microcontroller would be [0x40 0x00] or [0x40 0x01]
Byte Array Explored: Gait/Stance: These are Select commands.A Select command has a Command ID byte and an associated value (1 byte). The options from the list menu or radio buttons provide the associated byte. Using Stance as the example: Arbitrarily choose the Select Command ID to be 0x41 and the Arched, Level, and Recon Option ID’s to be 0x42,0x43,0x44 respectively. if Recon is selected then the byte array sent to the microcontroller would be [0x41 0x44].
Byte Array Explored: Variable Leg Motion/Leg Servo Speed: These can be Short, Unsigned Short, Byte, or Unsigned Byte commands.A Byte and Unsigned Byte command have a Command ID byte and an associated value (1 byte).A Short and Unsigned Short command have a Command ID and an associated value (2 bytes). The value from the slider or stepper provide the associated byte(s). Continue on for example
Byte Array Explored: Using Variable Leg Motion as the example: Byte command: Arbitrarily choose Command ID to be 0x45 and the maximum and minimum for the slider to be 127 and -128 respectively. If you were to move the slider to a value of 30 or 0x1E in HEX, then the byte array sent to the microcontroller would be [0x45 0x1E]. Note: It works the same for Unsigned Byte. Remember that Unsigned Byte differs in that it cannot produce negatives.
Byte Array Explored: Using Variable Leg Motion as the example: Short command: Arbitrarily choose Command ID to be 0x46 and the maximum and minimum for the slider to be 32767 and -32768 respectively. If you were to move the slider to a value of 1000 or 0x03E8 in HEX, then the byte array sent to the microcontroller would be [0x46 0x03 0xE8]. Note: It works the same for Unsigned Short. Remember that Unsigned Short differs in that it cannot produce negatives.
Byte Array Explored:From Microcontroller to Android Byte arrays can be sent back to the Android phone. The reason is to properly display the robot’s present state on the Control Panel widgets. Using the Spiderbot/Hexapod example: If in Recon mode(a mode in which the robot cannot move) an instruction is sent for the robot to move, the Control Panel should reflect a change in its stance by showing Level (a move capable mode). Since as it moves it’s in Level mode. The Android phone would need to receive a byte array of [0x41 0x43] to make the change. (Stance and Option IDs from previous example)
Extra Resources/Information Setting Up the Code For The Arduino ADK: Tutorial Provided by Ryan Fiske (Fall 2013) http://www.arxterra.com/wp-content/uploads/2013/10/ArxterraCodeSetup.pdf Arduino Uno requires a USB to USB OTG cable to connect to Android phone. The following link provides information on: -How to get permission to download the apps (please use google email associated with your google play account) -Where to download Arduino code for communication with Phone. http://www.arxterra.com/rosco/software/