Using Basic Hand Tools
Explore selecting, using, and maintaining essential hand tools for AFNR projects. Learn layout tools and proper techniques for cutting, shaping, and more.

Using Basic Hand Tools
E N D
Presentation Transcript
Next Generation Science/Common Core Standards Addressed! • CCSS.ELALiteracy. RST.11‐12.9Synthesize information from a range of sources (e.g., texts, experiments, simulations) into a coherent understanding of a process, phenomenon, or concept, resolving conflicting information when possible.
Agriculture, Food and Natural Resource Standards Addressed! • PST.01.02. Apply physical science and engineering principles to design, implement and improve safe and efficient mechanical systems in AFNR situations. • PST.01.02.02.a. Identify the tools, machines and equipment needed to construct and/or fabricate a project in AFNR.
Bell Work! • Discuss how to select hand tools. • Identify and explain how to use layout tools. • Identify and explain how to use cutting, shaping, and boring tools. • Identify and explain how to use holding and turning tools. • Identify and explain how to use driving and wrecking tools.
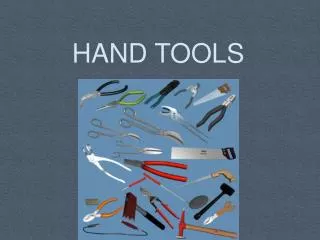
Interest Approach • Display a variety of hand tools, tour a hardware store to look at tools, or go to an internet web site to view tools (i.e. www.stanleyworks.com or www.toolsource.com). • All people in our society either use hand tools or pay others who use hand tools.
Interest Approach • Ask students if they know the names of the tools and how to use them. • Compare cheap tools with quality tools. • Talk about the importance of using the right tool for the job. • Explain when a hand tool must be used instead of a power tool.
100 foot wind up tape Adjustable jaw wrenches Auger bit Backsaw Bar clamp Block plane Box-end wrenches Brace Carpenter’s pencil C-clamp Center punch Chalk line Combination open-end box-end wrench Terminology (1)
Combination pliers Combination square Coping saw Crosscut saw Crow bars Curved claw hammers Diagonal side cutting pliers Digital level Fixed jaw wrenches Flat bars Framing square Hand drill Hand screw clamp Hand tool Jack plane Keel or carpenter’s crayon Terminology (2)
Keyhole or compass saw Layout tool Line level Locking tape measures Locking pliers Machinist’s vise Marking gauge Miter clamp Needle nose or long round nose pliers Open-end wrenches Phillips or cross point screwdrivers Pipe vise Pipe wrenches Plane Plumb bob Power tool Push drill Rasplane Ripsaw Terminology (3)
Selecting Hand Tools • Hand tools are the most effective and efficient way to do many jobs • Tool: Any instrument used in doing work
Selecting Hand Tools • Hand tool: Any tool operated by hand to do work • Used to do a task or job that could not be done with the bare hand or without the tool • Power tool: Operated by some source of power other than human power
Selecting Hand Tools • Use hand tools when electrical or engine power is not available. • Hand tools are used to do the small jobs and to do the work where large machines cannot function. • Knowing how to use a hand tool helps when using a power tool designed for the same type of job.
Selecting Hand Tools. • Select the right tool to do a job and use it properly. • Using the wrong tool can be dangerous, can damage the tool, and results in inferior work. • Using the right tool in the wrong way is also dangerous.
Layout Tools • Tool used to measure or mark wood, metal, and other materials.
Measuring Devices • Measuring is normally done using rulers, measuring tapes. • Rulers: can be one foot, yardsticks, and meter sticks
Locking Tape Measures • Come in lengths ranging from 6 foot to 30 foot, a width of ½ to 1 inch, they lock open, and use a spring to retract the tape with the push of a button.
Other Measuring Layout Tools • Electronic Tape Measure • Divider----------- • Marking Gauge--------- • Chalk Line---------
100 Foot Wind Up Tape • 100 foot wind up tape is useful in building layout work where distances over 30 feet must be measured.
Once materials are measured and marked, they need to be cut, shaped, and bored as needed to prepare for assembling
Saws • Classified by use and teeth per inch. • An 8-point saw would have 8 teeth per inch. • Handsaws include the: • Crosscut, rip, compass or keyhole, coping and backsaw.
Crosscut Saw • Used to cut across the grain of wood. • Use the thumb to guide the starting of the cut while pulling the saw upwards slowly two or three times • Saw to the line using long steady strokes with the saw at a 45 degree angle to the board
Ripsaw • Used for sawing with the grain. • Hold the saw at a 60 degree angle with the wood and use a wedge between the cut surfaces if the board binds.
Keyhole or Compass Saw • 12 to 14 inch long narrow saw that starts at about ½ inch wide at the handle tapering to a point at the end of the blade. • Used for cutting curves and circles. • A hole is generally drilled as a way of starting the cut in the interior of a piece of wood.
Coping Saw • Small saw with a very thin blade of fine teeth. • Used for cutting intricate curves in thin material.
Backsaw • Finish carpentry saw with fine teeth generally used in a miter box to cut molding and trim.
Shaping Tools • Includes planes, wood chisels, and rasps.
Plane • Tool used to smooth surfaces and change the size or shape of wood materials. • Planes include: • Jack Plane • Smoothing Plane • Block Plane
Usually 14 inches long Used for smoothing long surfaces by shaving with the grain of the wood Jack Plane (Pictures Courtesy, Interstate Publishers, Inc.)
Smoothing Plane • Usually 8 inches long, • Used with the grain and to finish smoothing
Block Plane • Usually 6 to 6½ inches long • Used for smoothing the ends of boards by cutting across the grain. • To avoid splitting corners, clamp a piece of wood on both edges of the board or plane from the edge toward the center.
(Pictures Courtesy, Interstate Publishers, Inc.) Wood Chisel • Wedge-shaped cutting tool used to cut notches and shaving off excess wood • Come in a variety of widths and are generally hit with a wooden mallet.
(Pictures Courtesy, Interstate Publishers, Inc.) Wood Rasp • Also known as a wood file • Used for smoothing rough work and for removing small amounts of wood on curved and irregular-shaped objects.
Rasplane • Wood rasp in the shape of a plane • Use it in the same way as a wood rasp
Brace • Holds square shank bits for boring holes in wood.
Auger Bit • Square tang to fit into the brace. • The cutting end has a feed screw, cutting lips, and cutting spurs
Auger Bit • Drill until the feed screw begins to come through the wood, then back out the bit, and turn the wood over to finish the hole from the other side • Prevents the wood from splintering out
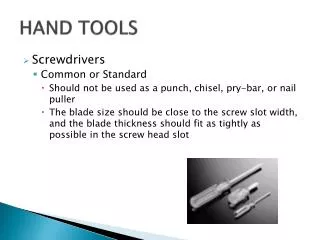
Holding or Gripping Tools • Help complete the job quicker, easier, and safer • Clamps and vises • Used to hold or grip wood or metal while being cut, shaped, bored, and fastened • Pliers,wrenches, and screwdrivers • Used at times for holding, gripping, or turning.
Clamps • Types: • C-clamp • Bar clamp • Hand Screw clamp • Miter clamp • Spring clamps • Band clamp/Strap clamp/Pony clamp
C-Clamps • Shaped like the letter C and • Comes in sizes ranging from 2 to 10 inches
Bar Clamps • Adjustable clamp that can range from a few inches to six feet
Hand Screw Clamps • Requires two hands for tightening • Can span up to 10 inches
Miter Clamps • Used for tightening corners • Example: Making a picture frame.
Band Clamps • Also called a Strap clamp or Pony clamp • Has many uses • May be ratchet tightened • Comes in a variety of lengths
Vises • Types: • Machinist’s vise, • Utility vise • Pipe vise
Machinist’s Vise • Made for heavy duty work • Have jaws that grip materials to keep them from slipping • Often mounted to a shop table.
Utility Vise • Has a small anvil on the back • Has removable jaws
Pipe Vise • Specially made to hold pipe without denting or flattening it
Pliers • Types: • Combination pliers • Needle nose pliers • Diagonal side cutting pliers • Channel lock pliers • Locking pliers