Download

1 / 44
440 likes | 632 Vues
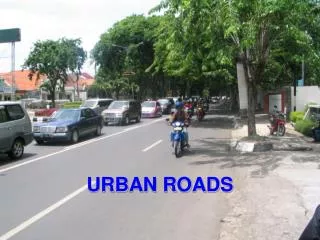
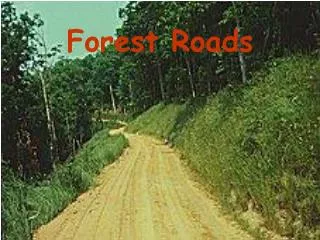
Roads in MineSight. Considerations in Setting Up A Road. The road should go to your intended destination You need to zoom in an zoom out enough to go to your destination Directness and Straightness of the route usually has some balance with cut and fill

E N D
Considerations in Setting Up A Road • The road should go to your intended destination • You need to zoom in an zoom out enough to go to your destination • Directness and Straightness of the route usually has some balance with cut and fill • Natural topography is usually not shaped like a road • You can try following the terrain to minimize any cut and fill • May save you money on road building • But it can lengthen your truck haul • And maybe put turns in that will slow you down. • Grade – The direction of the road will usually control its grade • How steep do you want your road to be • Might also pertain to a conveyor belt travelway
Once Upon a Time it was desired to move material by truck from A to B A B
One Could Go Up the Valley Without Too Much Trouble Of course getting up onto that Darn mountain top will be less fun.
Of Course the Shortest Distance Between Two Points is a Straight Line And if I do that much Cut And fill I also know the Shortest distance into my Wallet.
Need to Make a Decision • I will go up the valley • Perhaps do some cut when I get to the end of the valley • Then I may have to wind around to get to the mountain top.
Basic Process of Laying Down a Road in MineSight • Lay down a polyline for the center of the road • Attach a template for the road width and any necessary fill if the road needs to be built up • Do the same thing if the road needs to be cut in • Use surfaces intersect tools to imprint the haulroad onto your surface • And to create solids used to measure cut and fill volumes.
My First Move • I want MineSight to tell me the percentage grade of my road segments as a lay out the polyline center of the road • I will make this happen by playing with settings
Prepping Settings for My Work Pick the Status Bar Tab Go to Project Settings Set it to measure your dip in % rather than degrees (we usually measure % grade for roads)
What Is the Status Bar? Its that bar of numbers, coordinates, and stuff located at the bottom of a viewer Window.
Next I Will Set My Snap Set to Snap to an Elevation Now turn off my surface leaving my surface Contours to snap to.
I Now Begin Laying Out My Center Line Note that as I click (but don’t Release) for the next point on the Polyline it snaps to the contour Elevation and gives me the road Slope as I move the end point Around looking for a slope I can Live with. (in this case I want to keep it under 10%)
I Get A Route The slopes on this route Range from just over 6% To 11.7% (I tried to avoid cutting into Or filling into contours as They turned) One might need to try Several times to get a route They are happy with.
My Unhappy Switch Back Problem I do have to hard switch backs (I can do a little smoothing of My road center polyline).
I Did This With a Simple Polyline Smooth 1- Make new selection Pick the polyline 2- Polyline menu Select smooth 3- follow instructions To reselect 4- Preview to make Sure you are happy 5- Ok the action and Save.
We Now Prepare to Attach a Template on the Polyline If we need to fill then the fill will slope down From the edge of the road to the land below. Of course it’s the opposite if we are cutting.
Lets Get Our Template Ready to Represent This Pull up the Template Editor
The Editor Window Pops Up Here is a road build up projecting down to A surface somewhere below.
Setting Up Our Template I pick my road width – in this case 30 meters (the project I’m working on is in metric units) My height was 100 meters – this is probably high But I will cut it off with my natural ground surface My angle pick is 20 degrees – it gives me just under 3 units of run per unit of rise. It may be a little Idealistic but if I can work it it will be quite stable I want my base point at the top (the fill projects down From my road center polyline) {note that bottom is The default most of the time}.
Select the Polyline Go to the Surface Menu Pick Create On the side menu select Attach template along polyline
I’m Not Sure About Round One The slope is burying the road Down slope by my switch backs.
My Solution – Split the Road Select the Road Polyline Activate the split and Then click on the points Where you want to split Use Query to confirm the split
Attach the 20 degree outslope to the Polyline on Flatter Ground
Make A Slightly Steeper Outslope and Attach to the Middle Line Segment
Trying a Steeper Slope for the Mountain Area As can be seen, Sometimes the road Route does not work Out well.
Turning On Surfaces We Can See the Fill Area We will now Activate the Intersect Surfaces tool
Use the Blue Worm – Select Your Topo Surface as Primary, Your 3 fills as Secondary
We Have The Fill Part Done I used a new Active Edit object For my Surface with Fill.
I Will Set Up a Cut Template I will select that I will cut into the ground I will keep my road width and template height Since I am cutting into rock I can probably use A steeper slope with cut than fill Notice I have an issue with my “base point”. I need the template to attach to the road centerline
Intersect Surfaces Again – This time with a Cut Surface Option
Checking for Problems We have an area where The cut dud not work Well.
What Went Wrong Note we have places Where the turn surface Projected above other Cut surfaces causing only The higher cut surface To work.
See Where the Shadowing Effect of the Double Surface Worked.
Things to Try • Not making template so tall • Breaking line into segments so that the template does not cross itself • And no I’m not going to do that here • We will however learn to measure the cut and fill.
Pick the New and Original Surface Ask for a solid between the two Define it as a cut surface
Notes • These notes do not cover all the times I made geometry objects, put things in Edit mode, or turned geometry objects off or on • It is assumed you know these things • They do not attempt to cover all issues and problems that could come up • Although some examples are covered • Warning – switch backs in roads can create problems if the road center polylines are not broken into segments at such turns (you saw one such example in these slides).