Download
1 / 12
120 likes | 239 Vues
In this interactive lab session, groups will systematically observe various cells and preserved organisms at designated stations. Each team will engage in hands-on activities, including drawing specimens and documenting observations to enhance communication and collaboration skills. With roles assigned for observation and drawing, students will gather insights into macroscopic and microscopic life forms. After completing the rotations, groups will reconvene to discuss findings, create a collective report, and reflect on their observations. Essential materials include paper and writing tools; personal belongings should be secured.

E N D
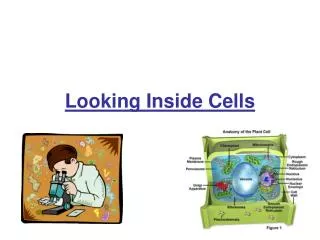
Lab #1 IE 7, Bi 1c LOOKING AT CELLS
OBJECTIVES • View cells and other preserved living organisms • Practice observation and writing skills • Making conclusions about observations through collaboration and sharing of ideas a s a team • Building team work.
You will be working in groups • Assign one who will in charge of drawing and noting down observations about the image on the microscope. • Assign one who will be in charge of drawing and noting down observations about the one of the specimens on your table. • If there are 3 persons in a group. 2 will be working on one specimen each. One will be working on the microscopic image.
What everyone should have • Paper, pen or pencil • Bring only the materials above. All other items such as bags, notebooks should be left in a secured area that will not block the movement of the entire class.
Procedure • Your first station ( the first table where you will start) is your own table. • View, draw, write your observations about the image and the specimens on your table. • I will tell the entire group that it is time to move on to the next station ( table). You will move counterclockwise to the next table. I will prompt groups as to where they should go. Wait for me to tell you that it is time to move.
6 STATIONS/ 2 areas • You will only be observing 6 stations. There are 12 stations, which means that you will only be moving around your half of the room. • I will tell you beforehand which tables are included for your group.
What are you going to do at the stations? • Go to your assigned specimen ( macroscopic or microscopic) • Draw what you see. • Write down 5 things about what you saw/drew. • If there is time, the other members of the group should also look at the image or the specimen that they were not working on.
How each one’s paper should look like Name Period Number Draw image/specimen At least 5 things about the image
When we are done with lab rotations… • Go back to your table with your original group members. • Discuss/compare your observations. Re-draw or re-write your observations as a group. • Turn-in ONE group report that will include drawings and observations. You also need to include some points that you talked about.
Group Report Format • Names: Period: 1. 2-3 drawings 2. Summary of observations for all 2 or 3 3. Conclusions made after sharing
What to turn in at the end of the period • Group report • Individual notes attached to the group report.
Yes or No • Touching the coarse adjustment • Touching the fine adjustment • Moving the slide • Moving the side clips • Removing any parts of the microscope • Calmly and quietly do your work and move on CALMLY and quietly go to the next station • Be careful of the wires