Download
1 / 51
510 likes | 864 Vues
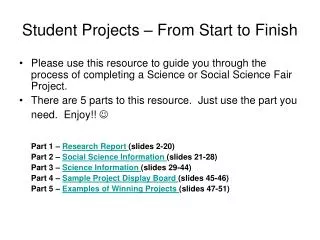
Student Projects – From Start to Finish. Please use this resource to guide you through the process of completing a Science or Social Science Fair Project. There are 5 parts to this resource. Just use the part you need. Enjoy!! Part 1 – Research Report (slides 2-20)

E N D
Student Projects – From Start to Finish • Please use this resource to guide you through the process of completing a Science or Social Science Fair Project. • There are 5 parts to this resource. Just use the part you need. Enjoy!! Part 1 –Research Report (slides 2-20) Part 2 – Social Science Information (slides 21-28) Part 3 – Science Information (slides 29-44) Part 4 – Sample Project Display Board (slides 45-46) Part 5 – Examples of Winning Projects (slides 47-51)
Part 1 –Research Report What are you going to write?
What’s in your Research Paper? • Title page (Sci) (SS) (LA) • Table of contents (list) (Sci) (SS) (LA) • Introduction (paragraph) (Sci) (SS) (LA) • Materials (list) (Sci) (Math) • Methods (paragraph) (Sci) (SS) • Review of Literature (paragraphs) (LA) (Sci) (SS) • Results (paragraphs) (Sci) (Math) • Discussion (paragraphs) (Sci) (SS) • Conclusions (paragraphs) (Sci) (SS) • Acknowledgments (as needed) • References (alphabetical list) (LA) (Sci) (SS) (Subject areas in parentheses are teachers you can go to for help with your project.)
Title Page • The title page contains: • The title of your project • Example: “How does light affect mold?” or • “How does your mold grow?” • NOT your name (just the number that your Science or Social Studies teacher has assigned your project) • School (Camden Middle School) • Date (date of fair)
Table of Contents • A list of what’s contained in your report (page by page) Table of contents 1 Introduction 2 Materials 3 Methods 4 Review of Literature 5-7 Results 8 Discussion 9 Conclusion 10 Acknowledgments 11 References 12
Introduction • The Introduction includes paragraphs about your: • Purpose (Why are you doing this project?) • Hypothesis (What you think will happen in your experiments?) (Science, not Social Science) • Problem (What is the scientific question or social issue to be solved?) • Explanation of what prompted your research (What interested you in your topic?) • What you hoped to achieve (What did you want to learn or find out about your topic?)
Materials List • Create a list of all your materials • Things you used to complete your project Project board cut-out letters Paper, pencil, markers 6 loaves of bread Sealed box Thermometer Timer Lamp Refrigerator Camera • Make sure that you list the amount of each item. • Include the measuring scale used for the items (Metric/Standard English).
1. Display Board Please make sure you have the three materials shown for the day of the Science or Social Science Fair. Do not display research paper on the project board. It should be in a sleeve or folder in front of the project. 2. Log book 3. Written Report
Methodology • Methods (paragraph) • Things you did to complete your project (example) • To complete my project, I bought 3 loaves of bread and placed the control in the refrigerator to keep it from molding. I placed one loaf in a dark, sealed box and I left one loaf out on the counter in the light. I took pictures of the 3 loaves. • I wrote down the beginning time for the 3 loaves and then observed them each day – once in the morning and once in the evening – to check for mold. I wrote down my observations in my log book. • No mold was observed until the 5th day. It was on both loaves in the same place – on the bottom.
Review of Literature • The Review of Literature includes paragraphs about: • The background information on your topic that you researched from: • Books • Encyclopedias • Web sites • Magazines or journals • Interviews
Review of Literature (example) “Mold is a fungus that requires “food” to grow. In my experiments I used bread as my food. I learned that mold does not require light to grow, but it does require moisture.” I also learned… In my experiments… In the book, Mold, the pictures of mold… Find and read information about your topic from your required sources (books, magazines, encyclopedias, Internet) and take notes that will help you explain your topic to others. Use your notes to write about your topic in your own words. DO NOT copy and paste computer information into your report – that is plagiarism!! Be sure to include all sources in your list of references (AKA: bibliography).
Research(Pick a topic and do some research on it to learn about it, then decide on a problem to solve.) • Research is the process of collecting information from: • your own experiences, • knowledgeable sources, and • data from exploratory experiments. • Your first research is used to select a project topic. This is called topic research. • example: mold growth
When you conduct research to better understand your topic: • Do use many references from printed sources—books, journals, magazines, and newspapers—as well as electronic sources—computer software and online services. • Do gather information from professionals—instructors, librarians, and scientists, such as physicians and veterinarians (interviews). • Do perform other exploratory experiments related to your topic.
Project Research • After you have selected a topic, you begin what is called project research. • This is research to: • help you understand the topic, • express a problem, • propose a hypothesis, and • design one or more project experiments to test the hypothesis. • The results of this experiment and other research give you the needed information for the next step—identifying the problem.
Results • Results • Data (information you collected as you did your experiments) • Time it took for mold to start growing • Amount of mold each day on each loaf • Temperatures of bread loaves • Analysis (what you decided that your data showed you) • Mold grew first on both, but faster on the loaf in the dark, possibly due to higher temperature and … • Include statistics, graphs, charts, etc.
Discussion • In a paragraph or two, compare your results with your research: Did your results (what your experiment showed about how mold grows)… …match your research (what you read and learned about mold)?
Conclusions • In your conclusion, you will: • Briefly summarize your results • After rereading your Review of Literature and your Results, summarize what you learned about your topic in your own words. • Be specific • Don’t babble or talk about anything but your topic. • Make practical applications • Think of a way to use what you’ve learned in a practical way (how to prevent mold from growing).
Acknowledgments • In this paragraph, you will give credit for help given by teachers, parents, or people you have interviewed. • I would like to thank my mom for typing the final draft of my project. • I would like to thank my science teacher for finding the graph template for me. • I would like to thank Dr. Science for allowing me to interview her.
References • Use APA style to cite your resources Go to www.citationmachine.net and type in the name of your resource to get the proper format. • Give credit for ALL resources used
References Gray, William D. (1970). What we find when we look at molds. New York: McGraw-Hill Book Company. Guidelines for Formal report. Retrieved on 9/19/07 from http://www.uga.edu/oasp/Science%20Fair/GSEF.ISEF%20Rulebook.pdf Haduch, Bill. (2002). Science Fair Success Secrets. New York: Dutton Children’s Books. “Mold.” The World Book Encyclopedia (2001), Volume 13, pg 689. Chicago: World Book, Inc. The Scientific Method. Retrieved on 9/24/07 from http://school.discoveryeducation.com/sciencefaircentral/
Part 2 – Social Science Information www.gcss.net
Social Science Disciplines • Anthropology – People are survivors. • Economics – People are consumers and producers. • Geography – People are earth dwellers. • History – People are descendants. • Political Science – People are citizens. • Sociology/Social Psychology – People are members of groups as well as individuals.
(Some) Social Science Topics • Crime and Law • Discrimination • Drugs and Drug Abuse • Education • Environment • Health • History • Media and Communications • Political Issues • Popular Culture • Psychology • Religion • Social Issues • Technology • Women's Issues
More Social Science Info • Choose an issue or problem that you have an interest in. • Narrow your focus to one aspect of the issue or problem that you would like to investigate or solve. • As much as possible, conduct your research from unbiased sources or at least include both sides of an argument in your research.
What to include in your Social Science Fair Project Report • Title page • Table of contents (list) • Introduction (paragraph) (clear statement of the questions being studied – may be stated as hypothesis, question, or purpose) • Methodology (paragraph) (procedures used in the research) • Review of Literature (paragraphs) • Discussion (paragraphs) • Conclusions (paragraphs) (based on analysis and interpretation of data that directly answer the question being studied) • Acknowledgments (as needed) • References (alphabetical list)
Part 3 – Science Information http://www.cgcc.edu/sci_fair/home.html
Scientific Method • Research(Pick a topic and do some research on it to learn about it, then decide on a problem to solve.) • Problem(The scientific question to be solved. Decide what you’d like to solve through experimentation. Do some more research and design an experiment.) • Hypothesis(What do you think will happen during your experimentation?) • Project Experimentation(Conduct your experiment and find out if your hypothesis was right or wrong.) • Project Conclusion(What did you learn? What really happened during your experiment – were you right? Be honest!)
Research(Pick a topic and do some research on it to learn about it, then decide on a problem to solve.) • Research is the process of collecting information from: • your own experiences, • knowledgeable sources, and • data from exploratory experiments. • Your first research is used to select a project topic. This is called topic research. • example: mold growth
(Some) Science Topics • Pick one • Things that move (vehicles, air, baseballs) • Things that grow (plants, molds) • Things that you like (chocolate, soda) • Things that change (pH, tastes, diapers) • Narrow it down – from many to one or two • Keep it simple – compare just 2 things, not 8 • Focus on one point, not everything • Conduct your topical research
Project Research • After you have selected a topic, you begin what is called project research. • This is research to: • help you understand the topic, • express a problem, • propose a hypothesis, and • design one or more project experiments to test the hypothesis. • The results of this experiment and other research give you the needed information for the next step—identifying the problem.
When you conduct research to better understand your topic: • Do use many references from printed sources—books, journals, magazines, and newspapers—as well as electronic sources—computer software and online services. • Do gather information from professionals—instructors, librarians, and scientists, such as physicians and veterinarians (interviews). • Do perform other exploratory experiments related to your topic.
Include charts, graphs, or other visual displays that help explain your project results. Results
Problem(The scientific question to be solved. Decide what you’d like to solve through experimentation. Do some more research and design an experiment.) • The problem is the scientific question to be solved. It is best expressed as an "open-ended" question, which is a question that is answered with a statement, not just a yes or a no. For example, "How does light affect the reproduction of bread mold on white bread?" • Do limit your problem. Note that the previous question is about one life process of molds—reproduction; one type of mold—bread mold; one type of bread—white bread; and one factor that affects its growth—light. To find the answer to a question such as "How does light affect molds?" would require that you test different life processes and an extensive variety of molds. • Do choose a problem that can be solved experimentally. For example, the question "What is a mold?" can be answered by finding the definition of the word mold in the dictionary. But, "At room temperature, what is the growth rate of bread mold on white bread?" is a question that can be answered by experimentation.
Hypothesis(What do you think will happen during your experimentation?) • A hypothesis is an idea about the solution to a problem, based on knowledge and research. It is a single statement that is the key to a successful project. • All of your project experimenting will be performed to test the hypothesis. The hypothesis should make a claim about how two factors relate. For example, in the following sample hypothesis, the two relating factors are light and bread mold growth. Here is one example of a hypothesis for the earlier problem question: • "If bread mold does not need light for reproduction on white bread, then mold will grow in a dark environment.” • I base my hypothesis on these facts (gathered through research): • Organisms with chlorophyll need light to survive. Molds do not have chlorophyll. • In my exploratory experiment, bread mold grew on white bread kept in a dark bread box.
Hypothesizing • Do state facts from past experiences or observations on which you base your hypothesis. • Do write down your hypothesis before beginning the project experimentation. • Don't change your hypothesis even if experimentation does not support it. If time permits, repeat or redesign the experiment to confirm your results.
Project Experimentation(Conduct your experiment and find out if your hypothesis was right or wrong.) • Project experimentation is the process of testing a hypothesis. The things that have an effect on the experiment are called variables. There are three kinds of variables that you need to identify in your experiments: independent, dependent, and controlled. • The independent variable is the variable you purposely manipulate (change). (light changed to dark) • The dependent variable is the variable that is being observed (the mold), which changes (or may change) in response to the independent variable. (the light) • The variables that are not changed are called controlled variables. (white bread) Do have only one independent variable during an experiment. Do repeat the experiment more than once to verify your results. Do have a control. Do have more than one control, with each being identical. Do organize data.
Materials List • Create a list of your materials • Things you used to complete your project Project board cut-out letters Paper, pencil, markers 6 loaves of bread Sealed box Thermometer Timer Lamp Refrigerator Camera • Make sure that you list the amount of each item. • Include the measuring scale used for the items (Metric/Standard English).
List all the steps of your procedure - these are the directions anyone can follow to repeat your experiment. Methods
Project Conclusion(What did you learn? Explain thoroughly. What really happened during your experiment – were you right? Be honest!) • The project conclusion is a summary of the results of the project experimentation and a statement of how the results relate to the hypothesis. • Reasons for experimental results that are contrary to the hypothesis are included. If applicable, the conclusion can end by giving ideas for further testing. • If your results do not support your hypothesis: • Don't change your hypothesis. • Don't leave out experimental results that do not support your hypothesis. • Do give possible reasons for the difference between your hypothesis and the experimental results. • Do give ways that you can experiment further to find a solution.
Conclusion • What did you find out? • Answer the problem based on the results of your experiment. • Tell if your hypothesis was correct or incorrect. • Tell what you think might have gone wrong in the experiment.
Science Project Display Board • Materials • ______ • ______ • ______ More pictures, charts, graphs or drawings
1. Display Board List of Materials Please make sure you have the three materials shown for the day of the Science Fair. 2. Log book 3. Written Report