Download
1 / 123
1.23k likes | 1.47k Vues
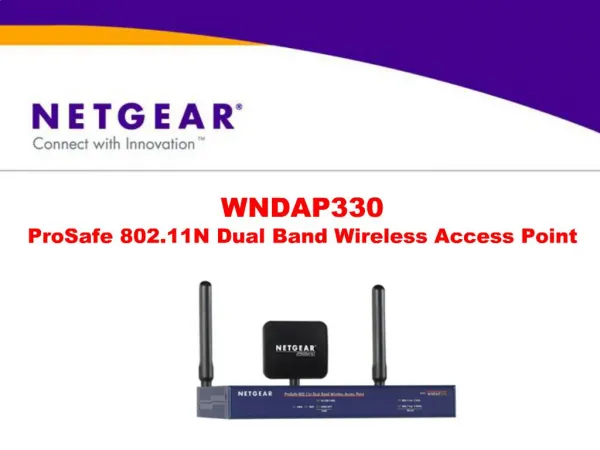
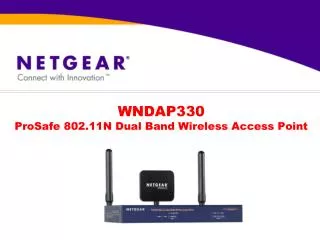
WNDAP330 ProSafe 802.11N Dual Band Wireless Access Point. Section 1: Course Introduction. Course Description. This course will cover product information, product specifications, product features, hardware installation and software administration of the WNDAP330 access point.

E N D
Course Description • This course will cover product information, product specifications, product features, hardware installation and software administration of the WNDAP330 access point. • The course is intended for L1, L2, L3 technical support engineers, VARs and sales.
Course Objectives • Upon successful completion of this course, students will be able to answer basic questions about the product including hardware specifications and features of the access point. • Example: • Sales question - Why do I need to buy the WNDAP330 instead of the WG302? • Hardware Features – Which wireless frequency the WNDAP330 operates on? • Software Features – Can WDS operates in 11n speed? • Students will be able to physically install the hardware. • Students will be able to administer the access point using the GUI.
CoursePrerequisites • Attendees should have a basic understanding of OSI reference model and be familiar with 802.11 standard.
Course Agenda • Section 1: Course Introduction • Section 2: Product Information • Section 3: Product Features • Section 4: Competitive Information • Section 5: Pre-install / Site Survey • Section 6: Hardware Installation • Section 7: Software Installation • Section 8: Software configuration • Section 9: Testing the completed installation • Section 10: Troubleshooting
Product Description • The WNDAP330 is the first 802.11n ProSafe access point. It supports either 2.4Ghz or 5Ghz frequency (not both concurrently). • 802.11n provides expanded coverage and increase speed. • The WNDAP330 comes with all the advanced features available on Netgear ProSafe access point.
Netgear Access Point Family WN802T WG302 WNDAP330 802.11n dual band Access Point 802.11n Access Point 802.11g Access Point WPN802 WAG102 WFS709TP WGL102 Pre-N Access Point 802.11a Access Point WG602 WG102 WAGL102 802.11g Access Point 802.11g Access Point Wireless controller “Lite” Access Point Home Access Points ProSafe Access Point
Support Information • Serial number prefix: • 1V1 – WNDAP330-100NAS/AUS/UKS/ISS • 1V2 – WNDAP330-100JPS • Warranty: • ProSafe Full Lifetime Warranty (3 years power supply) • SKU: • WNDAP330-100NAS • WNDAP330-100UKS • WNDAP330-100ISS • WNDAP330-100AUS • WNDAP330-100JPS
Support Information • Support Contract: • OnCall 24x7 3 Yrs, Phone+NBD Replacement, Cat. 1 (NA, EU, AUS, UK/EU) • XPressHW 3 Yrs, Next Business Day Replacement, Cat. 1 (NA, EU, AUS, UK/EU, FR, GR) • Accessories:
Hardware features • One RJ-45 10/100/1000base-T Gigabit Ethernet port with auto-sense, auto-negotiation, and Auto Uplink™ support. • 802.3af Power over Ethernet • One (1) console port with standard RS-232C interface with DB-9 males connector. • Two Reverse SMA 5dbi dual band dipole antenna and one reverse SMA 3dbi dual band patch antenna. (Not recommended to replace with ProSafe Antennas ANT2405, ANT2409 or ANT24D18). • Metal cases includes Kensington lock slot for anti-theft.
Software Feature Set • IEEE 802.11n draft 2.0 specification, 2.4GHz and 5.0GHz • IEEE 802.11a 5.0 GHz • IEEE 802.11b/g 2.4GHz • Wi-Fi Protected Access (WPA, WPA2) • Wired Equivalent Privacy (WEP) 64-bit, 128-bit encryption for IEEE 802.11b and IEEE 802.11g • IEEE 802.1x RADIUS authentication with EAP TLS, TTLS, PEAP • MAC address authentication • Multiple BSSID support • 802.1Q VLAN support • Rogue AP detection • Hot-spot • Secure SSH telnet, Telnet • SNMP management supports SNMP MIB I, MIB II, 802.11 MIB and proprietary configuration MIB • Wireless Distribution System (WDS) • Point-to-point, point-to-multipoint wireless bridge mode • Repeater mode
Selling points • Up to 10x the coverage and 15x the speed of 802.11g network. • Operates in 5 GHz radio band to avoid interference from 802.11b and 802.11g network devices. • Can be configured to operate in 2.4 GHz radio band for backward compatibility of 802.11b or 802.11g network devices. • Security features include WPA, WPA2, rogue AP detection and 802.1x with RADIUS support. • Integrated 802.3af PoE for easy deployment. • Comprehensive SNMP functionality for advanced network management. • Deploy over large areas with point-to-point and point-to-multipoint bridge WDS.
System Requirements • A 10/100/1000 Mbps Local Area Network device such as a hub or switch • The Category 5 UTP straight through Ethernet cable with RJ-45 connector included in the package, or one like it • A 100-240 V, 50-60 Hz AC power source • A Web browser for configuration such as Microsoft Internet Explorer 5.0 or above, or Mozilla 3.0 or above • At least one computer with the TCP/IP protocol installed • 802.11a/b/g/n or 802.11a/b/g/n-compliant devices, such as the NETGEAR WG511 Wireless Adapter
Package Contents • ProSafe 802.11n Dual Band Wireless Access Point WNDAP330 • Two Reverse SMA 5dbi dual band dipole antenna and one reverse SMA 3dbi dual band patch antenna. • Power adapter and cord (12 V dc, 1.5 A) • Straight through Category 5 Ethernet cable • NETGEAR WNDAP330 802.11a/b/g/n Dual Band Wireless Access Point Installation Guide • Resource CD • Support Registration card
Location Selection • The operating distance or range of the wireless connection can vary significantly based on the physical placement of the wireless access point. • The latency, data throughput performance, and notebook power consumption of wireless adapters also vary depending on the configuration choices. • For best results, place the wireless access point: • Near the center of the area in which your PCs will operate. • In an elevated location such as a high shelf where the wirelessly connected PCs have line-of-sight access (even if through walls). • Away from sources of interference, such as PCs, microwaves, and 2.4 GHz cordless phones. • Away from large metal surfaces.
Antenna Placement • Putting the antenna in a vertical position provides best side-to-side coverage. Putting the antenna in a horizontal position provides best up-and-down coverage. • The WNDAP330 utilize MIMO technology, therefore, replacing the antenna with other high gain antenna such as Netgear ANT2405, ANT2409 or ANT24D18 is not recommended.
Multiple Access Points Deployment • If multiple access points for 11b/bg/ng are being used, it is better if adjacent access points use different radio frequency Channels to reduce interference. • The recommended Channel spacing between adjacent access points is 5 Channels (for example, use Channels 1 and 6, or 6 and 11). For 11a/na, the 6 Channel spacing is not needed.
Security Consideration • Indoors, computers can connect over 802.11b/g/n or 802.11a/g/n wireless networks at ranges of several hundred feet or more. This distance can allow for others outside your area to access your network. It is important to take appropriate steps to secure your network from unauthorized access. • The time it takes to establish a wireless connection can vary depending on both your security settings and placement. • Some types of security connections can take slightly longer to establish and can consume more battery power on a notebook computer.
Wireless Security • Turn Off the Broadcast of the Wireless Network Name (SSID). If you disable broadcast of the SSID, only devices that have the correct SSID can connect. This nullifies the wireless network “discovery” feature of some products such as Windows XP, but the data is still fully exposed to a determined snoop using specialized test equipment like wireless sniffers. • Restrict Access Based on MAC address. You can restrict access to only trusted PCs so that unknown PCs cannot wirelessly connect to the WNDAP330. MAC address filtering adds an obstacle against unwanted access to your network, but the data broadcast over the wireless link is fully exposed. • Use WEP. Wired Equivalent Privacy (WEP) data encryption provides data security. • Use WPA or WPA-PSK. Wi-Fi Protected Access (WPA) data encryption provides data security. The very strong authentication along with dynamic per frame rekeying of WPA make it very difficult to compromise. Because this is a new standard, wireless device driver and software availability may be limited.
Hardware Installation • 1.Prepare a computer with an Ethernet adapter. If this computer is already part of your network, record its TCP/IP configuration settings. • 2.Configure the computer with a static IP address of 192.168.0.x and 255.255.255.0 for the Subnet Mask. • 3.Connect an Ethernet cable from the WNDAP330 to the computer. • 4.Turn on your computer, connect the power adapter to the WNDAP330 and verify the following: • The PWR power light goes on. • The LAN light of the wireless access point is lit when connected to a powered on computer. • The WLAN LEDs should be blinking.
Reset the AP to factory default • The Reset button has two functions: • Reboot. When pressed and released quickly, the WNDAP330 will reboot (restart). • Reset to Factory Defaults. This button can also be used to clear ALL data and restore ALL settings to the factory default values. • To clear all data and restore the factory default values: • 1.Power off the WNDAP330 and power it back on. • 2.Use something with a small point, such as a pen, to press the Reset button in and hold it in for at least 5 seconds. • 3.Release the Reset button.
1. Login to the GUI • Connect to the WNDAP330 by opening your browser and entering http://192.168.0.235 in the address field. The WNDAP330 login screen will appear. • Enter admin for the user name and password for the password, both in lower case letters • Click Login. • When the wireless access point is connected to the Internet, under the Support tab, select Documentation to view the documentation for the wireless access point. • On the top-right of the screen, select Logout to exit the WNDAP330 setup screens. (You will automatically be logged out of the wireless access point after 5 minutes of no activity.)
2. Initialize Access Point Name and select country/region • Enter the Access Point Name of the WNDAP330. • This unique name is the access point NetBIOS name. The default Access Point Name is located on the bottom label of WNDAP330. The default is netgearxxxxxx, where xxxxxx represents the last 6 digits of the WNDAP330 MAC address. You may modify the default name with a unique name up to 16 characters long. • From the Country/Region pull-down menu, select the region where the WNDAP330 can be used (the default Country/Region is the United States).
3. Configure IP address • Select IP on the main menu. • Configure the IP Address settings appropriate for your network.
Setting Time • There is no real time clock in the access point. To receive current time from NTP, the access point must have access to an NTP server. • To configure time on the WNDAP330, select Time from the left-hand menu. • Configure the following information: • Time Zone. From the pull-down menu, select the local time zone for your wireless access point from a list of all available time zones. The default is USA-Pacific. • NTP Client. Enable NTP Client to synchronize the time of the access point with an NTP Server. The Default is Enabled. • Use Custom NTP Server. Check the option if you have a custom NTP server. The default is Disabled. • Hostname / IP Address. Enter the host name or the IP address of the custom NTP server. The default is time-b.netgear.com.
Configure wireless access • 1.From the main menu under Configuration, select Wireless. The Wireless Settings screen will display. • 2.Enter the wireless settings for your area. • 3.Click Apply to save your settings.
Deploying the access point • 1.Disconnect the WNDAP330 and position it where it will be deployed. The best location is elevated, such as wall mounted or on the top of a cubicle, at the center of your wireless coverage area, and within line of sight of all the mobile devices. • 2.Lift the antenna on either side so that they are vertical. • 3. Connect an Ethernet cable from your WNDAP330 Wireless Access Point to a LAN port on your router, switch, or hub. • 4.Connect the power adapter to the wireless access point and plug the power adapter in to a power outlet. The PWR, LAN, and Wireless LAN lights and should light up.
Hotspot • DHCP Server must be enabled first before configuring Hotspot