Electronic Bench Press Spotter
Electronic Bench Press Spotter. ECE 345 – Senior Design Jon Donenberg, Barry Horwitz. Summary. 4 Major Areas of Inquiry Concept Original Design Scale-model Implementation Testing and Analysis Successes, Challenges, and Recommendations. Concept. Description of Problem.
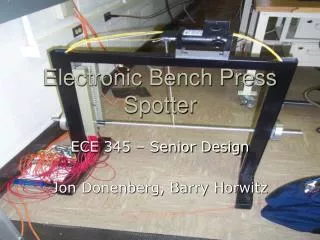

Electronic Bench Press Spotter
E N D
Presentation Transcript
Electronic Bench Press Spotter ECE 345 – Senior Design Jon Donenberg, Barry Horwitz
Summary • 4 Major Areas of Inquiry • Concept • Original Design • Scale-model Implementation • Testing and Analysis • Successes, Challenges, and Recommendations
Description of Problem • Weightlifters work near maximum lifting ability to promote muscle development • Can be dangerous when the weightlifter reaches muscle ‘failure’ if a system to relieve him or her of the bulk of the weight is not present • Task usually fulfilled by another weightlifter – a ‘spotter’ • Can design an electronic system to fulfill this role
Performance Benchmarks • Speed • typical weightlifters lift in the speed range of 1cm/s to 4 cm/s • Falling weight may approach 1 m/s • Detection Accuracy • eliminate input signal errors • Safety • electrical and mechanical failsafes must ensure a robust device that will not cause injury (and/or lawsuits)
Original Design • Full-scale Bench Press System • 200+lbs capacity • Requires kW of power capacity • DC motors rated for such work can run in the thousands of dollars • Financially infeasible (would break the 345 bank) • Decided instead on 1/5 scale model with reduced weight • Operational elements of circuitry are the same; only motor size and controller specs change
Original Design – Input Circuit • Originally based on old sensor array using reflection instead of direct IR signal • Each sensor output is logic LO unless the bar is in front reflecting the beam • In this manner, the sensors were fed to 8-3 Priority Encoders • Four 3-bit strings fed to two 4-bit full adders (most significant bit a function of encoder outputs) • Sensor info added to produce a 5-bit output string
Original Design – Input Circuit • Problems • Sensor reflection based on ideas of ECE110 project lab; not optimal for our project • Original Encoders (MC10165) output logic LO @ 3.5V; attempted using comparators to lower the level to zero proved useless (even Mark couldn't figure it out) • Solution • changing the sensor location to direct beam would necessitate inverters on each input; or a new circuit design • new circuit design more simple, using OR gates
Original Design – Output Circuit • Originally planned to use a smaller motor controller limited to 3A, LMD18200 chip • Problem • After testing the motor with our system, we needed a controller rated for higher currents • Solution • Devantech MD03 – Up to 20A continuous current
Input Circuitry – IR Sensor Array • Maximum Detector Characteristics: • Emitter-Collector Voltage: 5V • Ic Collector Current: 50mA • Power Dissipation: 150mW • Peak Sensitivity Wavelength: 850nm • Bandwidth Range: 620-890nm • Angle of half-sensitivity: +/-20o • Maximum Emitter Characteristics: • Continuous Forward Current: 150mA • Radiant Power Output: 15mW • Peak Emission Wavelength: 950nm
Input Circuitry – IR Sensor Array • Emitter-Detector Circuit • Emitter and Detector on ‘line of sight’ • Detector output reads logic HI unless the emitter IR signal is blocked
Input Circuitry – IR Sensor Array • Emitter & Detector Arrays • Measured Total Detector Current: ~200mA • Total Emitter Current: ~100mA
Input Circuitry – Binary Encoder • 32 Bit Priority Encoder • 5-bit string output is sent to Basic-X to designate location of bar within the sensor array
Input Circuitry – Binary Encoder • 3 Levels • Typical Propagation Delays • NAND gates – 125 ns • 83 Encoders – 10ns • Inverters – 20ns • Maximum Propagation Delays • NAND gates – 250ns • 83 Encoders – 15ns • Inverters – 33ns • Total System Maximum Delay ~0.3us
Processing Circuitry – BasicX-24 • BasicX Characteristics: • Program Execution Speed: 16 us/16-bit ADD • Operating Voltage: 5.0V • Current Requirements: 20 mA • Maximum Current (w/ loads): 80mA • Onboard Timer Speed: 512 Hz
Processing Circuitry – Code • Major Executable Functions • Main() – primary executable function; runs at startup • Initialize() – set all variables to initial values • InputValue() – check and identify sensor input • InitializePWM() – turn on internal PWM at specified operating frequency • PutPinPWM() – toggle PWM high/low according to an input duty cycle • CheckInput() – process sensor input and determine the current output state
Processing Circuitry – Code • Output State Sub-Functions • Embedded in CheckInput(), UpCode(), and DownCode() • Reversal Compensation – Pulls bar to top of system and holds it in place until the user is ready to begin lifting again • UpCoil – Coils lift cord as bar is raised • Velocity Compensation – Applies counterforce to get user back to the set minimum velocity • Stuck Bump Compensation – Applies a slight upward force to the bar when the user is frozen in place for more than 4 seconds
Processing Circuitry – Code • Basic PWM Implementation: • Turn on PWM at 14.456 kHz • Calculate Duty Cycle • Apply Duty Cycle to PWM output (applied within a loop architecture) • Set Duty Cycle to non-operational value • Code Skeleton: Do While (Execution Condition == True) DutyCycle = Operational Value Call PutPinPWM(PinOC1A, DutyCycle) Update Execution Condition Loop DutyCycle = non-operational Value Call PutPinPWM(PinOC1A, DutyCycle)
Processing Circuitry – Code • Velocity Compensation • System subject to a minimum lifting velocity (default = 3 cm/s = 2 sensor lengths per second) • If user falls below minimum velocity, system applies a counterforce to the bar equal and opposite to the amount of force required to raise the velocity back up to 3 cm/s
Processing Circuitry – Code • Velocity Compensation • Acceleration = 9.81 m/s2 + (Vminimum2 – Vactual2)/(2*min. sensor resolution) • Trequired = (mass)*(acceleration)*(pulley radius) • Trequired/TFL = Vrequired/VFL • PWM Duty Cycle = Trequired/TFL TFL, VFL are characteristics of the motor
Output Circuitry – Motor Controller • Devantech MD03 – 50-Volt 20-Amp H-Bridge Motor Driver • Voltage - 5v logic supply and 5V – 50V for the motor • Current - 50mA Max for logic and up to 20a for the motor • Mode 2 - 0v-5v (or PWM equivalent) with separate direction control • Current Limiter – Preset to 20 A
Output Circuitry – Motor Controller www.owlnet.rice.edu/~elec201/ Book/hardware.html
System Mechanical Characteristics • Vertical Sliders • Track Length – 18 in. • Operating Mass • Bar Weight: 632.0 g • Slider Weight: X2 = 457.4 g • Supplemental Mass Weight: X2 = 1281.6 g • Sensor Array • Array Lengths – 0.4 m • Sensor Spacing – 1.5 cm • Pulley Radius – 1 cm
Output Circuitry -- Motor • Motor Sizing: Power requirements • Pmax = (mass)*(gravity acceleration)*(min. sensor resolution)/(min. time resolution) = m*g*(max system velocity) = 94.3463W • Motor Sizing: Current requirements • Imax = Pmax/(Operative Voltage) = 7.86A
Output Circuitry -- Motor • Motor Sizing: Torque requirements • Max acceleration = 9.81 m/s2 + (Vminimum2)/(2*min. sensor resolution) • Tmax = (mass)*(max acceleration)*(pulley radius) = 0.2317 N-m • Motor Sizing: Speed requirements • Pull-up Speed Vup = 1 m/s = 954.9 rpm
Output Circuitry -- Motor • Motor Characteristics: • Model Type: 4z144 • Operating Voltage: 12V • Full Load Torque: 0.2892N-m • Maximum Speed: 1750 rpm • Rated Current: 6.9A-8.1A • Peak Current: 17.5A • Rated Power: 53.29 W • Peak Power: 124.3 W http://www.raemotors.com/pdf/4Z144-143-529-141-140-528-1Z840-842-851%20motor%20only.pdf
Performance Benchmarks • Speed Analysis • Minimum speed resolution for microprocessor: • 4.1 m/s >> 1m/s • Four orders of magnitude better than necessary
Performance Benchmarks • Speed Analysis • Optimal operating speed ~ 3cm/s • Sensor reads continue through our entire testing range
Performance Benchmarks • Detection Accuracy & Safety • Glitch frequency increases as velocity decreases due to misreads when no sensor is being tripped • How to fix the problem?
Performance Benchmarks • Detection Accuracy & Safety • When no sensor is being tripped, input signal will read 0 or a much lower sensor due to propagation delays in input changes • While moving upward, the next sensor should be above the current sensor • While moving downward, the next sensor should be below the current sensor • Experimental results show that skipping more than three sensors is extremely unlikely • Solution – software error buffers
Performance Benchmarks If (moving upward) then ' error check If (current sensor greater than last sensor) then If (difference between current sensor and read sensor < 2) then If (previously moving downward) then upErrorBuffer = 1 'turn on error buffer End If If (previously moving upward) then If (error buffer is active) then increment error buffer End If If (upErrorBuffer = 2) then Debug.Print "UP "; cstr(Alast); "->"; cstr(A) upErrorBuffer = 0 Call upCode() ElseIf (upErrorBuffer = 0) then Debug.Print "UP "; cstr(Alast); "->"; cstr(A) Call upCode() End If End If prevState = 1 downErrorBuffer = 0 End If End If End If
Performance Benchmarks • Detection Accuracy & Safety • Error checking virtually eliminates glitches except at excessive speeds • Safety is guaranteed at normal operational speeds
Performance Benchmarks • Electromechanical Safety • Operational Currents for reversal trials well within safe range for motor • Mechanical stop included
Successes • With error checking, system glitches were virtually eliminated • Operational currents fall well within suggested parameters • Prototype model performs to specifications
Challenges • Input Circuit Design and Implementation • Early misunderstanding of power requirements caused scrapping of original output circuit configuration and the death of a few unfortunate capacitors
Challenges • Occasionally sluggish response time at startup (from bottom) due to spikes in current requirements – in the worst case could cause operational failure • Potential Solution: “Stiffening Capacitor” • Used in cars with large sound amplification systems • Capacitor is placed in parallel with motor; charged to the operating voltage (12V) • Capacitor can be used to stabilize voltage level at the motor and dump excess current into the motor when peak exceeds power source ratings • Similar to a low-pass filter; voltage drop is an ‘AC wave’ that is filtered out • (Thanks to Prof. Swenson for insight on this topic!)
Recommendations • How does model scale to full-size, home use? • Need to run a much larger motor – 90V DC off wall AC current is typical • Power requirements to operate on 300lb load ~ 4 kW; at 90V current setup would require ~50A! • Must reduce current requirements
Recommendations • OPTION 1: CAR BATTERY + GEAR BOX • Gear box can be used to step down required torque and reduce current requirements • Tradeoff with maximum operative speed is acceptable due to the relatively low-speed nature of the application • 48V battery with 400 Amp-hrs would likely last for months since motor runs for very short periods of time
Recommendations • OPTION 2: WALL SOURCE + STIFFENING CAPACITOR • Wall source can run 90V motor • Most home fuses are ~20A • Could use large stiffening capacitor to handle brief, peak current requirements • Can also use a gear box in this implementation to reduce current requirements
Recommendations • WORD OF CAUTION: • Capacitor size requirements can be massive • Rule of thumb – 1F/kW of required power • Scale model application requires ~ 0.1 F Capacitor • ~4F for full-scale operation • These things are huge! • If this guy explodes, you may lose your house http://www.sounddomain.com/sku/ROCCPCC40
Special Thanks to: • Mark Weigert • Scott McDonald (and the rest of the machine shop) • Profs. Swenson & Carney • Greg Sorenson • Coffee