Lathe
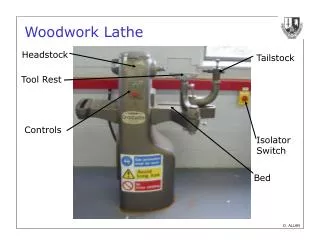
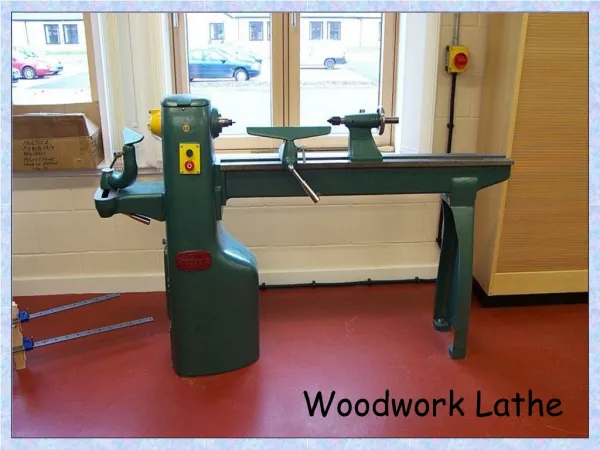
Lathe. Parts. 1. Headstock. hollow spindle gear box. 2. Tailstock. handwheel locks. 3. Bed (ways). carriage made up of saddle and apron cross slide compound rest (rotates to any angle) & holds tool post half nut lever - used only for cutting threads thread dial

Lathe
E N D
Presentation Transcript
1. Headstock • hollow spindle • gear box
2. Tailstock • handwheel • locks
3. Bed (ways) • carriage made up of saddle and apron • cross slide • compound rest (rotates to any angle) & holds tool post • half nut lever - used only for cutting threads • thread dial • feed rod - general turning • lead screw (Acme thread) - for threading only
Lathe spindle - internal Morse taper at nose end • centers • collet assemblies
Outside the spindle nose • threaded nose • long taper with drive key • camlock
1. Independent 4 jaw chuck • most precise • most difficult to set up • holds work more securely • oddly shaped pieces • use dial indicator for centering work piece • can reverse jaws • jaws are removed 3,2,1 and returned in order of 1,2,3
2. Universal 3 jaw chuck • some 2 or 6 jaws • easier to set up • less precise • jaws will not reverse so a separate set of jaws must be used • chucking • normal • external • internal
3. Drive plate • used with lathe dog to drive work mounted between centers
4. Face plate • can mount work directly to face of plate • has T-slots
5. Collets • for small detailed work • range only few thousandths of inch • work pieces to be gripped must not vary more than +/- .003” • rough or inaccurate work - don’t use with collet • never tighten a collet without a workpiece in its jaws • rubber flex collets - have a wider range (about .125”)
Tailstock • jacobs chuck (drills) • taper shank drills • centers
Hand feeding is not used for long cuts • lack of uniformity • poor surface finish
Using power feed and approaching a shoulder, disengage 1/8” before shoulder
Micrometer collar graduations • single depth - tool moves as much as the collar shows • you are actually removing twice as much from the diameter • turn in .020” , actually moves in .020” removing .040” from dia. • some lathes built to compensate - turn in .020”, actually moves in .010” to remove .020” from dia.
1.) Facing • to obtain flat surface on end of work piece
Why is facing done? • to establish lengths • before center drilling • on parts clamped on face plate
Can feed in either direction when facing • 1. feed from center to outside • better surface finish • difficult to cut on a solid face in the center • 2. feed from outside to center (preferred) • can take heavier cuts • easier to cut to scribed lines on the circumference of the work
Methods of facing to length • face to layout line • less precise • turn compound slide parallel to the ways and use micrometer dial • most precise
2.) Center Drilling • also called combination drill and countersink • performed because the hole must have 60 deg angle to clear point of center • range from 1/8” to 3/4” body diameter • don’t feed drill too fast • don’t feed drill too deep
3.) Turning between centers (done after facing and center drilling)
Adv: • can turn without eccentricity • can turn more of a shaft
Disadv: • no parting • no boring • no drilling
Accessories needed • tailstock center • headstock center • drive plate • lathe dog • knockout bar
Adjust tailstock so the bent tail of the dog moves freely in its slot
Adv: • quick setup • positive drive
Disadvantage: • eccentricities on a shaft can be caused by chuck jaw inaccuracies • work piece slips endwise into the chuck - come off tailstock center • solutions to this • 1. make chalk mark at chuck to monitor slipping • 2. machine a shoulder on the shaft to contact face of chuck
General Single Point Turning Tools • HSS • Carbide • greater rigidity • greater material removal rates
Tool geometries (shape of tool) • grooving / parting • threading • knurling • boring - boring bar
Tool holders and Tool posts • mounted on compound rest and held in T-slot
1. Standard type (obsolete) • straight shank • left hand • right hand
Tools should be set on the centerline of the work piece for turning (as well as for facing) • can set this by checking with the center in the tailstock • can set this by using a steel rule
Checking alignment of lathe centers (4 methods) • points of centers brought together • tailstock witness marks • test bar - uses dial indicator mounted on tool post • cutting and measuring (most accurate)

