Download
1 / 21
320 likes | 1.07k Vues
Learn basic procedures for administering insulin by an insulin pen, covering types of pens, procedures, and supervision by the school nurse. Find competency checklists and resources for safe medication administration.

E N D
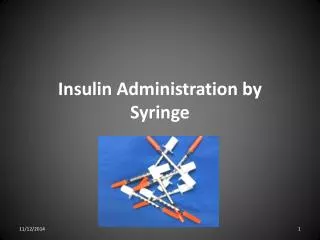
Insulin AdministrationUsing an Insulin Pen Created by Rachel Gallagher Former School Nursing Consultant
This unit covers basic procedures for administering insulin by insulin pen. There are different kinds of insulin pens and variations in directions for different students. Demonstration, skills observation, consultation, and ongoing supervision by the school nurse will be important for correct medication administration.
Competency checklists are available at: http://dpi.wi.gov/sspw_schlnurse.html For more information regarding delegation and consultation, please see the DPI question and answer documents available at: http://dpi.wi.gov/sspw/pdf/snpracticeact.pdf Products used were for demonstration purposes and are not an endorsement of the products.
What Topics will be Discussed? • What is diabetes? • What is the prevalence of diabetes? • What is the difference between type 1 and 2 diabetes? • What is insulin? • What are some important facts regarding insulin? • What are the parts of the insulin pen? • What are the supplies needed? • What is the procedure for giving insulin by an insulin pen?
What is Diabetes? • Chronic Disease • Two common types – Type 1 and Type 2 • Type 1 Diabetes – Pancreas produces no insulin or a very small amount. • Type 2 Diabetes – Pancreas does not produce enough insulin and/or the insulin does not work as it should. • Both types require balancing food, exercise and insulin to keep blood sugar as close to the normal range (80-120 mg/dl) as possible.
What is the prevalence of Type 1 and Type 2 diabetes? • 151,00 students with type 1 diabetes under the age of 20 (CDC, 2011) • 1.7 per every 1,000 students 1-19 years has been diagnosed with type 1 diabetes. http://www.cdc.gov/diabetes/projects/cda2.htm • 7.2 per every 100,000 students has been diagnosed with type 2 diabetes (CDC, 2011) http://www.cdc.gov/diabetes/projects/cda2.htm
The difference between Type 1 and Type 2 diabetes? • Type 1 diabetes is a chronic disease where the pancreas produces no or little insulin needed to control blood sugar levels in the blood. • Treated with insulin, monitoring blood glucose levels, exercise and eating healthy food. • Type 2 diabetes is a chronic disease where the pancreas produces not enough insulin and/or the body is not able to use the insulin properly. • Treated with eating healthy food, exercise, oral medication and/or insulin.
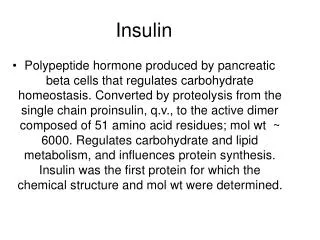
What is insulin? • A hormone produced by the pancreas • Used to treat Type 1 or Type 2 diabetes • Insulin regulates blood sugar levels in the blood • Insulin must be given by a syringe, insulin pen or insulin pump • Insulin is measured in units • There are different types of insulin
Important facts regarding insulin pen cartridges • Check expiration date. • If using a new cartridge, label cartridge with date. • Insulin cartridges not in use should be refrigerated. • Do not shake insulin cartridges. • Store at room temperature and prevent exposure to sunlight. • Expiration date for each specific type of insulin pen cartridges varies; always check with nurse regarding expiration dates.
What are the parts of an insulin pen? Insulin pen Insulin cartridge – stores the insulin Pen needle Cap Protective cover Needle
What are the five Rs? • Right student • Right medication • Right dose 5Rs + 2 • Right time • Right route • Right documentation • Right reason
What is needed prior to giving insulin with an insulin pen? • Medical provider and parent authorization • Insulin pen • Gloves • Alcohol swab(s) • Unopened pen needle • Insulin cartridge (may be inside the insulin pen). • Authorized sharps disposal container • Glucose monitor
What is the procedure for giving insulin using an insulin pen? • Gather supplies. • Check the five rights. 3. Determine type of pen that is used • Prefilled disposable pen : A prefilled insulin cartridge is already in pen. • Reusable pen: Most of the time the insulin cartridge will be in the pen. If not, load insulin pen cartridge into pen. 4. Wash hands and apply gloves. 5. Recheck the five rights.
Procedure continued… 6. Check expiration date for insulin pen cartridge or disposable insulin pen. 7. Attach pen needle by twisting the needle on end of insulin pen. (Wipe top of insulin pen with alcohol wipe if instructed to do so by nurse.) 8. Pull off and remove outer pen needle protective cap and cover (Do Not Touch Needle).
Procedure continued… 9. Prime pen by dialing 2 units. 10. Push the end of pen (plunger) to push out the 2 units. A small drop of insulin should be visible. (This checks insulin flow and is called an “air shot”). If insulin does not appear, repeat steps 9 and 10.
Procedure continued… 11. Once the pen has been primed, dial the desired insulin dosage to be administered to student .
Procedure continued… 12. Choose a subcutaneous (tissue between the skin and muscle mass) injection site with the assistance of the student as appropriate. Insulin is absorbed more effectively by the body when the administration sites are rotated. • abdomen • upper arm • upper buttock • outer thigh Subcutaneous Injection Sites
Procedure continued... 13. Cleanse injection site with alcohol swab (optional) and allow skin to dry. Never fan or blow on area cleansed with swab. 14. Gently pinch skin of chosen injection site and insert pen needle at a 45-90 degree angle into skin. 15. Push button (plunger) down at end of pen completely to give insulin. 16. Wait 10 seconds while keeping insulin pen and pen needle in place, to ensure all insulin is given. (This is due to the fact that all insulin pens drip.)
Procedure continued... 17. Pull the insulin pen and needle out from the injection site to remove needle. 18. Do not replace the protective needle cap; carefully unscrew pen needle to remove from pen. 19. Dispose of needle in an approved sharps disposal container. 20. Remove gloves and wash hands. 21. Document insulin administration.
Questions or comments regarding this webcast? Suggestions on future school nursing topics? Please Contact: WI Dept. of Public Instruction School Nursing Consultant 608-322-4816