Using the GTSTRUDL Base Plate Wizard
Using the GTSTRUDL Base Plate Wizard. Example of Creating and Analyzing a Base Plate. Rob Abernathy CASE Center GTSUG June, 2009 Atlanta, GA. Ex_1: Simple W on rectangular plate. Start the Base Plate Wizard.

Using the GTSTRUDL Base Plate Wizard
E N D
Presentation Transcript
Using the GTSTRUDL Base Plate Wizard Example of Creating and Analyzing a Base Plate Rob Abernathy CASE Center GTSUG June, 2009 Atlanta, GA
Ex_1: Simple W on rectangular plate GTSUG June, 2009
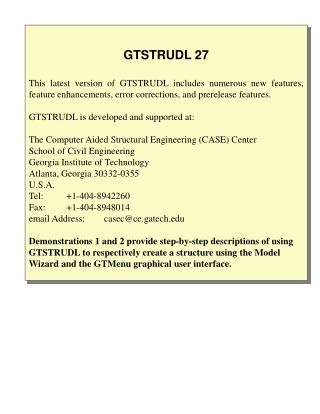
Start the Base Plate Wizard The Base Plate Wizard will not start unless you have a separate license for it. This extra password can be put in the regular GTSTRUDL password file. Documentation for the Base Plate Wizard is available through the Help -> Reference Manuals menu pick in GTSTRUDL, or the Help menu pick in the Base Plate Wizard. GTSUG June, 2009
The Plate Page Use the Plate tab to enter the plate dimensions: height, width and thickness. GTSUG June, 2009
The Attachment Page The Attachment page will list all the attachments to the plate. There is a limit of 25 separate attachments. From this page you can add, change or delete attachments. GTSUG June, 2009
The Attachment Page – Add Attachment When you click the ‘Add Attachment’ button, this dialog pops up. Select the Table ‘WSHAPES9’ Select the Profile ‘W10x45’ You can translate and rotate the attachment footprint, but for this example, the default values of centered and 0.0 rotation are correct. GTSUG June, 2009
Attachments – Create your own The Attachment file determines the Tables and Profiles available in the Add Attachment dialog. You can create your Attachment file with just the profiles you need, or create an Attachment file with custom profiles, e.g. non-AISC shapes, beam seats, etc. GTSUG June, 2009
Attachments – Create your own (cont) When you select a new Attachment file, you will be offered a choice of how deal with the existing Attachment file. ‘Add’ leaves the data from the current Attachment file and adds data from the new Attachment file, in effect combining the two Attachment files. ‘Replace’ clears the data from the current Attachment file, leaving only the data from the new Attachment file. NOTE: By default, all of the ASD 9th Edition shapes except for double angles are included, so it is likely you will want to create a custom Attachment file. GTSUG June, 2009
Attachments – Create your own (cont) • Refer to Appendix A2 in the Base Plate Wizard Documentation for more information about creating attachments. • You can create as many Attachments files as you need and change between them with the Options – Attachment file menu pick. • See the sample Attachment files in C:\Program Files\GTStrudl\30\BasePlate GTSUG June, 2009
The Anchors Page The Anchors page displays a summary of each anchor, with its location, diameter and type description. Use the Edit Anchors button for a detailed description of an anchor. Add Anchors: Add new anchors to the base plate. Add as many as you need, but they all must have the same properties, i.e. diameter, axial stiffness, etc. Edit Anchors: Select anchors, then click this button. Only edit anchors with the same properties together. Delete Anchors: Select anchors, then click this button. GTSUG June, 2009
Add Anchors The Add Anchors dialog is where you describe the plate anchors. You must specify anchor location, axial properties and shear properties. The Anchor Patterns button helps to place anchors that are arranged in a symmetrical pattern. GTSUG June, 2009
Add Anchors (cont) Shear properties include: Fixed – anchor shear is calculated from the reactions. Elastic spring – KFX and KFY Nonlinear spring – Use a specified NLS None – this is only appropriate for an anchor modeled as a frame member, or with a shear lug (modeled as a constraint) or some other applied constraint. GTSUG June, 2009
Add Anchors (cont) If you want to have the Results Summary check the anchor results, enter the Allowable Values. This is not a check by ACI 318 Appendix D. GTSUG June, 2009
Anchor Patterns The Anchor Patterns dialog can add as many anchors as you like. The ‘X’ and ‘Y’ values are how far to come in from each corner to place the corner anchors. ‘Top/Bot’ is how many anchors to evenly space between the corner anchors in the X direction. ‘Sides’ is how many anchors to evenly space between the corner anchors in the Y direction. GTSUG June, 2009
The Bearing Surface Page The bearing surface page is used to specify the stiffness of the surface under the base plate. Concrete of 4000 psi is assumed. If the base plate is elevated, check the “No bearing surface support” radio button, but be sure your anchors provide a stable support system, such as anchors modeled as frame members. Tip: When you want to check the geometry in GTMenu for a complex base plate before analysis, set the type to “No bearing surface…” until you verify the model. This will simplify viewing the base plate in GTMenu. GTSUG June, 2009
Check Geometry in GTMenu Remember to check the “Process Input File..” box. After OK – you will see the input file running and generating output – the View -> View in GTMenu pick will be activated. GTSUG June, 2009
Check Geometry in GTMenu (cont) In GTMenu, you can verify that the generated geometry is appropriate. GTSUG June, 2009
The Loading Page The Loading page allows you to enter or review the loads to be applied to the base plate attachments. Loadings can be directly typed in, or they can be read from a file. Files may be created by you in the specified Base Plate Wizard format (see Section 9.1, Case 1), or they can be Joint or Member results DBX files. GTSUG June, 2009
Loadings (cont) As an example, read the member end forces from the start of member 1 to be applied to attachment 1. When the OK button is clicked, the specified DBX file is read, results for member 1 extracted, and then added into the load data dialog, as shown. GTSUG June, 2009
Analyze and Check Results When the base plate data is complete with attachments, anchors, bearing surface and loads, you are ready to analyze. Pick the File -> Write GTSTRUDL input file selection again. Note that the analysis box is now available since loads exist. When you click OK, an input file created and send to be processed. This can take a while, depending on model size and number of loads. GTSUG June, 2009
Results Menu After an analysis has been performed, the Results menu will be activated. The Results Summary is a quick way to check the status of the base plate. Select the type of data to include in the Summary and then click the OK button. GTSUG June, 2009
Results Summary If Allowables have been specified, each type of result will be marked Pass or Fail. GTSUG June, 2009
Exit Base Plate Wizard Upon exiting the Base Plate Wizard, if it detects you have made changes, you will be prompted to save the changes in a Georgia Tech Base Plate (.gtbp) file. This file is a text file whose format is defined in Appendix A1. You can explicitly save this file at any time with the File -> Save to .gtbp menu pick. You can restore a previously saved base plate with the file -> Restore from .gtbp menu pick. GTSUG June, 2009
Input file The Base Plate Wizard creates a GTSTRUDL input file that remains after the Wizard is closed. The input file begins with a header summarizing the base plate components. GTSUG June, 2009
Input file (cont) Next come the JOINT COORDINATES, ELEMENT INCIDENCES and ELEMENT PROPERTIES. GTSUG June, 2009
Input file (cont) Attachments come next. Notice the creation of a RIGID BODY master node ‘C1’. This is where loads applied to the attachment are placed. If the attachment is modeled as an extension (2D elements extending in the Z+ direction) the RIGID BODY will be created at the end of the extension. GTSUG June, 2009
Input file (cont) Comments are added with K (bearing surface stiffness) calculation information. See the Base Plate Wizard documentation for more information and the equation used to calculate K. Then nonlinear springs are created for each joint, much like CALCULATE SOIL SPRINGS does. GTSUG June, 2009
Input file (cont) Anchors are modeled as springs (elastic or NLS) or support conditions at the node in the center of the anchor. GTSUG June, 2009