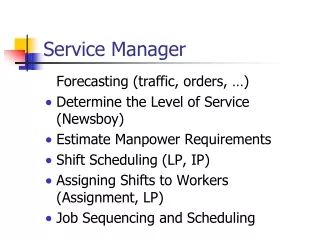
Service Manager
Service Manager. Service Manager.


Service Manager
E N D
Presentation Transcript
Service Manager Our Service Manager is part of the ExchangeDefender support portal as a central hub of control for ordering and managing the majority of our services. Once you log into our support portal and click on Service Manager, you will be presented with the Service Manager Dashboard and our "Add Services" shortcuts.
Add Services Menu This menu allows you to skip the big service list and go straight to ordering: Service Manager Dashboard This pane will give you the ability to order and manage everything from one location. Each service listed on this page will allow you to manage the service or add a new service. This is controlled by clicking on the Product name (management) or on subscribe (add new service). Exchange Our Exchange Control Panel allows you to control many of the features that Exchange offers that require access to the EMC or Shell. We have encompassed these common tasks into a seamless AJAX driven control panel. Once you click on Exchange, you will be presented with a screen that lists all of your hosted exchange accounts:
In order to manage and view account details on a desired mailbox please click the little gear icon next to the intended mailbox. This will expand that specific mailbox into a detailed view that will provide additional information pertaining to that account as well as the management options. • The view above shows you all the server information that is required for deployment tailored to the account and server selected. • Server: cas.louie.exchangedefender.com • Outlook Anywhere Server: cas.louie.exchangedefender.com • Outlook Anywhere Authentication: NTLM • Autodiscover CNAME: autodiscover.louie.exchangedefender.com • Outlook Web Access: htpps://cas.louie.exchangedefender.com/owa • NT Domain: LOUIE • Username: demo.ed • Email Aliases: demo.ed@louie.exchangedefender.com • Outlook 2010 32bit - (Windows): Download • Outlook 2010 64bit - (Windows): Download • Outlook 2010 VLK: XXXXXXXXXXXXXXXXXXXXXXXXXXXXXXXXXX • Password: You can view the password by mousing over the asterisks on the screen. • In addition you'll gain access to our management options as show below:
The modify icon will review the following modification options: The Green Check mark makes the selected address the new primary address and UPN (username). The Red X removed the alias.
The "Add alias" will review the add alias process to add an additional email alias to the selected account as shown below: The "Add domain" option is a very important but often overlooked process. This is our equivalent of Exchange's "Add Accepted Domain" cmdlet/EMC process. Before your aliases can work you need to add the domain to the system once via this process. The "Security settings" option allows you to grant Full Access and/or Send As Permissions for the selected mailbox to other users within that company.
The "Create Forward" option allows you to Forward and "Forward & Deliver" all mail received by the selected mailbox. Note: If you're not forwarding to another mailbox on the same server, you will first need to create a valid "External Contact" before creating a forward below: The "Disable Account" option marks the account for disconnects the mailbox. If it's not re-enabled within 14 days it will be removed. The "Remove Account" option removes the account from our hosted exchange environment. Public Folders This tab under the Exchange Control Panel allows your create, manage access, and remove Public Folders for your clients.
The "New Public Folder" icon allows you create a new Public Folder for you clients and reveals the following dialog: Once you have filled out all of the information above and click "Create Public Folder" within 60 seconds your public folder will be accessible to the folks listed in the Member list. Note: It is of the utmost importance that permission and Public Folder names not be changed within Outlook/OWA. As such breaks automation and if used improperly could create permissions issues for your clients. Once you've created your Public Folder you'll find the following icons: The blue icon reveals a detailed view of the PDF properties:
The 3 people icon allows you to add/manage new permission sets for the existing PDF's: External Contacts This tab allows you to Create and Delete External Contacts which are the equivalent of Mail Contacts. They serve two main purposes; they can be used to provide a GAL entry for an external contact for convenience, or they're often used for clients that like to use forwards to have a copy of all of their inbound mail sent off the server.
Key Points Name - This field MUST be unique if Joe Doe has a mailbox and wants to forward his email to another server the name CANNOT be Joe Doe, it can anything but that. A common use is Joe Doe Ext. Email - This field MUST also be unique. The system understands that you're trying to send all mail to joe.doe@doe.com to joe.doe@doefreemail.com. However, you've already used joe.doe@doe.com in the system so you must use an arbitrary address (commonly joe.external@doe.com) that will forward to his freemail.com address. Putting it all together - Mail > joe.doe@doe.com Mailbox > joe.external External Contact > Joe's free mail account. Distribution Groups This tab allows you to create, manage, and remove Distribution groups for your clients. The create button will reveal the following dialog:
Once you've created your Distribution Group you will find the following icons: The Blue Info icon reveals a detailed view of the Distribution Group properties: The 3 people icon allows you to add/manage new permission sets for the existing Distribution Groups:
SharePoint This control panel is used for a very specific purpose, creating "SharePoint Only" users for our Stand alone SharePoint and some custom SharePoint deployments. If your client has hosted exchange you should not be using this control panel for user management/access. Their hosted exchange accounts are their SharePoint portal accounts.
Web Hosting This control panel is used solely for adding and deleting Web Hosting services. Currently our actual management for web hosting is found athttps://www.ownwebnow.com/cp.
Offsite Backups This control panel allows you to do basic access management, create and delete Offsite Backup accounts. The detailed management backup software management is done via the server your account is on; this page will provide you with a link to it using the blue icon.
BlackBerry (BlackBerry Enterprise Server) This control panel allows you to order, reset, and delete activations for BlackBerry Devices linked to our Hosted Exchange platform. Please remember that this process although automated still requires approval to complete. For any changes made, please wait for your ticket to confirm completion.
ExchangeDefender for Service Providers This control panel allows you to sign up for our ExchangeDefender for Service Provider product. You only need to sign up once. Once you have completed the sign up process below you add your client's domains at https://admin.exchangedefender.com. Essentials Our Essentials product line has the same capabilities management wise as their Enterprise Hosted Exchange and ExchangeDefender counter parts, however, feature differences can be found here at https://www.exchangedefender.com/exchange_essentials.php.