Download
1 / 16
160 likes | 464 Vues
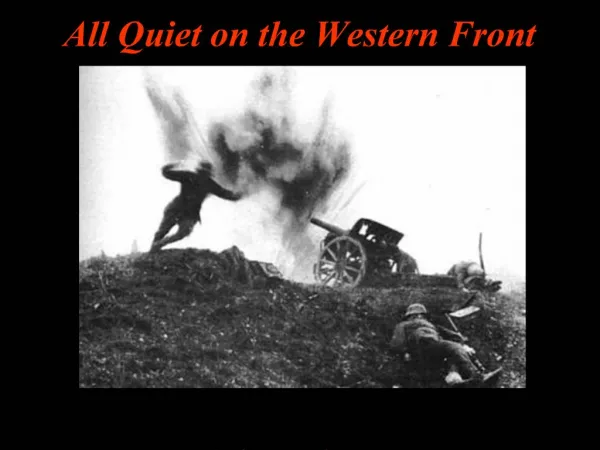
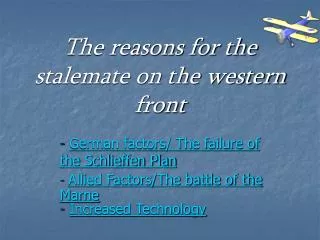
The reasons for the stalemate on the western front. - German factors/ The failure of the Schlieffen Plan. - Allied Factors/The battle of the Marne. - Increased Technology. German Factors/ The failure of the Schleiffen Plan.

E N D
The reasons for the stalemate on the western front - German factors/ The failure of the Schlieffen Plan - Allied Factors/The battle of the Marne -Increased Technology
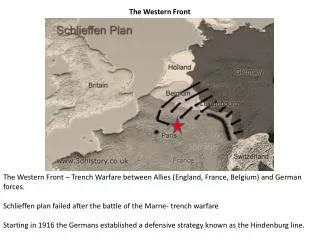
German Factors/ The failure of the Schleiffen Plan The main reason for the stalemate starting was the failure of the Schlieffen plan. The aim of the plan was to invade France on the Western front followed by an attack on Russia meaning both enemies would be defeated without having to fight a war on both fronts. The plan relied on timing and being able to go through neutral Belgium and Netherlands in order to attack France. Germany did not however stick to the strict timing which allowed Britain and France time to mobilise. Advancing through Belgium also brought Britain into the war due to the ‘scrap of paper’ alliance. Moltke the German chief also weakened the right wing making it more difficult for the Germans to reach the West side of Paris and were brought to a halt at the battle of the Marne.
Original Schlieffen plan map Perspective: Source is secondary and of the German perspective as it depicts the original intentions of the Schlieffen Plan Sourced from:Textbook: Webb, K (2003) World War I From Sarajevo to Versailles. Australia: McGraw- Hill This map illustrates the original aims of the Von Schlieffen plan allowing historians to draw comparisons between this and the actual troop movements in order to draw conclusions as to why the plan was a failure.
The map demonstrates the changes that were made by the German chief Moltke to the Schlieffen Plan. He decided to only advance through Belgium instead of also through the Netherlands causing a bottleneck at Aachen and Liege. He also weakened the right wing (illustrated in yellow) and the troops therefore did not reach the west side of Paris as intended. Schlieffen Plan and actual troop movements map Perspective: Secondary, mutual perspective representing German movements. Sourced from: http://encarta.msn.com/media_681500236/schlieffen_plan_and_ actual_troop_movements.html
Quote by Moltke Perspective: Von Moltke- German chief of general staff. Sourced from: Dennett, B., and Dixon, S. (2003) Key features of modern History. Australia: Oxford University Press. The quote represents Moltke’s intentions in making change’s to the Schleiffen plan by entering France only through Belgium and not also through the Netherlands. This could allow historians to decide whether the changes made by Moltke were the reasons for the failure or if the plan was destined for failure from the beginning. “It will be very important to have in Holland a country whose neutrality allows us to have imports and supplies…however awkward it may be, the advance through Belgium must therefore take place without the violation of Dutch territory”
Source from the Dictionary of Modern HistoryPerspective: Secondary source from historian Alan PalmerSourced From: A. Palmer, Dictionary of Modern History, Penguin, 1983, p.257 This source is useful as it illustrates a secondary perspective of the reasons for the failure of the Schlieffen Plan. Including the underestimated strength of Russia, the power of Belgian resistance and the effectiveness of the British forces.It also proves reasons as to why the Plan may not have succeeded even without the changes made my Moltke. “It may however be doubted whether the Schlieffen Plan deserves it high reputation, for its author had underestimated the strength of the Russians and the near panic that their advance would cause in Berlin, the power of Belgian resistance, the effectiveness of the British Expeditionary Force, and the importance of the French railway system in bringing up reserves.”
Allied factors Germany’s plan to advance through Belgium was slowed significantly by Belgium forces. This slowing of the advance caused the Schlieffen plan to be behind target. The time delays of Germans entering also allowed the British to mobilise. Britain fought Germany at Mons in Western Belgium which also caused time delays. On September 1914 the German advancement was brought to a halt by France at the battle of the Marne. This French victory ensured the development of trench warfare that would be continued for the next four years on the Western front. The ‘race to the sea’ was a strategy that aimed at gaining control of the channel ports which would give either side a huge advantage. This race did not bring about any breakthroughs for either side and only proved to increase the length of the trenches
‘Bravo Belgium’ Punch Cartoon Perspective: Punch Magazine and is therefore from an English perspective. Sourced From: Textbook: Webb, K (2003) World War I From Sarajevo to Versailles. Australia: McGraw- Hill This cartoon illustrates a small Belgium man guarding a gate and a large German advancing with a weapon. This represents the resistance held by the Belgium forces. This slowing of the advance caused the Schlieffen plan to be behind target therefore contributing to the stalemate.
Race to the Sea map Perspective: Secondary, mutual perspective representing troop movements. Sourced from: http://www.historyofwar.org/Maps/maps_race_to_sea.html The map depicts the path in which the tranches were built along whilst the Germans and allies raced to the sea using outflanking movements. This guaranteed the development of long stretches of trenches contributing to the stalemate
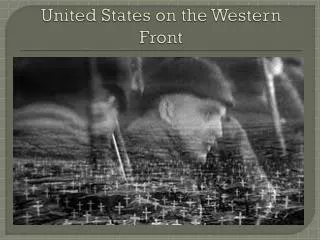
Photograph of French Taxicabs Before the Battle of the Marne Perspective: French photographer Sourced From: http://encarta.msn.com/media_681500229_761569981_1_1/Taxicabs _Bound_for_the_First_Battle_of_the_Marne.html This photograph depicts French taxicabs lined up carrying French troops to the Battle of the Marne. It represents the efficiency in which the French were able to mobilise signifying their success at the battle of the Marne, pushing Germany away from Paris and bringing the war to a halt.
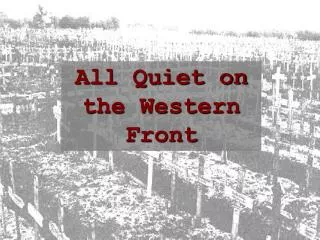
Aerial photograph of long stretches of Trenches Perspective: Primary, mutual perspective Sourced From:Dennett, B., and Dixon, S. (2003) Key features of modern History. Australia: Oxford University Press. This photograph is useful in depicting the long stretches of trench lines that were a result of the ‘race to the sea’. The development of huge trench lines meant that tactics such as the long process of attrition began to be used ensuring the development of the stalemate.
Increased technology During this time technology increased significantly including the use of gas, machine guns and barbed wire. Although this was advancing, the techniques used by each side did not adapt which made it very difficult to make any progress against the enemy lines. The many battles undertaken by both the Germans and the allies proved to weaken each side and its supplies. It also brought about a highly developed trench system. These factors made it more difficult for a war of movement and therefore resulted in a stalemate.
Photograph of British Machine Gun Perspective: British photographer which therefore represents British perspective. Sourced From: http://gunhistoryindia.blogspot.com/2008/09/history-of-guns-indian-national-army.html This photograph pictures the Vicker machine gun adopted by the British in 1912. It is useful depicting the type of machine guns that were available and its effectiveness in defense which therefore ensured that there were no breakthroughs from either side on the Western Front.
Highly developed trench system diagram Perspective: Secondary, British perspective depicting the ideal trench. Sourced From: Textbook: Webb, K (2003) World War I From Sarajevo to Versailles. Australia: McGraw- Hill This diagram depicts the ideal British trench. Although this was not the reality of the majority of trenches it can still give historians insight into the development of trenches which were ideal for defensive purposes contributing to the stalemate.
Photograph of Allied soldier caught in barbed wire Perspective: A war time photographer Sourced From:http://www.nd.edu/~dlindley/govt491/govt491maincoursepage.html This photograph depicts a dead allied soldier caught in barbed wire. It is useful as it depicts the difficulties that barbed wire caused in reaching enemy lines. This difficulty restricted movement and contributed to the development of the stalemate.
Extract from War Poem, Dulce et Decorum Perspective: Wilfred Owen, English soldier and war poet. Sourced from: Owen, W, Dulce et Decorum est in cross, T, The Lost Voices of World War One, Bloomsbury, London, 1988, p.78 This sources is useful as it offers a first hand account of the effects that gas has on soldiers. It provides insight into the way in which gas was used for defensive measures which made it more difficult for soldiers to cross the enemy lines. Contributing to the stalemate. “Gas! GAS! Quick, boys! An ecstasy of fumbling, Fitting the clumsy helmets just in time; But someone still was yelling out and stumbling, And flound’ring like a man in fire or lime… Dim, through the misty panes and thick green light, As under a green sea, I saw him drowning”