Eclipse Yoke
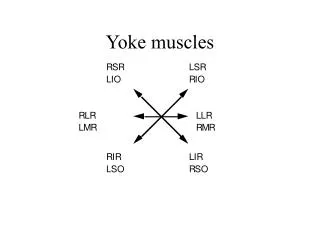
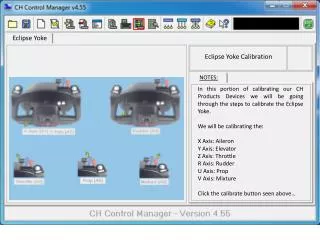
Eclipse Yoke. Eclipse Yoke Calibration. NOTES:. In this portion of calibrating our CH Products Devices we will be going through the steps to calibrate the Eclipse Yoke. We will be calibrating the: X Axis: Aileron Y Axis: Elevator Z Axis: Throttle R Axis: Rudder U Axis: Prop

Eclipse Yoke
E N D
Presentation Transcript
Eclipse Yoke Eclipse Yoke Calibration NOTES: In this portion of calibrating our CH Products Devices we will be going through the steps to calibrate the Eclipse Yoke. We will be calibrating the: X Axis: Aileron Y Axis: Elevator Z Axis: Throttle R Axis: Rudder U Axis: Prop V Axis: Mixture Click the calibrate button seen above…
Eclipse Yoke NOTES: Using your mouse, Trackball or, Trackball Pro click on the CH FighterStick USB. Then, click on the Okay button…
Eclipse Yoke NOTES: This screen in the Control Manager GUI will allow you to Test/Calibrate your Eclipse Yoke as well as adjust your Axis Settings. For the purpose of this calibration I will not adjust the Axis Settings. Now is a good time to insure the Yokes X and Y axis are centered. To Calibrate your Eclipse Yoke, click on the Calibrate button…
Eclipse Yoke NOTES: The steps involved in calibrating the Yoke are pretty simple and easy to follow. You will be prompted to move and hold the Yoke: Left Right Forward and Aft… Press Click!
Eclipse Yoke NOTES:
Eclipse Yoke NOTES:
Eclipse Yoke NOTES: CONTROL MANAGER v4.55 FOR DUMMIES
Eclipse Yoke NOTES: CONTROL MANAGER v4.55 FOR DUMMIES
Eclipse Yoke NOTES: The Throttle Lever [A3] is the furthest left of the three levers (Black Knob) To insure full travel of your throttle axis [Z]in your game of choice DO NOT move the throttle lever to its full back, or full forward position.
Eclipse Yoke NOTES:
Eclipse Yoke NOTES: In these next steps you will be prompted to move and holdthe Rudder Levers… And Click!
Eclipse Yoke NOTES:
Eclipse Yoke NOTES:
Eclipse Yoke NOTES: The Prop Lever [A5] is the middle of the three levers (Blue Knob) To insure full travel of your propaxis [U]in your game of choice DO NOT move the throttle lever to its full back, or full forward position.
Eclipse Yoke NOTES:
Eclipse Yoke NOTES: The Mixture Lever [A6] is the middle of the three levers (Red Knob) To insure full travel of your mixture axis [V]in your game of choice DO NOT move the mixture lever to its full back, or full forward position.
Eclipse Yoke NOTES: CONTROL MANAGER v4.55 FOR DUMMIES
Eclipse Yoke NOTES: Check the range of your axes: X: 0-255 R: 0-255 Y: 0-255 U: 0-255 Z: 0-255 V: 0-255 The Raw Data may (probably will) fluctuate a small amount, typically not enough for your game to be affected. Click: Apply…
Eclipse Yoke NOTES: Move the Yoke aft and turn it to the right. Press the right Rudder axis all the way in. Move the three levers (Throttle, Prop, and Mixture) all the way aft… Press:
Eclipse Yoke NOTES: Move the Yoke forward and turn it to the left. Press the left Rudder axis all the way in. Move the three levers (Throttle, Prop, and Mixture) all the way forward… Press:
Eclipse Yoke NOTES: Center the Yoke. Center the Rudder axis. Move the three levers (Throttle, Prop, and Mixture) to their center position… And you are Done.