Download
1 / 44
450 likes | 575 Vues
Use of microscopes prepared by Jennifer Gose DDDI Project Coordinator Consortium for Internet Imaging and Database Systems College of Agricultural and Environmental Sciences The University of Georgia. Using microscopes to capture images for diagnosing agricultural problems requires:

E N D
Use of microscopes prepared by Jennifer Gose DDDI Project Coordinator Consortium for Internet Imaging and Database Systems College of Agricultural and Environmental Sciences The University of Georgia
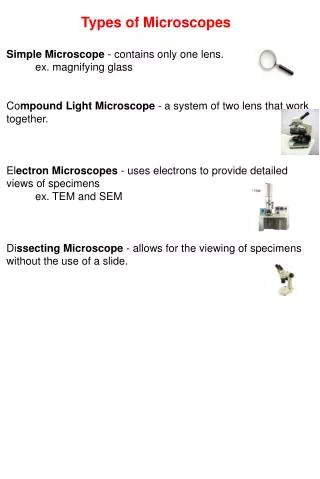
Using microscopes to capture images for diagnosing agricultural problems requires: • - appropriate specimen preparation • proper microscope setup • correct use of microscopes • proper camera use • Specimen preparation is a very important aspect of capturing microscope images, and varies greatly with subjects. Although specific microscopes vary in features and operation, principles of setup and manipulation are usually similar. Video cameras require a different approach to image capture than hand-held still-picture cameras, but again, principles of using cameras are similar.
Setting up a trinocular dissecting microscope for best viewing
Ocular tube for mounting a camera Oculars for viewing by eye “Trinocular” means three oculars or eyepieces
A stereo “dissecting” scope has two complete lens systems, producing two separate images which are combined in the mind of the observer to produce a three-dimensional image that allows Two independent lens systems easier manipulation of specimens.
Specimens can be illuminated from two light sources; one below and one above, depending on needs of viewing a particular specimen Upper illuminator for “incident light” viewing Lower illuminator for “transmitted light” viewing
Light source selection switch Dimmer switch for lights Illuminating specimens from below provides for “transmitted” light viewing and from above for “incident” light viewing. One control switch selects the light source and the other varies light intensity. To preserve bulb life, IT IS IMPORTANT to reduce current surge by turning the dimmer all the way down before operating the light-selection switch.
Focus control Magnification zoom-control Focus and magnification can be varied to produce the best view of a specimen
Specimens for incident-light viewing can be placed against various backgrounds to improve contrast and feature identification Light-colored stage for dark specimens and dark-colored stage for light ones
As with any images used for diagnoses, relative size is extremely important. Whenever possible, a comparative scale should be included with an image, or at least the approximate magnification indicated. cm. approx. 100X
To send an image from the dissecting scope to the ocular tube for mounting a camera, a diverter prism is moved out of the field of view on one lens system. This process eliminates the image from one of the viewing eyepieces, and may require repositioning the specimen for best viewing. For viewing through eyepiece For capturing with camera
A stereo dissecting microscope is normally used to view relatively large specimens at magnifications from about 5X to about 50X. The scope provides a very large range of adjustment to accommodate a variety of specimen sizes and to allow many options for specimen illumination.
To accommodate large specimens, the entire focusing head of the scope can be raised on the support column. Small specimens can be accommodated by lowering the focusing head on the support column. The illuminator can be moved to provide light as needed for best viewing. Focusing head Support column
Adjust the microscope eyepieces so you can comfortably see a well-focused image through both. Space eyepieces so you can comfortably see through both at the same time. If one eyepiece tube is fixed focus, close the opposite eye and, using the microscope focusing knob, carefully focus an image of the sample for the open eye. (If both eyepiece tubes are variable focus, either one will do.) Now close the other eye and use the variable focus eyepiece tube to bring the image into focus for the open eye.
Focus on the specimen at the lowest Zoom setting and be sure the feature of interest is in the center of the field of view. There will be a much larger field of view but much less detail visible than at higher Zoom settings.
Zoom to the desired magnification level and refocus if necessary. The field of view will be much reduced, but the feature of interest will be much magnified.
When the microscope has been adjusted to produce the best image of a specimen, it is ready for capturing with the camera. Now the diverter-prism must be pulled into position to direct light up the third ocular tube to the camera mounted on it. REMEMBER What you see in the camera or on the image-capture viewer is what will be saved to a digital file. NOT NECESSARILY what you see by eye through the eyepieces. BE SURE a final focus is made in the camera viewer or on the image-capture viewer.
REVIEW • Be sure illuminator dimmer is turned all the way down before selecting a light source on the scope. • 2) Once the light source is selected, turn dimmer control up slowly • 3) Move focusing head to a position on the support column that allows appropriate focusing • 4) Focus on specimen at desired magnification • 5) Adjust eyepieces for best viewing • 6) Adjust illuminator for best lighting • 7) “Zoom” to a different magnification if desired, refocus and readjust light • 8) Divert image to camera, reposition specimen and fine focus on camera or image-capture viewer. • 9) Capture desired image
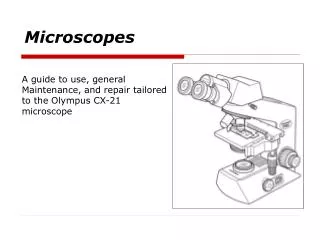
Setting up a trinocular compound microscope for best viewing
Ocular tube for mounting a camera Oculars for viewing by eye “Trinocular” means three oculars, or eyepieces
Rotating turret to hold objective lenses Objective lenses “Compound” means having multiple objective (lower) lenses mounted on a rotating turret (lens holder)
Focusing the microscope on specimen slides can be accomplished with a coarse adjustment control for rapid adjustment, and a fine control for small adjustments, particularly necessary at high magnification levels. Coarse control Fine control
The “mechanical stage” holds specimen slides and allows them to be moved precisely under objective lenses to focus on any area of interest. Stage positioning controls
The microscope illuminator, or light source, provides light for transmission through the specimen for viewing its structure. The amount of light is modified with a shutter or diaphragm using a control knob to open or close it for more or less light. Diaphragm control Illuminator
The condenser focuses light from the illuminator onto the specimen slide to provide the best lighting for viewing. It can be raised or lowered and centered for precise focusing as necessary. It has its own shutter diaphragm too, for varying the amount of light reaching the specimen slide. Centering controls Diaphragm control Focusing knobs
To send light from the microscope to a camera mounted on the third ocular tube, a diverter-prism is moved into the field of view by pulling out its control arm.
Setting up a microscope for best viewing involves adjusting the parts of the scope to the viewer, focusing the scope on the specimen slide and adjusting the illuminator or light source to the slide being viewed.
Turn on microscope illuminator by rotating dimmer knob slowly clockwise. Fast turn-on shortens bulb life. Dimmer knob
Place a sample slide on the microscope stage under the lowest power objective lens.
Adjust the microscope eyepieces so you can comfortably see a well-focused image through both Space eyepieces so you can comfortably see through both at the same time. If one eyepiece tube is fixed focus, close the opposite eye and, using the microscope focusing knob, carefully focus an image of the sample for the open eye. (If both eyepiece tubes are variable focus, either one will do.) Now close the other eye and use the variable focus eyepiece tube to bring the image into focus for the open eye.
Focus on the specimen slide (e.g. these wood cells from a piece of paper). Using the 4X objective lens, there will be a much larger field of view but much less detail visible than with the 40X lens. 4X 40X
Rotate the illuminator diaphragm control until the diaphragm is closed all the way. Using the focusing knob on the condenser, bring the diaphragm image into as sharp focus as possible. Using the centering controls, be sure the diaphragm image is positioned in the center of the field of view. 4X 40X
Adjust the condenser diaphragm so that the specimen features are as clearly visible as desired. Condenser diaphragm wide open Condenser diaphragm closed down to provide correct contrast for clear viewing
The nature of light and lenses results in a plane of focus which becomes thinner as magnification increases. That means for a particular specimen slide, it becomes possible to focus through the thickness of a specimen. Some parts will be in focus while others will not, as in these wood cells focused at different “depths” through the slide. Compare
As with any images used for diagnoses, relative size is extremely important. Whenever possible, a comparative scale should be included with an image, or at least the approximate magnification indicated. cm. approx. 100X
When the microscope has been adjusted to produce the best image of a specimen, it is ready for capturing with the camera. Now the diverter-prism must be pulled into position to direct light up the third ocular tube to the camera mounted on it. REMEMBER What you see in the camera or on the image-capture viewer is what will be saved to a digital file. NOT NECESSARILY what you see by eye through the eyepieces. BE SURE a final focus is made in the camera viewer or on the image-capture viewer.
REVIEW • Turn on microscope illuminator slowly. • Place specimen slide on mechanical stage • Focus on specimen at desired magnification • Adjust eyepieces for best viewing • Adjust condenser for best lighting • Adjust condenser diaphragm for best contrast • Refine focus for depth of field • Refine focus for image capture • Capture image
Capturing Microscope Images An analog video camera can be adapted to a microscope and individual video frames captured and converted to digital image files. Images at least 640x480 pixels in size are best, saved as JPG files. (Digital video cameras are now available too, with USB output.)
Capturing Microscope Images (continued) The same camera may be used on compound as well as dissecting scopes with the proper adapter. The system can be adjusted so that the viewed image is par focal on either scope.
Capturing Microscope Images (continued) An image-capture device is required when using an analog camera.
Capturing Microscope Images (continued) Many hand-held digital cameras can be adapted to capture images from microscopes. Very high resolution images produce unnecessarily large image files, so the camera should be set to a lower resolution and to JPG file type for this process.
REVIEW • A video camera can be used to capture images from microscopes • With the proper adapter, the same camera can be used on more than one microscope • When using an analog video camera, an image-capture device must be used to get an image into the computer • Many hand-held digital cameras can be adapted to capture images from microscopes too • A final fine focus must be made on the image- capture screen before capturing and image
“Wireless” digitally assisted diagnoses For certain virulent diseases or for especially valuable crops, time may be of the essence. In such cases it may be safer or more cost effective to transmit information and images of problem symptoms from the field. Wireless connectivity is now possible, although transmission is slow and expensive and coverage is often poor and/or inconsistent. Also portable equip- ment for microscopic images is expensive.
REVIEW • Wireless transmission of information and images may be important in certain circumstances • Wireless Internet connectivity is becoming more consistent, but still relatively slow and expensive • Slow transmission speeds make short Web forms and small image sizes necessary for wireless digitally assisted diagnoses • Portable microscope equipment is often expensive and less capable then desktop equivalents • Specimen preparation in the field is difficult • On-call diagnostic support is required