First you have to select the required communication buses and the CPU.
80 likes | 213 Vues
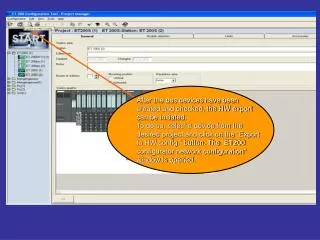
After the bus devices have been created and checked, the HW export can be initiated. To do so, select a device from the desired project and click on the ”Export to HW config.“ button. The “ET200 configurator network configuration“ window is opened.

First you have to select the required communication buses and the CPU.
E N D
Presentation Transcript
After the bus devices have been created and checked, the HW export can be initiated. To do so, select a device from the desired project and click on the ”Export to HW config.“ button. The “ET200 configurator network configuration“ window is opened.
First you have to select the required communication buses and the CPU.
Double-clicking on the communication interface of the device or CPU will open the respective interface parameters dialog.
Select the desired bus under “Bus Assignment“ and specify the address number under ”Address“
When the interfaces for all devices and the CPU are configured, you have to specify where you want to store the configuration. The cfg file now created can afterwards be used for the HW export in STEP7.
Create a new project in STEP7, select the same CPU type as in the network configuration of the ET200 configurator and open the hardware.
In the HW config of STEP7, choose the menu item “Station“ -> “Import…“ and set the path for the cfg file. Select the file configuration to be imported and start the import procedure with ”Open“.
When the import is successfully completed, you can continue editing the HW configuration as usual.