Download
1 / 48
480 likes | 569 Vues
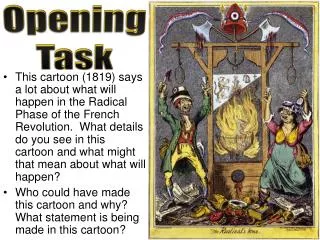
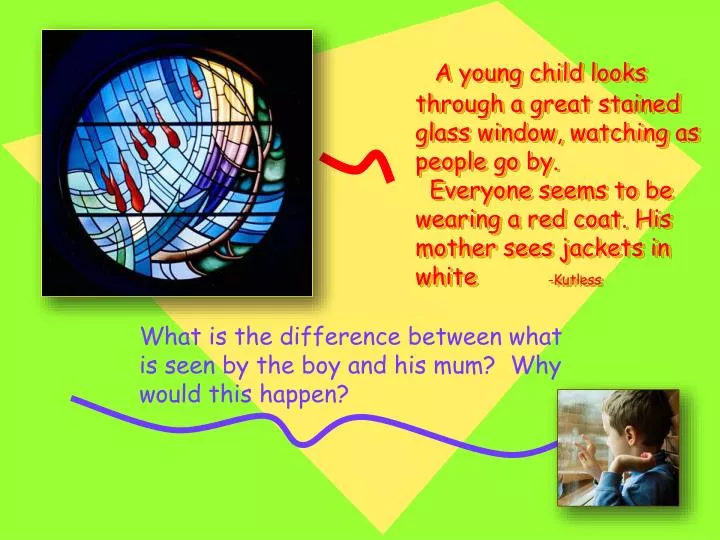
A young child looks through a great stained glass window, watching as people go by. Everyone seems to be wearing a red coat. His mother sees jackets in white -Kutless. What is the difference between what is seen by the boy and his mum? Why would this happen?. Perspective.

E N D
A young child looks through a great stained glass window, watching as people go by. Everyone seems to be wearing a red coat. His mother sees jackets in white -Kutless What is the difference between what is seen by the boy and his mum? Why would this happen?
Perspective • The way in which objects are seen due to their spatial attributes (their dimensions and from what point they are being viewed). • This causes objects to look smaller the further they are from you. Artist represent this in the effect called Foreshortening
Perspective and Art This example is a One Point Perspective, which imitates the way our eyes perceive space as disappearing to a single point on the horizon. It Started in the Renaissance with Artists that wanted to create a realistic setting for their Pieces. Perspective is used by artists to create the Illusion of Depth in their art. ChristHanding the Keys to St. Peter by Pietro Perugino (1481-82)
What did Art look like before the Renaissance? The Virgin and Child Enthroned and Surrounded by Angels,Cimabue, ca. 1280 The Crucifixion,Pietro Lorenzetti,1340s Byzantine Art
Perspective • Many of the earlier works artists created showed little depth. • Does this picture reflect depth? Why or why not? • How could this picture be changed to increase its’ depth? Kaufmann Haggadah. Spain, late 14th C.
Many artists have used a variety of different techniques to show depth. However it was not until the Renaissance that artists developed a system to show depth logically and consistently. Raphael. Betrothal of the Virgin 1504
A one point perspective is created byplacing a singleVanishing Pointon theHorizon Line. Objects recede towards this point along lines calledOrthogonals. In a One Point Perspective the Front Face of a form is seen as the closest point . Vanishing Point Front Face Front Face Horizon Line Front Face Orthogonals ChristHanding the Keys to St. Peter by Pietro Perugino (1481-82)
During the Renaissanceartists became interested in making two-dimensional artwork look three-dimensional. This image was painted 2 years earlier. Notice that Macaccio has painted the background gold rather than showing perspective. Masaccio. The Holy Trinity. 1428
PerspectiveInfluential People during the Renaissance • Art: • Michelangelo • Leonardo da Vinci • Science • Galileo • Literature • Shakespeare Raphael, School of Athens, One-point linear perspective
Perspective • Artists used mathematics and close observation to invent linear perspective. • Linear perspective allows artists to trick the eye into seeing depth on a flat surface.
Linear Perspective: • Based on the way the human eye sees the world. • Objects that are closer appear larger, more distant objects appear smaller. • To create the illusion of space the artists creates a vanishing point on the horizon line. • Objects are drawn using orthogonal lines, which lead to the vanishing points.
Perspective • Can you locate the Horizon Line? • How did you determine this? • Can you find the vanishing point in this picture?
Perspective The red line is the Horizon Line.
Perspective Can you locate the vanishing point?
Perspective Draw a horizon line towards the top of your paper.
1. CENTRAL EYE LEVEL HORIZON / EYE LEVEL HORIZON / EYE LEVEL
2. LOW EYE LEVEL HORIZON / EYE LEVEL HORIZON / EYE LEVEL
3. “BIRDS” EYE LEVEL HORIZON / EYE LEVEL HORIZON / EYE LEVEL
TWO POINT PERSPECTIVE
TWO POINT PERSPECTIVE HORIZON / EYE LEVEL HORIZON / EYE LEVEL
Perspective Draw two vanishing points on the horizon line near the page edges.
Perspective Now draw a vertical line this is your front edge. Draw it in near the bottom middle of the page, so you have plenty of room to add more forms to your building.
Perspective Now connect the both ends of the front edge to both vanishing points. These are orthogonals. Draw lightly so you can erase!
Perspective Draw two vertical lines between the orthogonals where you want the back edges of your form to appear.
Perspective Now join the back and top corners to the opposite vanishing point to complete the top of the form.
Perspective Erase the extra orthogonals. Now you have a form drawn in two-point perspective!
Task 1. 20 marks due week 7. • Create a 2 point perspective drawing from inside or outside of the school. A3 size. • Sketch out in pencil first. Add shading and details to make the drawing realistic.
Marking criteria. • You must demonstrate an understanding of how to draw 2 point perspective by representing the image in the correct proportions. 7.5 marks • The drawing must show a creative approach. 5 marks A high degree of skill should be shown in rendering light, dark and detail. 7.5 marks
Now Select a Vanishing Point on the Horizon Line and connect the edges of your square to it using Orthogonal Lines. Next draw the Front Face of a Square in one corner of the page. Use your ruler to draw a Horizon Line in the middle of your paper. After that draw a Horizontal line to end your shape and a Vertical line to complete the side Now Finish your shape by erasing the remaining Orthogonal lines.
Now Experiment with drawing boxes in other parts of the page to see how they come out. See what it looks like to stack boxes or subtract one from another.
Click on this hyperlink Perspective Drawing - Animated!