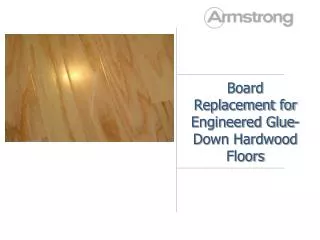
Board Replacement for Floating Floors
Engineered Hardwood Board Replacement Procedures . Board Replacement for Floating Floors. Board Replacement for Floating Floors. Tools. Hammer Miter Saw Chisels Vacuum Circular Saw Angle Pliers Tapping Block 120-150 Grit Sandpaper Drill w/ 3/8” bit Block Plane

Board Replacement for Floating Floors
E N D
Presentation Transcript
Engineered HardwoodBoard Replacement Procedures Board Replacement for Floating Floors
Board Replacement for Floating Floors Tools • Hammer Miter Saw • Chisels Vacuum • Circular Saw Angle Pliers • Tapping Block 120-150 Grit Sandpaper • Drill w/ 3/8” bit Block Plane • Sanding Block Utility or Linoleum Knife • Nail Set
Board Replacement for Floating Floors Materials and Supplies • Replacement Board(s) • PVA Adhesive • Underlayment Tape-clear packing tape • 2080 3M Blue masking tape • 5 min epoxy(optional) • Clean white rags • Wood filler • Underlayment • Dry wall tape or news paper
Board Replacement for Floating Floors ! CAUTIONS When doing any type of repair on a wood floor, care must be taken to protect the environment from dust and debris and the surrounding floor to damage from tools and equipment. Always follow the manufacturer’s recommended safety instructions and practices when using power tools. Operations involving sawing, sanding or machining wood products can produce wood dust. Airborne wood dusts can be an explosive hazard. Wood dust may also cause respiratory, eye and skin irritation. The International Agency for Research on Cancer (IARC) has classified wood dust as a nasal carcinogen in humans. Always follow the manufacturer’s recommended safety precautions when using power tools. The power tools must be equipped with a dust collector. If high dust levels are encountered, use the appropriate NIOSH-designated dust mask. Avoid dust contact with eyes and skin
Board Replacement for Floating Floors Check replacement board(s) for damage, size, and fit. Pay close attention to graining as well as color. The replacement board(s) should to be acclimated to the environment. Outline the damaged board(s) with 3M® - 2080 Blue tape. This will help protect the floor surrounding the repair. Mark board(s) where cutting takes place using a permanent marker. Leaving minimum 1 inch center.
Board Replacement for Floating Floors Drill holes in corners using the 3/8 inch bit. Take care not to drill into the boards surrounding the repair. Note, use a nail set for a starter or a pilot point drill bit. (see right corner)
Board Replacement for Floating Floors Set the circular saw to the thickness of the replacement boards. Make cuts, using circular saw, be careful not to cut into boards that do not need to be replaced. Starting from the center of the board(s). Using a circular saw cut along layout lines make all cuts, stopping at drilled holes Remove center piece.
Board Replacement for Floating Floors Align a tapping block over end joint of the adjacent board to protect it while removing the triangular piece. Placing weight on tapping block, grasp triangular piece with angle pliers and gently lift and wiggle until you break glue line. Repeat at other end of replacement board. Using angle pliers grasp edge piece and lift gently until you break the glue line. Pull piece inward towards the center. Tip: a chisel can be used to drive piece inward towards center, if needed. Clean glue residue from tongue and groove in floor where the new board will be inserted and vacuum all debris. Optional: Groove can be cleaned with 1/8” Slotted or 7mm router bit.
Board Replacement for Floating Floors Using a small piece of replacement board, cut so you have a side and end tongues. Use to check the fit of the side and end groove in existing flooring. Remove the blue tape and replace damaged underlayment and re-tape in place, if necessary
Board Replacement for Floating Floors Measure and cut replacement boardto length, removing groove end.
Board Replacement for Floating Floors Remove bottom of groove edge on length of replacement board The removal of the bottom of the groove can be accomplished with either a router with a rabbet bit or a table saw.
Board Replacement for Floating Floors Cut the end to match the removed bottom portion of the groove (rabbet joint) to preset depth. Care must be taken to match the upper portion of the groove to prevent ledging (over-wood) after it is installed.
Board Replacement for Floating Floors Remove corners at leading edge of the tongues. This will allow the engaging of the tongue and groove. Use sanding block to smooth your cuts on replacement board(s). (120-150 grit sand paper suggested)
Board Replacement for Floating Floors Apply Adhesive to bottom of grooves and on top of tongues in replacement area. Tip: Use a paper barrier to prevent the adhesive from bonding to underlayment
Board Replacement for Floating Floors The finished replacement board ready to be set into place
Board Replacement for Floating Floors Engage tongue side at the end tongue first. Tap on ledged end (rabbet cut end) with care not to damage the replacement board.
Board Replacement for Floating Floors Use a tapping block and hammer engage the long tongue joint. Then close up the end joint to complete the fit. Using appropriate filler, fill any gaps. Weight board with appropriate weight(s) overnight