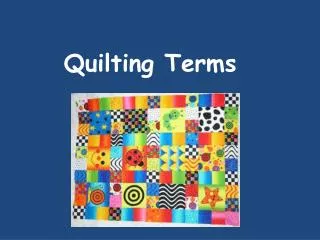
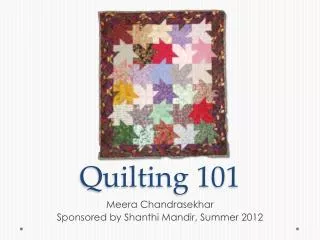
Quilting 101
Quilting 101. Meera Chandrasekhar Sponsored by Shanthi Mandir, Summer 2012. Anatomy of a Quilt. Top – usually pieced blocks, laid out in a pattern Middle – batting, polyester or cotton, various thicknesses (low, medium, high lofts) Bottom – quilt backing fabric, can be plain or patterned

Quilting 101
E N D
Presentation Transcript
Quilting 101 Meera Chandrasekhar Sponsored by Shanthi Mandir, Summer 2012
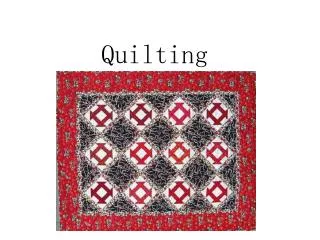
Anatomy of a Quilt • Top – usually pieced blocks, laid out in a pattern • Middle – batting, polyester or cotton, various thicknesses (low, medium, high lofts) • Bottom – quilt backing fabric, can be plain or patterned • Quilting – stitching the three layers together in a pattern • Binding – finishing the edge
Basics • Resources: • quilting.about.com • Singer Quilting Book (available used at Amazon.com for $5 or less) • Fabric - 100% cotton • Thread – Grey cotton • Cutting - Rotary cutter • Sewing - 1/4” inch seam allowance • Pressing • Accuracy, accuracy, accuracy!
Fabric • 100% cotton • Quilting is a big time hobby; fabric companies print coordinating fabrics • Fat Quarters – good way to start • Works well if you choose one main fabric, and then choose secondary fabrics • Color coordination • Different size prints • Color value (light/medium/dark)
Treating the Fabric • Prewash like colors the way you plan to wash your finished product • Dry in dryer. All shrinkage done before you cut! • Flatten, press. • Use dry iron. Lay iron flat on fabric, don’t move it around. • Go crosswise, so you don’t stretch the fabric.
Tools • Rotary Cutter (not scissors) .. very sharp! • Cutting mat • Ruler – Multitude of sizes! Get clear acrylic rulers with 1/4” lines and 1/8” markings. Most frequently used: • 6 x 24” with 30, 60 and 45 degree lines • 6 x 6” or 6.5 x 6.5”
Rotary Cutter Safety Close the Safety Latch on the Cutter Every Time You Put it Down Always Cut Away from Your Body The rotary cutter should always roll away from your body. Never attempt to cut "backwards" towards yourself. It's too dangerous. Don't Make "Crossover" Cuts Do not hold a ruler with your left hand and cross over the ruler to cut on its left side. There's just too much risk of injury to your arm and fingers Keep Your Fingers Away from Ruler Edges A right-handed cutter must hold the ruler steady with the left hand while cutting down the right side of the ruler. Lefties reverse the process. Keep those fingers away from the ruler's edge and out of the path of the cutter.Put fabric grips under the ruler to keep it from slipping around. Always Cut Standing Up!
More Cutter Safety.. Handle Replacement Blades with Care Rotary blades are sharp enough to cut an artery, and can easily cut deep into your fingers Don't Throw an Old Blade Directly Into the Trash I usually wrap the edges in masking tape before I discard a blade Keep Your New Blades in a Safe Place Best – use the box they come in (I usually buy a box of 5) If they are so dangerous, why use them? Accuracy of cutting Speed Can cut up to 6 layers of fabric exactly They are the “killer app” of quilting!
Sewing - Quarter Inch Seam • Mark the 1/4” seam line with tape or moleskin • Sew a line. Check with graph paper / ruler • Small inaccuracies add up – so be accurate as you construct the blocks
Sew and Press, Sew and Press! Every time you sew a seam, press it! Press... Don't Iron Always press your quilt blocks, allowing the weight of the iron to do the work for you. Avoid moving the iron back and forth across your blocks. The movement can stretch them out of shape. You can use movement when pressing large pieces of fabric, but take care not to pull or tug too much. Dry iron is best Most quilters rarely use steam to press quilt blocks, but sometimes steam or a squirt of spray starch is helpful.
Blocks - literally thousands • http://quilting.about.com/od/quiltpatternsprojects/ig/Free-Quilt-Block-Patterns/Broken-Wheel-Quilt-Block.htm • See books for easy blocks • Notice how each block is a square!
Practice: make a nine-patch block 3” finished size; before sewing, 3.5” 9”
For a finished 9” square, each small square is 3.5” • Cut 3.5” strips, 3 from each of two fabrics • Join: 3. Press! All seams toward darker color 4. Cut: 5. Join cut strips 6. Press! Note: The idea is to make as many long seams as possible, then cut and assemble. It is harder to cut each square and then assemble the block – produces more inaccuracies in cutting and sewing 3.5” 3.5” Join Join
Time to get started! • Choose 3 or 4 fabrics for your block • Often a light, a medium and a dark color look good together • Size – 12” block makes a small cushion 16” block makes a large one • Then choose your block, revisit the colors. • Use graph paper to plan your block, and to plan the pieces you will need to cut.
Squares, Triangles and Funky Shapes • For a square piece: • Cut ½” larger than finished size (if your block needs a 2” finished square, your fabric should have a 2.5” square). • Cut a strip first, then chop it up into squares. • If you have funky shapes, make a template: • Make a full-sized version on graph paper • Cut, and paste on manila folder weight cardstock • Draw ¼” lines around the shape, then cut again • Use this template to cut your fabric • For triangles and diamonds, there are easy cutting and piecing techniques – see book.