Facebook Photo Basics for Seniors: Easy Steps to Add Photos and Create Albums
Learn how to add photos to Facebook in simple steps. Discover how to change your profile picture and create photo albums to share with friends and family. Perfect for seniors who want to enhance their social media skills.


Facebook Photo Basics for Seniors: Easy Steps to Add Photos and Create Albums
E N D
Presentation Transcript
Adding Photos to Facebook Stephani Gibson 231-928-0257 sgibson@fremontlibrary.net
Introduction • Designed for those who took “Facebook for Seniors” class • Objectives: • Change your profile picture • Upload photos to create an album • Pause presentation to do the steps
What You Need To Know • You must have your photos saved before you can upload them to Facebook. • Can be saved somewhere on your computer or to a portable device (flash drive, disc, etc.) • You should know where you have it saved
Change Your Profile Picture • Profile picture: Picture that shows up next to your name when you write a status update or comment • Click on “Profile” • On left side of screen, click on “Edit My Profile”
Change Your Profile Picture, cont’ • Click on “Profile Picture” • Click on “Browse” • A window will pop up for you to select where you have your picture saved • Find where you have it saved • Select the picture by double-clicking on it
Change Your Profile Picture, cont’ Once you double-click on your picture to select it, you should see it change on your screen. That’s it! To get back to your profile, click on “View My Profile”
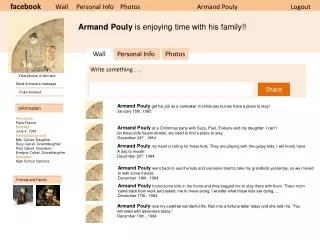
Create an Album • Album: Collection of photos that you want to share • Can be random or related in some way • On your Profile page, click on “Photos” at the top of the screen
Your screen should look like this (without all these photos):
Create an Album, cont’ • Click on “+ Create a Photo Album” • Enter a name for the album • Other fields are optional • Click on “Create Album” when you are finished filling out the information
Create an Album, cont’ • Click on “Select Photos” • Can select multiple photos by holding down the Ctrl key while clicking on them • Window will open where you can select your photos (same as selecting photos for profile picture) • Click on the photos you want, then click “Open”
Create an Album, cont’ • Click on “Upload Photos” • Your pictures will then appear • Can add captions for each and select which photo you want to have as the album cover • When finished, click “Save Changes”
Create an Album, cont’ • Option to publish photos now (they will appear on your friends’ home page) or skip • Can share the album with friends later even if you skip • Your saved photos will then appear and you’re done!
Conclusion • Thanks! • Share photos with your friends and family • Further questions: • Email me at sgibson@fremontlibrary.net • Call 231-928-0257