Download

1 / 34
340 likes | 466 Vues
Learn how to effectively use Microsoft Publisher to create visually engaging storyboards. This guide covers essential steps, from opening the template and saving your drafts to editing text boxes and adding graphics. Discover how to change view sizes for better editing, resize and move text boxes, stylize text with different fonts and colors, and insert images effectively. Ideal for public health professionals looking to enhance their communication through impactful visuals.

E N D
Using Microsoft Publisher for Story Boards Jennifer Damon Michigan Public Health Institute
Getting Started Open the template. You will get a page that looks like this:
Saving the Template Go to the File menu, use the “Save As” function, and give your draft a name, e.g., “LHD Story Board Draft 1”
A Word About the View The default view is 17%. You can find this at the top of the page:
Changing the View • The reason the view is so small is that the document is set up to be printed as a 36” by 48” poster. • To change the view, simply click the drop down arrow and choose one of the pre-defined view sizes or type in your own. • The most effective view for editing is about 34%. • You can move the page around using the scroll bars on the bottom and right side of the page.
Now You’re Ready to Edit! • Let’s start with text editing. • All text is contained within text boxes. • Like any Microsoft software, you can edit by clicking and highlighting the text you want to change and typing directly over it. • You can also click to place the cursor in the text box and type like you would in any Word document.
Let’s Try It Highlight the text “Health Department Name” in the upper left hand corner and type in your own LHD’s name.
Another Exercise Place your cursor in the “Team Members” text box in the middle and type your team members’ names.
Creating a New Text Box Go to the “Insert” menu and choose Text Box.
Creating a New Text Box, continued A crosshair will pop up. Place and drag until the text box is the desired size.
Let’s Try It Place your cursor in the text box and type a sentence.
Notes About Text Boxes Text boxes can be resized by placing your cursor over one of the circles around the edge. You will get a double-headed arrow. Click and drag to your desired size. MPHI is in Okemos, Michigan.
Notes About Text Boxes • If you wish to move the text box, select the text box and hover your mouse around one of the edges. You will get a 4-headed arrow, and you can click and drag to move the box. • To delete a text box, click on it to select it and press “Delete” on your keyboard. Alternately, you can right-click and select “Delete Object” from the menu.
Stylizing Your Text • Changing font face, size, and color is accomplished exactly like in Microsoft Word. • Highlight your text and choose the font, size, and color from the formatting menu.
Font Face, Size, and Color Font Face Font Color Font Size If you have the font face “Gill Sans MT”, this is the font utilized throughout the story board template. If you do not have this font, a substitute will have been made on your computer. Try to keep fonts consistent throughout the story board for uniformity of style.
Bite the Bullet To add bullet points to a text box, simply press the bullet list button on the formatting bar.
Let’s Try It Make a bulleted list of the cities you have lived in.
Other Formatting Options • The formatting toolbar above is identical to the one in Word • Options for text alignment (left, center, right, full justification), bold, italic, underline, changing the background color of a text box (paint can) • More options are available in the “Format” “Font” menu, such as different types of underlining, text shadows, small caps, etc.
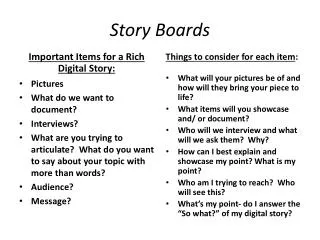
Worth 1,000 Words Remember, story boards should be very graphic-heavy. We want to show our audience what we are doing rather than tell them in words. Let’s add some graphics.
Not Your Uncle’s Boring Vacation Photos Go to the “Insert” menu Choose “Picture” Choose “From File”
Who Can Resist a Bunny Drinking Coffee? Just like with the text box, you can resize your picture by pulling on the corners or sides, and you can move it by clicking and dragging with the 4-headed arrow.
Let’s Try It Add your health department’s logo to the top left corner of the story board. (Hint: you should use two skills here; first, delete the text box. Then insert your picture.)
The Other Way to Do Things • You can also copy and paste graphics into your storyboard. • For example, if you have a chart in an Excel sheet, you can select the chart, right click, select “Copy”, then right click on your story board and choose “Paste.”
A Word of Caution • Most images created in Excel (e.g., graphs, charts) can be resized to a fairly large size. • However, other images, such as logos and photos, as well as most images from the Internet, can only be enlarged to a point before they start becoming pixilated and unsuitable for print. • This is due to the number of dots per inch (dpi) on the image. The more dots that are packed in per inch, the better.
Can You Tell What This Is? Don’t be afraid. It’s just a kitten. Original photo size:
Looking at the Big Picture To print your storyboard on a standard 8.5 x 11 page, use the following steps.
File Save As Save as Type Enhanced Metafile
It will say “Resolution” below the “File name:” and “Save as type:” when you choose Enhanced Metafile, and will default to “Desktop printing (150 dpi).” Click “Change” and choose “Commercial printing (300 dpi)”. Remember, the more dpi, the clearer the picture.
Click “Save” To print the file, right click on the file and choose “Open with” “Windows Picture and Fax Viewer” Click the printer button on the bottom of the page. This will bring up a print wizard.
Choose your printer. The next screen will ask you what size to print. Choose “Full page photo print: cropped and rotated to fit” (the second option). Click “Next” and printing will begin.
In Closing • Microsoft Publisher, in general, is very much like other Microsoft Office programs. • If a certain feature/function is in a menu in Word, it is very likely in the same place in Publisher. • Printing will be handled through a commercial printer that MPHI works with.
Technical Assistance If you need any additional assistance with Publisher or seem to be stuck, please contact: Jennifer Damon 517-324-8363 jdamon@mphi.org I’ll be happy to help you!