IE 337: Materials & Manufacturing Processes
IE 337: Materials & Manufacturing Processes. Lecture 2: Nature and Mechanical Properties of Metals. Chapters 2 and 3. Last Time. Material-Geometry-Process Relationships Manufacturing Materials Manufacturing Processes How do we characterize processes?. This Time. Metals

IE 337: Materials & Manufacturing Processes
E N D
Presentation Transcript
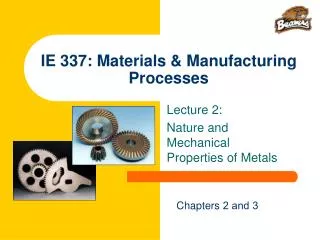
IE 337: Materials & Manufacturing Processes Lecture 2: Nature and Mechanical Properties of Metals Chapters 2 and 3
Last Time • Material-Geometry-Process Relationships • Manufacturing Materials • Manufacturing Processes • How do we characterize processes?
This Time • Metals • Origin of metallic properties (Chapter 2) • Mechanical properties (Chapter 3)
Figure 2.4 Three forms of primary bonding: (a) Ionic Atoms of one element give up their outer electron(s), which are in turn attracted to atoms of some other element to increase electron count in the outermost shell to eight Ionic Bonding
Figure 2.4 Three forms of primary bonding: (b) covalent Electrons are shared (as opposed to transferred) between atoms in their outermost shells to achieve a stable set of eight Covalent Bonding
Figure 2.4 Three forms of primary bonding: (c) metallic Sharing of outer shell electrons by all atoms to form a general electron cloud that permeates the entire block Metallic Bonding
Periodic Table Figure 2.1 Periodic Table of Elements. Atomic number and symbol are listed for the 103 elements.
Macroscopic Structures of Matter • Atoms and molecules are the building blocks of more macroscopic structure of matter • When materials solidify from the molten state, they tend to close ranks and pack tightly, arranging themselves into one of two structures: • Crystalline • Noncrystalline
Crystalline Structure Structure in which atoms are located at regular and recurring positions in three dimensions • Unit cell - basic geometric grouping of atoms that is repeated • The pattern may be replicated millions of times within a given crystal • Characteristic structure of virtually all metals, as well as many ceramics and some polymers
Three Crystal Structures in Metals • Body-centered cubic • Face centered cubic • Hexagonal close-packed Figure 2.8 Three types of crystal structure in metals.
Crystal Structures for Common Metals Room temperature crystal structures for some of the common metals: • Body‑centered cubic (BCC) • Chromium, Iron, Molybdenum, Tungsten • Face‑centered cubic (FCC) • Aluminum, Copper, Gold, Lead, Silver, Nickel • Hexagonal close‑packed (HCP) • Magnesium, Titanium, Zinc
Imperfections (Defects) in Crystals • Imperfections often arise due to inability of solidifying material to continue replication of unit cell, e.g., grain boundaries in metals • Imperfections can also be introduced purposely; e.g., addition of alloying ingredient in metal • Types of defects: • Point defects • Line defects • Surface defects
Point Defects Imperfections in crystal structure involving either a single atom or a few number of atoms Figure 2.9 Point defects: (a) vacancy, (b) ion‑pair vacancy, (c) interstitialcy, (d) displaced ion (Frenkel Defect).
Line Defects Connected group of point defects that forms a line in the lattice structure • Most important line defect is a dislocation, which can take two forms: • Edge dislocation • Screw dislocation
Figure 2.10 Line defects: (a) edge dislocation Edge of an extra plane of atoms that exists in the lattice Edge Dislocation
Surface Defects Imperfections that extend in two directions to form a boundary • Examples: • External: the surface of a crystalline object is an interruption in the lattice structure • Internal: grain boundaries are internal surface interruptions
Elastic Strain When a crystal experiences a gradually increasing stress, it first deforms elastically • If force is removed lattice structure returns to its original shape Figure 2.11 Deformation of a crystal structure: (a) original lattice: (b) elastic deformation, with no permanent change in positions of atoms.
Plastic Strain If stress is higher than forces holding atoms in their lattice positions, a permanent shape change occurs Figure 2.11 Deformation of a crystal structure: (c) plastic deformation (slip), in which atoms in the lattice are forced to move to new "homes“.
Effect of Dislocations on Strain • In the series of diagrams, the movement of the dislocation allows deformation to occur under a lower stress than in a perfect lattice Figure 2.12 Effect of dislocations in the lattice structure under stress
Mechanical Properties in Design and Manufacturing • Mechanical properties determine a material’s behavior when subjected to mechanical stresses • Properties include elastic modulus, ductility, hardness, and various measures of strength • Dilemma: mechanical properties desirable to the designer, such as high strength, usually make manufacturing more difficult • The manufacturing engineer should appreciate the design viewpoint • And the designer should be aware of the manufacturing viewpoint
Stress‑Strain Relationships • Three types of static stresses to which materials can be subjected: • Tensile - tend to stretch the material • Compressive - tend to squeeze it • Shear - tend to cause adjacent portions of material to slide against each other • Stress‑strain curve - basic relationship that describes mechanical properties for all three types
Most common test for studying stress‑strain relationship, especially metals In the test, a force pulls the material, elongating it and reducing its diameter Figure 3.1 Tensile test: (a) tensile force applied in (1) and (2) resulting elongation of material Tensile Test
ASTM (American Society for Testing and Materials) specifies preparation of test specimen Figure 3.1 Tensile test: (b) typical test specimen Tensile Test Specimen
Tensile Test Sequence • Figure 3.2 Typical progress of a tensile test: (1) beginning of test, no load; (2) uniform elongation and reduction of cross‑sectional area; (3) continued elongation, maximum load reached; (4) necking begins, load begins to decrease; and (5) fracture. If pieces are put back together as in (6), final length can be measured. 25
Engineering Stress • Defined as force divided by original area: where e = engineering stress, F = applied force, and Ao = original area of test specimen 26
Engineering Strain • Defined at any point in the test as where e = engineering strain; L = length at any point during elongation; and Lo = original gage length 27
Stress-Strain Relationships • Figure 3.3 Typical engineering stress‑strain plot in a tensile test of a metal.
Two Regions of Stress‑Strain Curve • The two regions indicate two distinct forms of behavior: • Elastic region – prior to yielding of the material • Plastic region – after yielding of the material
Elastic Region in Stress‑Strain Curve • Relationship between stress and strain is linear • Material returns to its original length when stress is removed Hooke's Law: e = E e where E = modulus of elasticity • E is a measure of the inherent stiffness of a material • Its value differs for different materials
Yield Point in Stress‑Strain Curve • As stress increases, a point in the linear relationship is finally reached when the material begins to yield • Yield pointY can be identified by the change in slope at the upper end of the linear region • Y = a strength property • Other names for yield point = yield strength, yield stress, and elastic limit
Plastic Region in Stress‑Strain Curve • Yield point marks the beginning of plastic deformation • The stress-strain relationship is no longer guided by Hooke's Law • As load is increased beyond Y, elongation proceeds at a much faster rate than before, causing the slope of the curve to change dramatically
Tensile Strength in Stress‑Strain Curve • Elongation is accompanied by a uniform reduction in cross‑sectional area, consistent with maintaining constant volume • Finally, the applied load F reaches a maximum value, and engineering stress at this point is called the tensile strengthTS (a.k.a. ultimate tensile strength) TS =
Ductility in Tensile Test • Ability of a material to plastically strain without fracture • Ductility measure = elongation EL where EL = elongation; Lf = specimen length at fracture; and Lo = original specimen length Lf is measured as the distance between gage marks after two pieces of specimen are put back together
True Stress • Stress value obtained by dividing the instantaneous area into applied load where = true stress; F = force; and A = actual (instantaneous) area resisting the load
True Strain • Provides a more realistic assessment of "instantaneous" elongation per unit length
True Stress-Strain Curve Figure 3.4 ‑ True stress‑strain curve for the previous engineering stress‑strain plot in Figure 3.3.
Strain Hardening in Stress-Strain Curve • Note that true stress increases continuously in the plastic region until necking • In the engineering stress‑strain curve, the significance of this was lost because stress was based on an incorrect area value • It means that the metal is becoming stronger as strain increases • This is the property called strain hardening
True Stress-Strain in Log-Log Plot Figure 3.5 True stress‑strain curve plotted on log‑log scale.
Flow Curve • Because it is a straight line in a log-log plot, the relationship between true stress and true strain in the plastic region is where K = strength coefficient; and n = strain hardening exponent
Applies a load that squeezes the ends of a cylindrical specimen between two platens Figure 3.7 Compression test: (a) compression force applied to test piece in (1) and (2) resulting change in height. Compression Test 41
Shear Properties • Application of stresses in opposite directions on either side of a thin element Figure 3.11 Shear (a) stress and (b) strain. 43
Hardness • Resistance to permanent indentation • Good hardness generally means material is resistant to scratching and wear • Most tooling used in manufacturing must be hard for scratch and wear resistance 44
Hardness Tests • Commonly used for assessing material properties because they are quick and convenient • Variety of testing methods are appropriate due to differences in hardness among different materials • Most well‑known hardness tests are Brinell and Rockwell • Other test methods are also available, such as Vickers, Knoop, Scleroscope, and durometer 45
Brinell Hardness Test • Widely used for testing metals and nonmetals of low to medium hardness • A hard ball is pressed into specimen surface with a load of 500, 1500, or 3000 kg Figure 3.14 Hardness testing methods: (a) Brinell 46
Brinell Hardness Number • Load divided into indentation area = Brinell Hardness Number (BHN) where HB = Brinell Hardness Number (BHN), F = indentation load, kg; Db = diameter of ball, mm, and Di = diameter of indentation, mm 47
Rockwell Hardness Test • Another widely used test • A cone shaped indenter is pressed into specimen using a minor load of 10 kg, thus seating indenter in material • Then, a major load of 150 kg is applied, causing indenter to penetrate beyond its initial position • Additional penetration distance d is converted into a Rockwell hardness reading by the testing machine 48
Rockwell Hardness Test • Figure 3.14 Hardness testing methods: (b) Rockwell: • (1) initial minor load and (2) major load. 49
Effect of Temperature on Properties Figure 3.15 General effect of temperature on strength and ductility. 50

