Clip Art
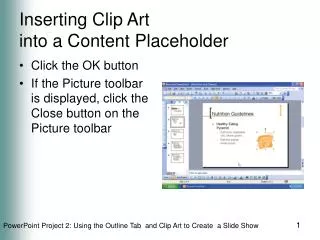
Clip Art. Where to find it. How to use it. Clip Art is previously created illustrations and graphics that you can use as is, or modify by ungrouping, combining with other illustrations, and adding different backgrounds, borders and effects. Clip Art. Where to get Clip Art. Software

Clip Art
E N D
Presentation Transcript
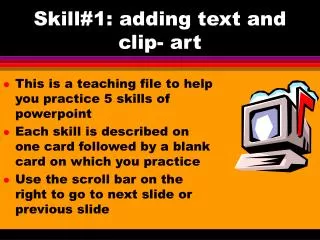
Clip Art Where to find it. How to use it.
Clip Art is previously created illustrations and graphics that you can use as is, or modify by ungrouping, combining with other illustrations, and adding different backgrounds, borders and effects.
Clip Art Where to get Clip Art • Software • On the Web • Create your own
Software There are many software programs which provide clip art.
On the Web You can find many sites on the web that provide free clip art for downloading: • www.free-clip-art.net • www.clipart.com • www.allfreeclipart.com • Microsoft Office Online
Create Your Own • Using graphics programs you can make your very own clip art images. One such program is Microsoft paint.
Another place to find clip art is by clicking on the “Insert Clip Art” button on the drawing tool bar of most Microsoft office programs. This is where your downloaded clip art will be stored.
Modifying Once you have an image you can change it. You may want to make it a different color, add or delete some elements or include some part of another clip art image. To do this you will need to ungroup the image. Ungrouping allows you to take the image apart. Most clip art is made up of several pieces that are put together to form a complete picture. Sometimes there are many layers to one image. All the different pieces or layers can be altered to suite your needs.
Original Image Before you can make any changes to an existing clip art image you must first ungroup it. Ungrouped Image
Steps to ungrouping an image: • Select the image by left clicking on it • Click on “Draw” on the drawing tool bar • then “Ungroup” • You are now ready to manipulate the clip art 1 3 2
An ungrouped image with all of its parts selected Each separate part has its own connecter points. You will need to click on each individual part to change it.
Once you have ungrouped the image, you can change different elements such as color and position. You may even delete elements you do not need or add parts of other images
To regroup an image • Select the entire image by clicking the “Select Objects” arrow. Then click and drag over the entire image. • Next click on “Draw” • Then “Group” 3 2 1
Your image is now complete! Not all images can be ungrouped. It will take a little trial and error until you find an image that will suite the needs of your project. But that is part of the fun! So find yourself some clip art and experiment with it. See what you can come up with. Remember, if you don’t like it just delete and start again. Allow yourself to discover the fascinating world of clip art!