INTUBATION REVIEW
290 likes | 535 Vues
INTUBATION REVIEW. SFC HILL. Advantages/Complications of Tracheal Intubation. Advantages of tracheal intubations:. Airway patency Protects the airway Maintains patency during positioning Control of ventilation

INTUBATION REVIEW
E N D
Presentation Transcript
INTUBATIONREVIEW SFC HILL
Advantages of tracheal intubations: • Airway patency • Protects the airway • Maintains patency during positioning • Control of ventilation • ventilation over a long period of time without intubation can lead to gastric distention and regurgitation
Advantages of tracheal intubations: • Route for inhalation anesthesia and emergency medications • N - Narcan • A - Atropine • L - Lidocaine • E - Epinephrine
Complications of tracheal intubation: • Trauma to the lips, teeth, and soft tissues of the airway. • Awareness • meticulous technique • Bronchial intubation • frequent complication • auscultation of the chest bilaterally
Complications of tracheal intubations: • Laryngospasm • common when extubation is done when the patient is in a semiconscious state • extubation should be done in a relatively deep anesthesia or when the protective laryngeal reflex has returned • Postintubation hoarseness and sore throat • due to mechanical presence of the tracheal tube
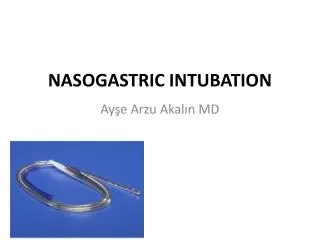
Preparation of Equipment • Assemble pharyngeal airways in assorted sizes • Nasopharyngeal • Oropharyngeal • Inspect laryngoscope for serviceability • Batteries • Light bulb • Blades; curved/straight (Macintosh or Miller)
Selection of laryngoscope blade (preference) • Macintoshis a curved blade whose tip is inserted into the vallecula (the space between the base of the tongue and the pharyngeal surface of the epiglottis). Most adults require a Macintosh number 3 or 4 blade.
Selection of laryngoscope blade (preference) • Milleris a straight blade that is passed so that the tip of the blade lies beneath the laryngeal surface of the epiglottis. The epiglottis is then lifted to expose the vocal cords. Most adults require a Miller number 3 blade.
Preparation of Equipment -Inspect endotracheal tubes • Tube size • adult male 8 mm to 9 mm tube • adult female 7 mm to 8 mm tube • Tube length- extend from the lower incisor to a point midway between the cricoid cartilage and Louis's angle (the sternal angle) on the patient • Endotracheal tube cuff
Preparation of Equipment • Malleable stylet (should not extend past Murphy's eye) • Lubrication • Laryngeal sprays
Inspect resuscitator (AMBU bag) for serviceability • Bag • Mask • Intake valve • Valve body with relief valve
Inspect stethoscope • Diaphragm • Earpieces • Tubing
Gather and prepare all equipment necessary for an emergency Airway • Scalpel handle • Surgical blades • Curved hemostats • Endotracheal tube • Syringe
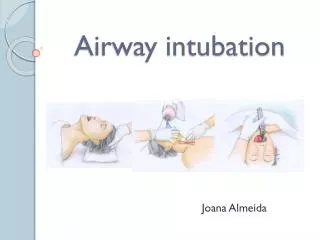
Intubation Technique • ventilate with 100 percent oxygen for approximately 1 min • Position bed height to bring the patient's head to a mid-abdominal height • Flex the cervical spine and extend the head at the atlanto-occipital joint • Long axis of the oral cavity, pharynx, and trachea lie almost in a straight line
Intubation Technique • introduce the blade into the right side of the patient's mouth • move the blade posteriorly and toward the midline, sweeping the tongue to the left and keeping it away from the visual path with the flange of the blade • ensure the lower lip is not being pinched by the lower incisors and laryngoscope blade • advance the laryngoscope until the epiglottis is in view
Intubation Technique • lift the laryngoscope upward and forward • insert the endotracheal tube from the right with its concave curve facing downward and to the right side of the patient • maneuver the endotracheal tube into the larynx, midway between the cricoid cartilage and the sternal angle
Intubation Technique • inflate the cuff and apply positive pressure ventilation while the assistant auscultates • secure the endotracheal tube in position
Curved Blade Technique The curved blade technique is essentially similar. The only difference being when the epiglottis is in view, advance the tip of the laryngoscope blade into the vallecula, formed by the base of the tongue and the epiglottis; lift upward and forward.
Nasotracheal intubation technique • topical lidocaine or phenylephrine should be applied to the nasal passages • 0.5-1.0% Neosynephrine and 4% Lidocaine, mixed 1:1 should also give satisfactory results • generously lubricate the nares and endotracheal tube • ET tube should be advanced through the nose directly backward toward the nasopharynx
Nasotracheal intubation technique • loss of resistance marks the entrance into the oropharynx • laryngoscope and Magill forceps can be used to guide the endotracheal tube into the trachea under direct vision • for awake spontaneous breathing patients, the blind technique can be used
Confirmation of tracheal intubation: • Direct visualization of the ET tube passing through the vocal cords • CO2 in exhaled gases • Bilateral breath sounds • Absence of air movement during epigastric auscultation
Confirmation of tracheal intubation: • Condensation (fogging) of water vapor in the tube on exhalation • Refilling of reservoir bag during exhalation • Maintenance of arterial oxygenation • Chest X-ray: the tip of the ET tube should be between the carina and thoracic arc or approximately at the level of the aortic arch
Extubation • ensure that the patient is recovering is breathing spontaneously with adequate volumes • evaluate the patient's ability to protect his airway by observing whether the patient responds appropriately to verbal commands
Extubation steps: • Oxygenate patient with 100 percent high flow O2 for 2 to 3 minutes • if secretions are suspected in the tracheobronchial tree, remove them with a suction catheter through the lumen of the endotracheal tube • ensure that the patient is not in a semiconscious state
Extubation steps: • turn the patient onto his side if he is still unconscious • unsecure the endotracheal tube from the patient's face • deflate the cuff and remove the endotracheal tube quickly and smoothly during inspiration • continue to give the patient O2 as required