Mastering Digital Outputs with Arduino: Connecting Hardware and Setting Pins
180 likes | 281 Vues
Learn about connecting hardware to a microcontroller like Arduino, setting pin directions, controlling LEDs, motors, relays, and more. Practice driving LEDs, understanding current limiting resistors, using transistors, and coding for digital IO. Acquire skills in digital output operations for various components.

Mastering Digital Outputs with Arduino: Connecting Hardware and Setting Pins
E N D
Presentation Transcript
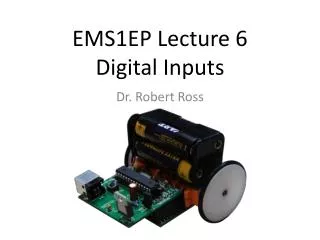
EMS1EP Lecture 5Digital Outputs Dr. Robert Ross
Overview (what you should learn today) • Hardware Connections • What the pins on the LArduino board do • Setting pin directions • digitalWrite()
Hardware • Microcontrollers need to interact with the real world (sensing, computing and outputting) • Today we look at how the microcontroller can control or output data • There are lots of things we might want to control: • LED • Motor • Servo • Linear Actuator • Relay • Speaker
Connecting hardware to the microcontroller • The pins on the microcontroller can only supply a small amount of current (<20mA) • Indicator LEDs are relatively low current (~5-15mA) and so they can be driven directly – larger current devices need another way to drive them
Driving LEDs from an Arduino Datasheet gives current and voltage for LED For example: • Vf = 1.9V • If = 10mA Use KVL and ohms law to find the value of R
Driving LEDs from an Arduino • Vf = 1.9V • If = 10mA • If Vcc = 5V • R = 310Ω
Class Quiz • As Vcc, Vf and If may change depending on the circuit, what current limiting resistor is needed for the following: • Vcc = 3.3V • Vf = 2.1V • If = 15mA
Driving higher currents • Use a transistor as a switch • Transistor has small base current but much larger collector current – so it can switch a higher load • For even higher loads use FETs as they have a lower on-resistance
Pins on the LArduino Select between USB supplied power and power on V+ pin Reset switch Analog input pins for ADC GND, 5V and V+ Digital I/O Pins Pins with a ‘P’ can be used for pulse width modulation
Driving a LED with the LArduino • Use 5V pin as Vcc • Use R = 330Ω Resistors • Set power to USB
Driving a LED with the LArduino // PIN ASSIGNMENTS int ledPin = 10; // LED connected to digital pin10 // The setup() method runs once on startup void setup() { // initialize pin as output: pinMode(ledPin, OUTPUT); } // Infinite loop void loop() { digitalWrite(ledPin, HIGH); // LED OFF delay(1000); // Wait 1S digitalWrite(ledPin, LOW); // LED ON delay(1000); // Wait 1S }
Digital Inputs and Outputs • The next two lectures will focus on the digital pins – the analog pins will come later • Before using the digital pins we need to set them up as either inputs or outputs • This is called setting the direction of the pins (input direction or output direction) • To do this we use the pinMode() function • Use pin assignments to refer to pins by name rather than number
pinMode() function • Syntax: pinMode(<pin_number>, <direction>) • Normally some pins will be assigned at the top of your code • e.g. • int LED1Pin = 10; • intswitchPin = 11; • These assignments are used for the pin number • Direction should be OUTPUT or INPUT • e.g. • pinMode(LED1Pin, OUTPUT); • pinMode(switchPin, INPUT);
Class Quiz • Pins 5 and 9 have LEDs connected to them • Pin 7 has a speaker connected to it • Pins 6 and 12 have switches connected to them • Write code to assign names to these pins and then code to set the direction of these pins inside the setup() function
digitalWrite() • After the direction of the pins has been setup the pins can either be set to high (5V) or low (0V) • digitalWrite() is used to set the value of each pin • Syntax: • digitalWrite(<Pin_Number>, <HIGH/LOW>); • e.g. //Sets pin to 5V – LED off digitalWrite(LED1Pin, HIGH); //Sets pin to 0V – LED on digitalWrite(LED1Pin, LOW); (0 and 1 can also be used to assign low and high respectively)
Class Quiz • Use the digitalWrite() function to do the following: • Set the pin LED1Pin to 5V • Set the pin Buzzer1Pin to a logical low • Set the pin LED3Pin to High • Turn on the LED at LED2Pin (the LED is in a sinking arrangement as shown earlier)
Class Challenge • Write a full sketch to alternately flash two LEDs (like a railway crossing) • LED flash period should be 1.5 seconds • LEDs on pins 10 and 12 • Write: • Pin assignments • Setup Function • Loop function
Summary(What you learnt in this session) • How to interface an LED with an Arduino • What the different pins on the LArduino do • Setting up pins and inputs and outputs • Setting pins high and low