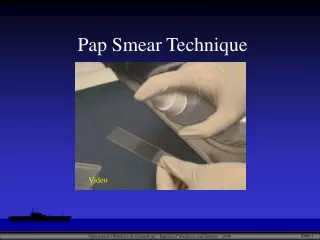
KATO THICK SMEAR TECHNIQUE
KATO THICK SMEAR TECHNIQUE. In 1954, Kato and Miura were the first tointroduce a new method, the “ cellophanethick -smear technique” which involved a principle of direct fecal sampling (Kato and Miura,1954).


KATO THICK SMEAR TECHNIQUE
E N D
Presentation Transcript
In 1954, Kato and Miura were the first tointroduce a new method, the “cellophanethick-smear technique” which involved a principle of direct fecal sampling (Kato and Miura,1954). • It is different from the standard directsmear procedure in that a larger amount offecal sample is employed and cellophanestrips are used as cover slips instead of glass.After further refinement, the Kato thick smeartechnique, was adopted in control programsin Japan (Kato, 1960). • A quantitative study of helminthic infections using the Kato method was initially carried out by Martin and Beaver in 1968 for thedetection of specific helminth eggs.
Advantages &Disadvantages • Advantages • N.B. The ideal time for observing Schistosoma eggs is 24 hrs after preparation except in bright sunlight , the slide will clear rapidly & can be examined. • Ascaris & Trichuris eggs are visible at any time & hookworm eggs are visible 30 min after preparation . • The kato- katz template delivers 41.7 mg of faeces . The number of eggs observed is multiplied by 24 to obtain the number of eggs per gm . of faeces.
Advantages &Disadvantages • Advantages • The aim of this paper is to show the appearanceof the helminth eggs when malachite green is replacedwith a stain comprised of nigrosin and eosin yellow informalin. • Several field studies confirm the simplicity,quality, and cost effectiveness of the proposed modification . • a visual reference of the results of the methodcan be useful to facilitate the recognition of parasite eggs by microscopists willing to adopt this methodology.
Advantages &Disadvantages • Disadvantages • Take time (The Kato-Katz methods require between 1 to 2 hoursbefore the glycerin clears the background of the stoolsmear on the slide for accurate visualization of mosthelminth eggs ) • The major problem of the technique isthat few hours after the preparation of the slidehookworm eggs are difficult to recognize due to overclarification by glycerin .
Materials • Stool samples • Glass slides • Cellophane (25×30 mm) • 50% glycerol • a Piece of paper • Coverslips • Pipettes • Stick • Gloves • Microscope
Preparation Material Use Glass slides and Coverslips with hole
Transfer a small amount of faeces onto a piece of paper. Soak the cellophane strips (25×30 mm) in 50% glycerol malachite green Solution for at least 24 hrs before use.
Press the screen on top of faecal specimen. Using a plastic spatula, scrap across the upper surface of the screen to sieve the faecal sample .
Transfer a small amount of the sieved faecal material into the hole of the template & carefully fill the hole. Level with the applicator stick.
Remove the template carefully so that all the faecal material is left on the slide &none is left sticking to the template.
Cover the faecal sample on the slide with the glycerol-soaked cellophane strip, wipe off excess glycerol with a small piece of toilet paper. Invert the microscope slide & press faecal sample against cellophane on a smooth surface to spread sample evenly .
Volatility on the other destination and then press to spread the sample
Slide ready for Examine Examine under microscope