Fundamentals of Programming in Visual Basic
Fundamentals of Programming in Visual Basic. 3.1 Visual basic Objects Visual Basic programs display a Windows style screen (called a form ) with boxes into which users type an edit information and buttons that they click to initiate actions.


Fundamentals of Programming in Visual Basic
E N D
Presentation Transcript
Fundamentals of Programming in Visual Basic • 3.1 Visual basic Objects • Visual Basic programs display a Windows style screen (called a form) with boxes into which users type an edit information and buttons that they click to initiate actions. • The boxes and buttons are referred to as controls. Form and controls are called objects.
3.2 Invoking Visual basic 6.0 • To invoke Visual Basic, click to the start button, point to programs, point Microsoft Visual basic 6.0, and click on Microsoft Visual basic 6.0 in the final list. • Then should be displayed on the screen the new project Window. • The main part of the Window “New Project”is a dialog box with three tabs – New, Existing and Recent.
3.2 Invoking Visual basic 6.0 • The number of project icons showing are either three ( with the Working Model and Learning Editions) or thirteen (with the Professional and Enterprise Editions) • Double-click the Standard Exe icon to bring up the initial Visual Basic screen.
3.2 Invoking Visual basic 6.0 • The menu bar of the Visual Basic screen displays the commands you use to work with Visual Basic: File, Edit, View, Project, Format, Debug, Run, query, Diagram, Tools, Add-Ins, Window, Help • The large stippled Form window, or form for short, becomes a Windows window when a program is executed. Most the information displayed by the program appears on the form.
3.2 Invoking Visual basic 6.0 • The Form Layout window allows you to position the location of the form at run relative to the entire screen using a small graphical representation of the screen. • The properties windows is used to change how objects look and react. • The icons in the Toolbox represent controls that can be used on the form
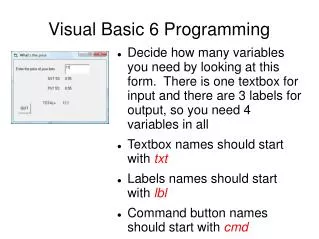
3.2 Invoking Visual basic 6.0 • Text Boxes: You use a text box primarily to get information, referred to as input, from the user • Labels: You place a label to left of a text box to tell the user what type of information to enter into the text box. • Command buttons: The user clicks a command button to initiate an action. • Picture boxes: You use a picture box to display text or graphics output.
3.2 Invoking Visual basic 6.0 • The Toolbar is a collection of icons that carry out standard operations when clicked. For example, the fifth icon, which looks like a diskette, can be used to save the current to a disk. • To reveal the function of a Toolbar icon, position the mouse pointer over the icon for a few seconds.
Building Your First Project • It's traditional when learning to program - in virtually any programming language - to begin with a program called 'Hello', or something similar. This is just a very simple program which prints out a message on the screen - usually "Hello, World!". • click File then New Project • To save the form and save the project. They are saved separately because it may be that you want to use the same form for other projects and it saves you having to design the same thing over again.
Building Your First Project • Click File then Save File As... • Give the form a name, say, hello.frm • Click File then Save Project As... • Give the project a name, say, hello.vbp • Remember to save your project whenever you make changes to it. • Now we are going to alter some of the properties for the form. There are over 40 properties listed and you could, of course, alter all of them. In practice, though, you will soon get to know which are the important ones.
Building Your First Project • Now we are going to alter some of the properties for the form. There are over 40 properties listed and you could, of course, alter all of them. In practice, though, you will soon get to know which are the important ones. Form Name frmHello Caption Hello Height 4000 Left 2500 Top 1600 Width 6000
So that's decided the name, size and position of the form. Note, by the way, that the Name property of the form is not the same as the filename that you choose to give the form when you saved it. If you want to set the background colour of the form then you can do so by clicking in the BackColorproperties box, then clicking on the arrow that appears, and selecting a colour from the palette. • Now we're going to place a command button onto the form. There are two ways to do this: i) double-click the command button icon in the toolbox ii) single-click the command button and then click and drag on the form to create a rectangle
Using the first method, you should have a form looking like this: • Now we are going to set some properties for the command button in a similar way to setting the properties for the form:· • click on the command button to highlight it • note that the properties box now contains a list for the button • check and adjust the properties for the button as follows
Command Button Name cmdDisplay Caption Display Height 495 Left 720 Top 2280 Width 1215 You will notice when you make these changes, that the button now has a caption 'Display' and its position has been changed. We are going to follow the convention of always starting the name of a command button with cmd.
add another command button in the same way and set the properties like this: Command Button Name cmdClear Caption Clear Height 495 Left 2400 Top 2280 Width 1215 • Your form should look like this now:
add a third button with these properties Command Button Name cmdExit Caption Exit Height 495 Left 4080 Top 2280 Width 1215
Now we are going to add another kind of control called a text box. • double-click the button to add the control - your form should look like this:
you should set the text box properties as under: Text Box Name txtMessage Alignment Center Height 495 Left 1680 MultiLine True Top 1320 Width 2655 • We are going to adopt the convention of starting the names of text boxes with txt. It's a little quirky, but if you want to set the set alignment to Center, then we have to set the MultiLine property to True. To make sure that the box has no text in it, you need to click in the Text property box, click the arrow that appears, and then delete any text from the box which pops up.
Finally, we are going to add yet another type of control called a label - it's the one with a letter 'A' on it. • double-click the button to add the label to your form • set the properties as follows Label Name lblMessage Caption Message: Height 255 Left 1680 Top 1080 Width 1215 • So your form now looks like this:
Make sure you save the project - clicking File then Save Project will automatically save the form as well as the project.
To run the project look for the 'start' button on the toolbar - it's a small right-pointing black arrow. • click the start button • clicking some of the buttons on the form • Nothing happens, but this isn't surprising really because all we have done is to design how the form looks and not how it behaves. • When a Visual basic program is run, a form and its controls appear on the screen. Normally nothing happens until the user takes an action, such as clicking a control or pressing the Tab key. Such an action is called an event. • The three steps to creating a Visual Basic program are as follows: • Create the interface; that is, generate, position and size the objects. • Set properties; that is, set relevant properties for the objects • Write the code that executes when the events occur.
The project is still running - this is indicated on the top title bar - and will be until you tell it to stop. • click the stop button • Before we start thinking about the programming code, let's just be clear about what we want the program to do. What is meant to happen when the user presses each of the buttons? • The button labelled Display should result in a message being displayed in the text box. • The button labelled Clear should result in any text in the text box being cleared. • The button labelled Exit should cause the program to stop running.
Check the following: • Click Tools then Options... and under the Editor tab make sure that Require Variable Declaration is ticked • In the same dialog box, and also under the Editor tab, make sure that Default to Full Module View is not ticked And now to the code... • In the Project window, click the View Code icon - if the icon is greyed out, check that the form, frmHello, is highlighted in the window • If you click the arrow in the left hand box at the top you should see something like this:
This is where the code for each of the controls is going to go. You don't have to write code for every control, only the ones where an event is going to occur. An event occurs, for example, when someone clicks a button or a checkbox, or when someone types text into a text box. In other words, an event is when the user does something, or interacts, with your program.
click on cmdExit and type in a line of text so that you have this: This is the code for the Exit button. To be more specific, it's the code for the Click event of the Exit button. Notice that in the right hand box at the top it says Click and if you click the black arrow you'll see a list of other possible events associated with the cmdExit button.
One of the properties of the txtMessage text box is called Text and, if you remember, we deleted any text there so that it was blank. It is possible to alter that property while the program is running and, indeed, that's exactly what we want to do when the user clicks the Display button. So we want the Click event of the Display button to alter the Text property of the text box control. Here's how it goes... • Click the View Code icon and then select cmdDisplay • Type in the code to get this:
The line of code txtMessage.Text = "Hello World!" is the one that sets the Text property of the txtMessage text box to "Hello World!". In other words, it displays your message. • We will now add code to the Clear button whose job is to clear any text from the text box... add the code to the cmdClear Click event:
This time, the code txtMessage.Text = “ "replaces whatever was there - your message - with whatever is between the quotes; in this case, nothing!run the program and check that it works !