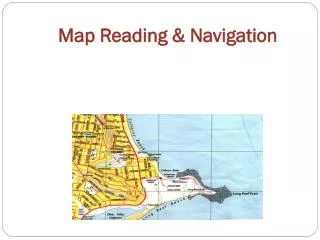
Map Reading & Navigation
Map Reading & Navigation. Aim of Map Reading. To navigate & recognize features on the ground & map. To picture the ground even though it hasn’t been seen. To understand and pass information quickly. Determine and plan a safe route. Definition of a Map….

Map Reading & Navigation
E N D
Presentation Transcript
Aim of Map Reading... • To navigate & recognize features on the ground & map. • To picture the ground even though it hasn’t been seen. • To understand and pass information quickly. • Determine and plan a safe route.
Definition of a Map… • Its a scaled representation of the earths surface shown on a plane surface. • It shows natural and/or artificial features. • Used as a form of communication, used to convey land features. • However, its only accurate at time of aerial photo or field revision.
Types of Maps... • Street directory • Topographic map • Thematic • Scientific
Basic Street Directory Map Edition (year) Legend Facility index Street index Map & reference
Town of Hampton Map • Using the grid reference system; A to J down the sides and 1 to 10 along the bottom • Locate two of each symbol from the legend on the map and record it in your note book. • For example: Cemetery “Grave Duguan Girl 1916” Grid reference G 6 If possible locate your home and reference it.
Marginal Information/Legend • Printed around the margin of the map to aid in using the map. • E.g.. Title, scale, type, legend of symbols, edition & sheet number, adjoining maps, contour interval, magnetic variation, grid reference block,
Conventional Symbols… • Water features • Structures • Boundaries • Road & Rail • Land features
Scale… Scale is expressed in 3 methods. • In words (One cm = One km) • Representative fraction. (RF) 1:25000 E.g 1cm = 25000cm or 250m. TRICK - REMOVE LAST 2 ZEROS TO GET ACTUAL SIZE ON GROUND IN METRES 1:10,000 to 1:100,000 are small scale 1:250,000 to 1:10 million are large scales • Linear scale - scaled ruler. TIP As the second number increases, detail shown on the map decreases
Measuring Distance… • Measuring straight line distance (map) • Paper • Divider • Ruler (side of compass) • Length of string
Map Coordinates Latitude& Longitude • Latitude = Horizontal lines (N or S of equator) • Longitude = Vertical lines • (E or W of Greenwich) • 2 Types • Geographical coordinates given as latitude and longitude • Grid coordinates given as Eastings & Northings
Grid Coordinates • Used to accurately locate/position objects on a map. • Two sets of numbered parallel lines (vertical & horizontal) intersecting at right angles to form squares on a map. • Superimposed over the map to provide a reference system. • Grid squares are generally 1km2. • Grid lines are defined as ‘Eastings’ & ‘Northings.’
TIP Across first, then up Or E before N Cont’… • Northings are the horizontal lines numbered bottom to top. • Read ‘Eastings’ first, then ‘Northings’. Developed by: Dave Bere Eastings are the vertical lines, numbered left to right. 99 00 01 02 03 03 02 01 00 99
4 Figure Area References… Developed by: Dave Bere • The co-ordinates represent the whole square, not just the single point. E.G 1201 - represents 1km2 • Find ‘12 easting’ first. • Find ‘01 northing’ second. 11 12 13 03 02 01 00
GPS… Developed by: Dave Bere • Global Positioning System (satellite based navigation) • Features included: • Your position on the Earth’s surface • Your current height - ASL • Your speed and direction of travel • Lat/Long or UTM • Different world datums • WGS84 • Developed by US Defence system • Uses 24 satellites orbiting the Earth twice a day Signal doesn’t penetrate buildings or thick scrub. Uses triangulation principle to pinpoint location. Minimum of 4 satellites are needed for an accurate 3D position Typical accuracy is within 30m - 95% of the time Interfaces with your PC and mapping software Consult users guide for operating instructions
Ground Shape… • Allows the user to visualise the surroundings • Ground shape is referred to as relief. • Relief can be shown as: • Hill shading & • Contours Developed by: Dave Bere
Contours… Developed by: Dave Bere A contour is a line that joins points of equal elevation Contour interval is the vertical distance between contour lines See legend for contour interval
Contour Patterns… • Contour lines close together show steep slopes • Contour lines far apart show gentle slopes • Contour lines evenly spaced show uniform slope • If the spacing decreases when going from high to low, the slope is convex • If the spacing increases when going from high to low, the slope is concave Developed by: Dave Bere
Land Features… • Representation of height • Bench mark, trig station, spot height • Physical features • Knoll • Saddle • Spur, ridge • Valley, gorge • Escarpment • Re-entrant • Crest • Plateau Developed by: Dave Bere
Gradient… • A method of expressing ground slope. • Gradient = Contour interval (height) Horizontal Distance • 1:10 = 1 unit up or down / 10 units across. • 1:1 is a 450 • Simplify to smallest fraction = 20 = 1 = 1:6 • 120 6 Developed by: Dave Bere
Compass… Developed by: Dave Bere • Degree system - (3600 circle) • North = 0/3600 • South = 1800 • East = 900 • West = 2700 • Cardinal points • 32 in total, • only 16 are really used.
Bearings… Developed by: Dave Bere The purpose of a bearing is to give an accurate indication of direction from one point to another. Simply, a bearing is an angle. It is the angle measured clockwise from a fixed zero line, generally north. • Grid bearings • Used when bearings are taken from or to the map. • Magnetic bearings • Used in conjunction with a compass. This type of bearing is for field operation. • Bearings are measured using a protractor or compass.
North Points… • True north - TN • Earth spins on this axis • Magnetic north - MN • Compass needle points to magnetic north • Its a location in the far north of Canada • Grid north – GN • The vertical lines overlayed on a map point to grid north – (eastings) • Not exactly true north. • Difference between TN & GN is called convergence • In map reading we only use GN & MN Developed by: Dave Bere
Magnetic Variation… • The difference between ‘grid north’ & ‘magnetic north’ is called magnetic variation. • The magnetic north pole is not fixed, it moves continually • Easterly & westerly variation • Check map for accuracy of variation Developed by: Dave Bere
Compasses… • Many types & shapes. • Prismatic, reflective & Silva • Consist of • Magnetised needle • A non ferrous or plastic box • A graduated 3600 circle and • Sometimes an aiming point Developed by: Dave Bere
Parts of a Compass… Developed by: Dave Bere Silva Compass Prismatic Compass
Taking a Grid Bearing… • Using a compass & map. • Place edge of compass along intended bearing. • Direction arrow points the way you want to travel • Turn housing so meridian lines are parallel to easting lines • Read grid bearing where housing and index intersect Note: This bearing must be converted to mag’ bearing if intended for field use. TIP Ignore the needle when using compass as a protractor Developed by: Dave Bere
Magnetic Bearings Developed by: Dave Bere • Setting a Magnetic bearing • Hold compass flat in palm • Set bearing on compass by rotating housing • Turn yourself till red needle lines up with north • Now walk in direction of directional arrow • Taking a Magnetic bearing • Hold compass with directional arrow pointing at intended object/direction • Rotate housing till north aligns with red arrow • Read bearing where index lines intersects
Magnetic Bearings cont… • Compass back bearings • Face the opposite direction, turn compass around & walk with directional arrow pointing towards you. • Or use white needle as directional indicator • Compass Error • Individual compasses • Local magnetic attraction due to steel/iron ore • Transmission lines = 80m • Car = 60m • Wire fence = 10m • Pick, Axe or shovel = 3m TIP The desk you’re sitting at has local magnetic attraction Developed by: Dave Bere
Cross-country Navigation • Factors influencing C-C navigation • Weather, terrain, vegetation, visibility • Team composition, fatigue • Access restrictions, boundaries, route choice • Improvised direction finding • By shadow stick & sun • By the stars • By using a watch & sun • GPS Developed by: Dave Bere
Cross Country Navigation cont… • Distance travelled - pacing & time • Average step is 75cm • Approx’ 650-660 right steps = 1km • Judging distance • Unit of measure (Good up to 400m – Sports fields or swimming pools) • Appearance (Takes a lot of practice – compare with surroundings) • Bracketing (Greater than 200m, Less than 600m) Developed by: Dave Bere • Predicted walking time • 5km/hr easy going • 3km/hr easy scrambling • 1.5km/hr rough country, snow, sand or thick bush • Add 1hr for every 500m up or 1000m down • Every 5 hrs allow an 1hr for fatigue.
Planning….. Developed by: Dave Bere • Route planning – Map study • Essential, you must have a good plan before setting off. • Have an alternate plan & route • Break route down into individual legs. • Each leg should terminate at recognisable objects or within an hour • Consider • Grain of country • Ridges • Rivers • Dense scrub • Access
Map Orientation… Developed by: Dave Bere • A simple way to read a map is to orientate the map to its surroundings. • Using land features • Lay the map on the ground. Rotate map till features on ground align with those on map. • Using a compass (grid) • Determine & set mag’ variation on compass • Align compass edge with ‘N-S’ meridian lines • Rotate map & compass till compass needle is aligned • Using a compass (mag) • Draw mag’ variation lines on map • Set compass to mag’ ‘N’ • Align compass edge with drawn lines • Rotate map & compass till compass needle is aligned • All compass bearings can now be taken directly from the map
Lateral Drift Developed by: Dave Bere Is when you drift away from the given destination, but you remain on the same bearing. The compass alone, is not enough to eliminate lateral drift. Spot a feature (tree, knoll) on the set bearing, walk to that feature, then reassess. Continue until destination is reached.
Avoiding an Obstacle • Used to traverse around cliffs, knolls, swamps etc • Pacing at 900 intervals • Leg 1 and 3 need to be of equal distance Developed by: Dave Bere
Remote Area Section… This section is not pitched at any level of expertise. Everyone should be well prepared before entering the bush. • 6 P’s = prior preparation and planning prevents poor performance. • Learn the area before departing • Have a navigational route planned • Group details • Route details • Intended camp locations • ETD and ETA Developed by: Dave Bere
Navigational Tips - (Generalised) • Sparse & scratchy vegetation along ridges & spurs • Thicker vegetation through gullies & valleys • South facing terrain is thicker vegetation • Slower moving through creek beds • Night navigation - use of lighting and the moon • Pack light, pack right • You’re only as fast as your slowest team member • Continue relating features from the ground to the map • Carry safety equipment & have knowledge of remote first aid • Know your limitations - be mentally & physically prepared Developed by: Dave Bere