DRABCD and CPR
DRABCD and CPR. As we spoke about last week, there is a lot of information to remember when learning First Aid. So, to make it a little easier acronyms are used for some processes. We will be looking at two of those today, they are DRABCD and CPR. Recovery Position.

DRABCD and CPR
E N D
Presentation Transcript
DRABCD and CPR • As we spoke about last week, there is a lot of information to remember when learning First Aid. So, to make it a little easier acronyms are used for some processes. • We will be looking at two of those today, they are DRABCD and CPR.
Recovery Position • When a patient is unconscious they lose their protection reflexes that maintain an open airway…these are the coughing and swallowing reflexes. • Because of this they are put into the recovery position.
Recovery Position continued… • To place a patient into the recovery position • Kneel beside patient • Place arm closest to you across the patient’s chest • Bend the leg closest to you so knee is pointing up • Place arm furthest away from you straight out from the body • Use the bent knee as a lever, and support the head and neck, roll the patient onto their side away from you until the bent knee hits the ground.
DRABCD • DRABCD is the primary assessment performed by the first aider to the patient. • Primary assessment means that it is the first thing that the first aider completes to check the situation of the patient.
DRABCD continued… D = Danger R = Response A = Airway B = Breathing C = Compression or CPR D = Defibrillator
Danger • The first step when arriving on the scene as a first aider is to assess the dangers. • Assessing the dangers does not just mean checking the danger for the patient there are actually two other groups of people that you should assess the dangers for first… • Firstly you need to check the dangers for yourself, and secondly, you need to check the dangers for bystanders as you don’t want more casualties.
Danger continued… • Checking for dangers does not simply mean looking around for obvious signs, for example seeing flames or oncoming traffic. • You also need to listen and smell for dangers. Listening could alert you to something leaking or the sounds of an animal, ie a snake, and smelling will alert you to leaking gas or petrol etc.
Response • Checking for the response of a casualty will allow us to establish the casualty’s conscious state. • A common method for checking for a response is the “Talk and touch” or “Shout and shake”. • This means first see if the casualty responds to questions, ask them what is your name, what happened? Or anything else to see if they respond. • If they don’t respond verbally, then see if they respond to a gentle shake of their shoulders. • If there is no response to a verbal command or movement, the casualty is unconscious.
Airway • The main aim of checking the airway is to ensure that there is nothing lodged that can prevent the casualty from breathing. • The first step is to check the airway by opening the mouth and look for any objects in the mouth. • These objects could include food, blood, vomit, teeth or tongue.
Breathing • While maintaining an open airway by tilting head back and opening mouth you need to ensure that the casualty is breathing. • This is done through look, listen and feel. LOOK: and see if the chest is rising and falling LISTEN: near the nose and mouth to hear breathing FEEL: by putting hands on or near chest to feel rise and fall when breathing
Breathing • When checking for breathing you should check for 10 seconds. • This is because the normal breath rate is 3-4 breaths every 1 seconds. • One gasp does not mean they are breathing regularly, it actually means that the person is close to death. • If breathing put casualty into recovery position, if not already and call 000. • If not breathing, begin CPR
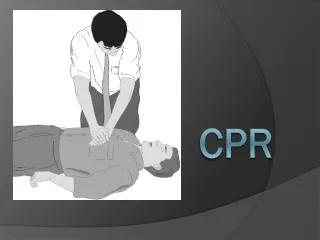
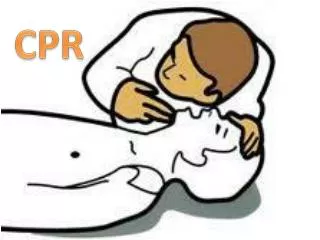
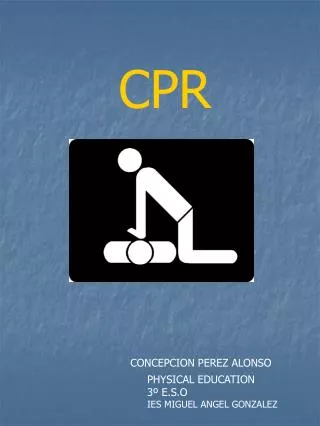
Compression orCPR • If a person is not breathing and CPR begins after longer than 3 minutes, brain damage will begin to occur. • This brain damage occurs at around 5-10% per minute. • It is for this reason that it is important to begin CPR as soon as you establish the casualty is not breathing and call 000 after performing CPR for a couple of minutes.
Compression continued… • Performing CPR… • Tilt head, block nose and open mouth • Perform 2 rescue breaths • Locate the centre of the chest • Perform 30 compressions • Tilt head, block nose and open mouth • Perform to full breaths • Start at step 3 again and keep going
Defibrillation • A defibrillator is an electrical machine that delivers an electric shock to the heart to stop it beating and try and put it back into normal rhythm. • If trained to do so, the next step in DR ABCD is to ask if a defibrillator is available and use it.
Today’s Tasks • Complete accompanying “DRABCD and CPR” worksheet from your workbook. • Practice DRABCD and CPR