CHAPTER OBJECTIVES
CHAPTER OBJECTIVES. Analyze the stress developed in thin-walled pressure vessels Review the stress analysis developed in previous chapters regarding axial load, torsion, bending and shear.

CHAPTER OBJECTIVES
E N D
Presentation Transcript
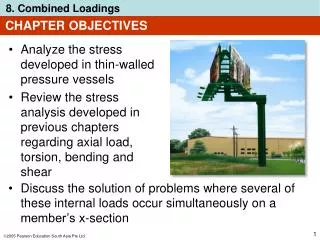
CHAPTER OBJECTIVES • Analyze the stress developed in thin-walled pressure vessels • Review the stress analysis developed in previous chapters regarding axial load, torsion, bending and shear • Discuss the solution of problems where several of these internal loads occur simultaneously on a member’s x-section
CHAPTER OUTLINE • Thin-Walled Pressure Vessels • State of Stress Caused by Combined Loadings
8.1 THIN-WALLED PRESSURE VESSELS • Cylindrical or spherical vessels are commonly used in industry to serve as boilers or tanks • When under pressure, the material which they are made of, is subjected to a loading from all directions • However, we can simplify the analysis provided it has a thin wall • “Thin wall” refers to a vessel having an inner-radius-thickness ratio of 10 or more (r/t ≥ 10) • When r/t = 10, results of a thin-wall analysis will predict a stress approximately 4% less than actual maximum stress in the vessel
8.1 THIN-WALLED PRESSURE VESSELS • Assumption taken before analysis is that the thickness of the pressure vessel is uniform or constant throughout • The pressure in the vessel is understood to be the gauge pressure, since it measures the pressure above atmospheric pressure, which is assumed to exist both inside and outside the vessel’s wall
8.1 THIN-WALLED PRESSURE VESSELS Cylindrical vessels • A gauge pressure p is developed within the vessel by a contained gas or fluid, and assumed to have negligible weight • Due to uniformity of loading, an element of the vessel is subjected to normal stresses 1 in the circumferential or hoop direction and 2 in the longitudinal or axial direction
pr t 1 = 8.1 THIN-WALLED PRESSURE VESSELS Cylindrical vessels • We use the method of sections and apply the equations of force equilibrium to get the magnitudes of the stress components • For equilibrium in the x direction, we require Equation 8-1
pr 2t 2 = 8.1 THIN-WALLED PRESSURE VESSELS Cylindrical vessels • As shown, 2 acts uniformly throughout the wall, and p acts on the section of gas or fluid. Thus for equilibrium in the y direction, we require Equation 8-2
8.1 THIN-WALLED PRESSURE VESSELS Cylindrical vessels • For Eqns 8-1 and 8-2, 1, 2 = normal stress in the hoop and longitudinal directions, respectively. Each is assumed to be constant throughout the wall of the cylinder, and each subjects the material to tension p = internal gauge pressure developed by the contained gas or fluid r = inner radius of the cylinder t = thickness of the wall (r/t≥ 10)
8.1 THIN-WALLED PRESSURE VESSELS Cylindrical vessels • Comparing Eqns 8-1 and 8-2, note that the hoop or circumferential stress is twice as large as the longitudinal or axial stress • When engineers fabricate cylindrical pressure vessels from rolled-form plates, the longitudinal joints must be designed to carry twice as much stress as the circumferential joints
pr 2t 2 = 8.1 THIN-WALLED PRESSURE VESSELS Spherical vessels • The analysis for a spherical pressure vessel can be done in a similar manner • Like the cylinder, equilibrium in the y direction requires Equation 8-3
8.1 THIN-WALLED PRESSURE VESSELS Spherical vessels • Note that Eqn 8-3 is similar to Eqn 8-2. Thus, this stress is the same regardless of the orientation of the hemispheric free-body diagram • An element of material taken from either a cylindrical or spherical pressure vessel is subjected to biaxial stress; normal stress existing in two directions
8.1 THIN-WALLED PRESSURE VESSELS Spherical vessels • The material is also subjected to radial stress, 3. It has a value equal to pressure p at the interior wall and decreases to zero at exterior surface of the vessel • However, we ignore the radial stress component for thin-walled vessels, since the limiting assumption of r/t = 10, results in 3 and 2 being 5 and 10 times higher than maximum radial stress (3)max = p
EXAMPLE 8.1 Cylindrical pressure vessel has an inner diameter of 1.2 m and thickness of 12 mm. Determine the maximum internal pressure it can sustain so that neither its circumferential nor its longitudinal stress component exceeds 140 MPa. Under the same conditions, what is the maximum internal pressure that a similar-size spherical vessel
pr t p(600 mm) 12 mm 1 = ; EXAMPLE 8.1 (SOLN) Cylindrical pressure vessel Maximum stress occurs in the circumferential direction. From Eqn 8-1, we have 140 N/mm2 = p = 2.8 N/mm2 Note that when pressure is reached, from Eqn 8-2, stress in the longitudinal direction will be2 = 0.5(140 MPa) = 70 MPa.
EXAMPLE 8.1 (SOLN) Cylindrical pressure vessel Furthermore, maximum stress in the radial direction occurs on the material at the inner wall of the vessel and is (3)max = p = 2.8 MPa. This value is 50 times smaller than the circumferential stress (140 MPa), and as stated earlier, its effects will be neglected.
pr 2t p(600 mm) 2(12 mm) 2 = ; EXAMPLE 8.1 (SOLN) Spherical pressure vessel Here, the maximum stress occurs in any two perpendicular directions on an element of the vessel. From Eqn 8-3, we have 140 N/mm2 = p = 5.6 N/mm2 Although it is more difficult to fabricate, the spherical pressure vessel will carry twice as much internal pressure as a cylindrical vessel.
8.2 STATE OF STRESS CAUSED BY COMBINED LOADINGS • In previous chapters, we developed methods for determining the stress distributions in a member subjected to internal axial forces, shear forces, bending moments, or torsional moments. • Often, the x-section of a member is subjected to several of these type of loadings simultaneously • We can use the method of superposition to determine the resultant stress distribution caused by the loads
8.2 STATE OF STRESS CAUSED BY COMBINED LOADINGS Application of the method of superposition • The stress distribution due to each loading is determined • These distributions are superimposed to determine the resultant stress distribution Conditions to satisfy • A linear relationship exists between the stress and the loads • Geometry of the member should not undergo significant change when the loads are applied
8.2 STATE OF STRESS CAUSED BY COMBINED LOADINGS • This is necessary to ensure that the stress produced by one load is not related to the stress produced by any other load
8.2 STATE OF STRESS CAUSED BY COMBINED LOADINGS Procedure for analysis Internal loading • Section the member perpendicular to its axis at the pt where the stress is to be determined • Obtain the resultant internal normal and shear force components and the bending and torsional moment components • Force components should act through the centroid of the x-section, and moment components should be computed about centroidal axes, which represent the principal axes of inertia for x-section
8.2 STATE OF STRESS CAUSED BY COMBINED LOADINGS Procedure for analysis Average normal stress • Compute the stress component associated with each internal loading. • For each case, represent the effect either as a distribution of stress acting over the entire x-sectional area, or show the stress on an element of the material located at a specified pt on the x-section
8.2 STATE OF STRESS CAUSED BY COMBINED LOADINGS Procedure for analysis Normal force • Internal normal force is developed by a uniform normal-stress distribution by = P/A Shear force • Internal shear force in member subjected to bending is developed from shear-stress distribution determined from the shear formula,= VQ/It. Special care must be exercised as highlighted in section 7.3.
8.2 STATE OF STRESS CAUSED BY COMBINED LOADINGS Procedure for analysis Bending moment • For straight members, the internal bending moment is developed by a normal-stress distribution that varies linearly from zero at the neutral axis to a maximum at outer boundary of the member. • Stress distribution obtained from flexure formula,= –My/I. • For curved member, stress distribution is nonlinear and determined from = My/[Ae(R – y)]
8.2 STATE OF STRESS CAUSED BY COMBINED LOADINGS Procedure for analysis Torsional moment • For circular shafts and tubes, internal torsional moment is developed by a shear-stress distribution that varies linearly from the central axis of shaft to a maximum at shaft’s outer boundary • Shear-stress distribution is determined from the torsional formula, = T/J. • If member is a closed thin-walled tube, use = T/2Amt
8.2 STATE OF STRESS CAUSED BY COMBINED LOADINGS Procedure for analysis Thin-walled pressure vessels • If vessel is a thin-walled cylinder, internal pressure p will cause a biaxial state of stress in the material such that the hoop or circumferential stress component is 1 = pr/t and longitudinal 2= pr/2t. • If vessel is a thin-walled sphere, then biaxial state of stress is represented by two equivalent components, each having a magnitude of 2= pr/2t
8.2 STATE OF STRESS CAUSED BY COMBINED LOADINGS Procedure for analysis Superposition • Once normal and shear stress components for each loading have been calculated, use the principle of superposition and determine the resultant normal and shear stress components • Represent the results on an element of material located at the pt, or show the results as a distribution of stress acting over the member’s x-sectional area
EXAMPLE 8.2 A force of 15,000 N is applied to the edge of the member shown. Neglect the weight of the member and determine the state of stress at pts B and C.
EXAMPLE 8.2 (SOLN) Internal loadings Member is sectioned through B and C. For equilibrium at section, there must be an axial force of 15,000 N acting through the centroid and a bending moment of 750,000 N·mm about the centroidal or principal axis.
EXAMPLE 8.2 (SOLN) Stress components 1. Normal force Uniform normal-stress distribution due to normal force is shown. = P/A = … = 3.75 MPa 2. Bending moment Normal stress distribution due to bending moment is shown. max = Mc/I = … = 11.25 MPa
15 MPa (100 mm – x) 7.5 MPa x = EXAMPLE 8.2 (SOLN) Superposition If above normal-stress distributions are added algabraically, resultant stress distribution is shown. Although not needed here, the location of the line of zero stress can be determined by proportional triangles, i.e., x = 33.3 mm
EXAMPLE 8.2 (SOLN) Superposition Elements of material at B and C are subjected only to normal or uniaxial stress as shown. Hence B = 7.5 MPa C = 15 MPa
EXAMPLE 8.3 Tank shown has inner radius of 600 mm and a thickness of 12 mm. It is filled to the top with water having a specific weight of st = 78 kN/m3. Determine the state of stress at pt A. Tank is open at the top.
EXAMPLE 8.3 (SOLN) Internal loadings Free-body diagram of section of both the tank and water above pt A is shown. Notice that the weight of the water is supported by the water surface just below the section, not by the walls of the tank. In this vertical direction, the walls simply hold up the weight of the tank. Wst = st Vst = … = 3.56 kN
EXAMPLE 8.3 (SOLN) Internal loadings The stress in the circumferential direction is developed by the water pressure at level A. To obtain this pressure, we use Pascal’s law, which states that the pressure at a pt located at depth z in the water is p = w z. Consequently, pressure on tank at level A is p = w z = (10 kN/m3)(1 m) = 10 kN/m2
EXAMPLE 8.3 (SOLN) Stress components 1. Circumferential stress Applying Eqn 8-1, using inner radius of r = 600 mm, we have 1 = pr/t = … = 500 kPa 2. Longitudinal stress Since weight of tank is supported uniformly by the walls, we have 2 = Wst/Ast = … = 77.9 kPa
EXAMPLE 8.3 (SOLN) Stress components Note that Eqn 8-2, 2 = pr/2t does not apply here, since tank is open at the top and therefore, as stated previously, the water cannot develop a loading on the walls in the longitudinal direction. Pt A is therefore subjected to the biaxial stress as shown.
EXAMPLE 8.5 The solid rod shown has a radius of 0.75 cm. If it is subjected to the loading shown, determine the stress at pt A.
EXAMPLE 8.5 (SOLN) Internal loadings Rod is sectioned through pt A. Using free-body diagram of segment AB, the resultant internal loadings can be determined from the six equations of equilibrium.
EXAMPLE 8.5 (SOLN) Internal loadings The normal force (500 N) and shear force (800 N) must act through the centroid of the x-section and the bending-moment components (8000 N·cm) and 7000 N·cm) are applied about centroidal (principal) axes. In order to better “visualize” the stress distributions due to each of these loadings, we will consider the equal but opposite resultants acting on AC.
EXAMPLE 8.5 (SOLN) Stress components 1. Normal force Normal stress distribution is shown. For pt A, we have A = P/A = … = 2.83 MPa
EXAMPLE 8.5 (SOLN) Stress components 2. Shear force Shear-stress distribution is shown. For pt A, Q is determined from the shaded semicircular area. Using tables provided in textbook, we have Q = y’A’ = … = 0.2813 cm3 A = VQ/It = … = 6.04 MPa
EXAMPLE 8.5 (SOLN) Stress components 3. Bending moments For the 8000 N·cm component, pt A lies on the neutral axis, so the normal stress is A= 0 For the 7000 N·cm component, c = 0.75 cm, so normal stress at pt A, is A= Mc/I = … = 211.26 MPa
EXAMPLE 8.5 (SOLN) Stress components 4. Torsional moment At pt A, A = c = 0.75 cm, thus A = Tc/J = … = 169.01 MPa
EXAMPLE 8.5 (SOLN) Superposition When the above results are superimposed, it is seen that an element of material at pt A is subjected to both normal and shear stress components
CHAPTER REVIEW • A pressure vessel is considered to have a thin wall provided r/t≥ 10. For a thin-walled cylindrical vessel, the circumferential or hoop stress is 1 = pr/t. This stress is twice as great as the longitudinal stress, 2= pr/2t. Thin-walled spherical vessels have the same stress within their walls in all directions so that 1= 2 = pr/2t • Superposition of stress components can be used to determine the normal and shear stress at a pt in a member subjected to a combined loading.
CHAPTER REVIEW • To solve, it is first necessary to determine the resultant axial and shear force and the resultant torsional and bending moment at the section where the pt is located. • Then the stress components are determined due to each of these loadings. The normal and shear-stress resultants are then determined by algebraically adding the normal and shear-stress components.

