
Uploaded by
nelson
0 SLIDES
431 VUES
30LIKES
Introduction to ArcGIS
DESCRIPTION
Introduction to ArcGIS. Class Topics. Welcome and Introduction What is ArcGIS ? What is ArcMap ? Getting around ArcMap Working with Layers Accessing DNR Data Exploring Data Working with Tables Labels, Annotation, and Graphics Building Layouts and Printable Maps.
Download

1 / 0
Télécharger la présentation 
Introduction to ArcGIS
An Image/Link below is provided (as is) to download presentation
Download Policy: Content on the Website is provided to you AS IS for your information and personal use and may not be sold / licensed / shared on other websites without getting consent from its author.
Content is provided to you AS IS for your information and personal use only.
Download presentation by click this link.
While downloading, if for some reason you are not able to download a presentation, the publisher may have deleted the file from their server.
During download, if you can't get a presentation, the file might be deleted by the publisher.
E N D
Presentation Transcript
-
Introduction to ArcGIS
- Class Topics Welcome and Introduction What is ArcGIS? What is ArcMap? Getting around ArcMap Working with Layers Accessing DNR Data Exploring Data Working with Tables Labels, Annotation, and Graphics Building Layouts and Printable Maps
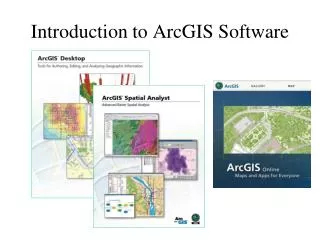
- What is ArcGIS? ArcGIS is a ‘family’ of software products produced by ESRI.
- What is ArcGIS? Licensed at different levels of capabilities ArcView Cheapest, entry level software. Edit shapefiles and Personal GeoDatabases. ArcEditor Mid-range pricing, increased functionality. Supports multi-user Database editing ArcInfo Expensive, full geoprocessing capabilities, designing and build multi-user databases, establish topologic relationships between datasets
- What is ArcGIS - Extensions ArcGIS has “Extensions” that extend the core functionality of the program Spatial Analyst – grid processing 3D Analyst – 3d modeling More… These are the same no matter what level of software licensing you use Can build extensions for ArcGIS with custom functionality for specialized purposes
- What is ArcGIS? Program Modules ArcMap – module for interactive data editing, making maps and analysis. ArcCatalog – module for browsing, accessing, and managing (creating and organizing) data ArcToolBox – an environment for performing geo- processing operations on spatial data
- What is ArcGIS? – ArcMap Interactive Map-Based Tasks Mapping Editing Queries Analysis Printing
- What is ArcGIS? - ArcCatalog Browse your data Preview the data and the table Create, define and manage data and projects Create and view metadata Hint: this is where you can create a shapefile or geodatabase from scratch
- What is ArcGIS - ArcToolBox Geoprocessing commands organized and accessed in ArcToolBox Build custom tools and analysis models using ModelBuilder Share models and tools
- What is ArcGIS? ArcGIS is just one part of a larger line of software available from ESRI, including: Desktop GIS ArcGIS Engine, ArcInfo, ArcEditor, Arcview, ArcReader, ArcGIS Desktop Extensions Server GIS ArcGIS Server, ArcGIS Image Server Mobile GIS ArcGIS Mobile, ArcPad ESRI is the “Microsoft” of GIS…
- What is ArcGIS? Enterprise ArcGIS License agreement between ESRI and Minnesota State Agencies Two types of licenses: Stand-Alone licenses – for field use and sites with limited/no network connectivity Shared license Licenses checked out from central license server Users must be on a network
- What is ArcGIS? Stand-Alone Licensing Users have the ability to Borrow a shared license for stand alone (disconnected) use for up to 30 days at a time.
- What is ArcGIS? Enterprise License Agreement (ELA) includes: ArcMapDesktop software Stand alone Arc/Info licensing Unlimited shared Arc/Info level licensing Extensions Unlimited Spatial, 3D, Geostatistical, Network, ArcPublisher, Mapplex ArcGISServer Products
- Introduction to ArcMap Lesson Overview This lesson covers the core concepts of the ArcMap User Interface (UI) and how to use them to display data ArcMap User Interface components Toolbars and Context Menus Data Frames Layers in ArcMap
- Introduction to ArcMap The ArcMap interface is composed of: Table of Contents – displays legends, selection, and source information for layers Display Area – This is where the map is displayed Data View – displays data (View) Map View – displays map layout (Layout) Status Bar – At the bottom of the display showing status, coordinate information, etc. Toolbars – Organized sets of commands and tools
- Introduction to ArcMap Toolbars (can be moved and docked) Table of contents Display Area Status Bar
- Introduction to ArcMap Commands and buttons for ArcGIS are organized into “Toolbars” Toolbars can be docked or floating and can be turned on and off Lots of toolbars exist – Use the CUSTOMIZE | Toolbars menu option to see toolbars and their display status If you lose a toolbar, look to see if it is checked on in the list
- Introduction to ArcMap Docked Toolbar Floating Toolbar
- Introduction to ArcMap Don’t open too many toolbars at any given time Toolbars can clutter the screen and make things hard to find Can be docked all over Commonly used Toolbars: Standard – standard tools New, Open, Save, Print, etc. Tools - tools for interactive display navigation Draw – tools for working with graphics and text Editor - tools for editing data Layout – tools for working on layouts
- Introduction to ArcMap Standard Toolbar Layout Toolbar Tools Toolbar Draw Toolbar
- Introduction to ArcMap Toolbar Madness: A condition brought on by the inability to find toolbars The ability of Toolbars to be moved around provides a challenge to user support Toolbars can hide behind things and can get pushed off screen People like to move things around to fit their personality or organizational structure Closed – Open – Left/top/bottom/right
- Introduction to ArcMap ArcMap uses “Context Menus” to organize options and commands Context Menus are accessed by clicking the right mouse-button Shows those options that are valid within the context of the item the mouse pointer is over When you right-click on a Layer, only those options valid for layers are displayed Almost every item in ArcGIS has a Context Menu Get into the habit of right-clicking on things you see, you’ll be surprised at what you can find!
- Introduction to ArcMap For instance, the Context Menu for a layer in ArcMap has only those options that relate to what you can do with a layer
- Introduction to ArcMap As we go through this class you will be introduced to some of these toolbars and context menus There are just too many to go through them all – you have to explore The use of Context Menus will be stressed during the exercises and demonstrations
- Introduction to ArcMap In ArcMap work is saved in a file called a Map Document (MXD extension) Create new, open existing, and save documents from the File menu and/or the Standard Toolbar Map documents store references to data but not the data itself
- Introduction to ArcMap Map Documents have a Property Sheet that can be set by the user File | Map Document Properties Used mostly for documentation purposes Good for storing helpful info regarding Map Document Can define how paths are store Absolute (save drive letter) Relative (don’t save drive letter)
- Introduction to ArcMap Data Frames Within the Table of Contents data layers are organized into Data Frames Displays a collection of layers drawn in a particular order for a given map extent and map projection Can have multiple frames but only one can be active Alt-Click to activate Data Frames have their own property sheet
- Introduction to ArcMap Layers: Spatial Data in ArcMap Layers are the graphic representation of spatial data in ArcMap In ArcMap, data displayed in a Data Frame are called LAYERS Layers are generated from vector and raster data sources (and others we’ll talk about later)
- Introduction to ArcMap The Table of Contents (TOC) Layers draw in their TOC order from bottom up As you add data, ArcMap will automatically place rasters on the bottom, followed by polygons, then lines, then points Reorder the layers by selecting and dragging You can show, hide, rename, or remove layers Familiar checkbox for displaying data Multiple Layers can be Grouped Legends can be expanded and contracted The TOC is moveable/dockable
- Introduction to ArcMap TOC Display Options Drawing Order Source Visiblity Selection
- Introduction to ArcMap ArcMap has many tools for navigating and exploring data Most are found on the Tools Toolbar Interactive Zoom-in Interactive Zoom-Out Pan Zoom to Full-Extent Fixed Zoom-in Fixed Zoom-out Previous Extent Next Extent Select Feature Clear Selected Features Select Elements (Graphics) Hyperlink Identify HTML popup Measure Find Find Route Open Time Slider Window Go to XY Create Viewer Window
- Exercise 1 – Introduction to ArcMap Get familiar with the ArcMap Interface Tools, Buttons, Toolbars, Context sensitive help Learn the basic layer navigation tools Zoom, pan, previous, next Table of Contents display Collapse and expand legends
- Introduction to ArcMap Data Frames: displays a collection of layers drawn in a particular order for a given map extent and map projection Create new Data Frames Insert | Data Frame Active Data Frame shows in Display Window Active Frame name is in bold Activate Frames Alt-Click Context Menu - Activate
- Introduction to ArcMap Data Frame Properties The Data Frame property sheet has a number of tabs that contain settings/ properties to define General Tab – used to define general characteristics of data frame Name and Description Map and Display Units Reference Scale (for labels) Rotation (of view) Label Engine
- Introduction to ArcMap The Data Frame Tab Defines the extent and scale of what is to be displayed Extent Automatic Fixed Scale – can’t zoom in or out, only pan Fixed Extent – Can’t pan or zoom Other Data Frame Extent used by Full Extent Command Define your own extent “Clip” to Shape Display data within the extent of an existing layer Great alternative to physically clipping data
- Introduction to ArcMap The Coordinate System Tab Defines the coordinate system of this data frame All data (regardless of native coordinate system) will be projected to this coordinate system before display Normally should be set to NAD83 UTM Zone 15N (MN DNR standard projection)
- Introduction to ArcMap Can manually define the Data Frame coordinate system within the Coordinate Tab OR Get in the habit of adding one of the layers from DNR QuickLayers when you start a new ArcMap document. Data Frame will assume the projection of the first data added to a data frame!
- Introduction to ArcMap Extra: Data Frame So, why is it so important to have the data frame’s coordinate system set? Assuming all the data layers you want to display have projection files (.prj), or you know their native projections and can define them, ArcMap will project the layers on-the-fly. For example, you’ve acquired some data from a county but their data is in a county coordinate system…ArcMap can recognize this and will project the county data on top of ours.
- Introduction to ArcMap Grids Grids are drawn around Map Frames on a Layout for referencing purposes Three types of grids Reference (Indexing) Graticules (Lat/Long) Measured (Map Units - UTM)
- Introduction to ArcMap Frames Frames are used to put borders around data Frames on a Layout Border Styles Background Fills Drop Shadows
- Introduction to ArcMap Extent Indicators Point out where other Data Frames are Normally used in Locator maps Shows project areas in context within larger geographic areas “Main Map” Data Frame Extent
- Working with Layers Layers Form the basis for work in ArcMap Layers come in a variety of forms Feature Layers – Vector Raster Layers – Raster Datasets (images and grids) ArcMap can work with numerous data types GeodatabasesShapefiles Arc/Info Coverages Web Mapping Services Many image formats
- Working with Layers To add Layers From ArcMap (manually): Add Data button File | Add Data menu option Context menu on the Table of Contents or on the display window From QuickLayers You can also Add Data from ArcCatalog by dragging and dropping… Click this to open ArcCatalog window
- Working with Layers Connect to a folder The Add Data dialog box Has the Windows Explorer look and feel Shows “Connected Folders” If you don’t see a folder, you need to click on Connect to a folder button and “connect” the folder you want Only shows geographic data - Vector and Raster Uses icons to indicate data type (Raster, Poly, Point, Line) Slow when searching folders with lots of data
- Working with Layers Add Data dialog box – Hints: Use the “Connect to Folder” option for places you navigate to often You can disconnect the connection Folder and data are not deleted! Try to avoid browsing with this window– can be slow Use Connect to Folder instead
- Working with Layers Icons are used to identify different data types Polygons Points Rasters Lines Tables
- Working with Layers Drag a Layerfrom ArcCatalogWindows to Table of Contents
- Working with Layers Layers in the TOC: Legends can be collapsed and expanded CTRL-Click expands or collapsed all layer legends Layers can be moved up and down the TOC Layers can be copied, pasted and removed
- Working with Layers Layers can be merged into Group Layers
- Working with Layers The Layer Context Menu Copy and remove layers Open a layer’s attribute table Join and Link (relate) tables Zoom to the active layer Zoom to Make the layer visible Set the visible scale range Work with Feature Selections Label features Convert Labels to Annotation Convert Features to Graphics Export and manage Data (Convert to Shapefile) Save as a layer file Set Layer Properties
- Working with Layers Layer Properties In ArcGIS Layers have a number of properties that you can define Access Properties by: Double-clicking the layer of interest, or Right-click and then select Properties The General Tab contains basic information including the name and visible scale range
- Working with Layers The Source Tab Shows you the base data location and allows you to change it if needed If you see a red exclamation point next to a layer in Data Frame, this is where you can fix the problem. Also displays data extent
- Working with Layers The Selection Tab Each layer can now have its own selection color or symbol Default is to outline the feature in Aqua Helpful in differentiating between selected features from multiple layers
- Working with Layers The Display Tab Allows you to control the way the layer is displayed MapTips show attribute values when you hover the mouse over a feature Control Layer transparency Setup Hyperlinks Exclude certain features from displaying
- Working with Layers The Symbology Tab Define legend symbology Fiddle factor is quite high Can import legends from ArcView 3.x
- Working with Layers In ArcMap there are tons of predefined symbology Select one or create your own Change the fill color Outline color More Symbols available The Symbol Selector is used for all symbol operations Defining Symbology Easy to create custom symbols Symbol Manager is extensive…
- Working with Layers Legends Single Symbol Categories Unique Values Quantities Used primarily on numeric fields
- Working with Layers Category Legends Select the Value field Use the Add All Values button to add all unique values to the legend Use Add Values button to add selected values to the legend Select a color scheme, or Select each color patch individually, or Select multiple symbols by holding down [Shift] or [Ctrl] Usually you want to turn off <all other values>
- Working with Layers Styles ArcMap has very strong legend and symbolization capabilities for Raster and Feature Themes Many more canned symbols and colors available contained in Styles A style is a theme based collection of colors and symbols that help enable consistent cartography
- Working with Layers Styles – click on Style References in the layer symbol selector
- Working with Layers The Fields Tab This property allows you to view the layers fields and their definitions Set the primary display field used for MapTips Set aliases Make visible or invisible Set the display format of numeric field data
- Working with Layers Definition Query Tab Set a query to define which features will be accessible/visible Uses a Query Builder (SQL - Structured Query Builder Language) <Field_name> <Operator> <Value or String>
- Working with Layers The Labels Tab ArcMap has a robust labeling environment Specify the label parameters here Lots of options, ways of placing labels Labels are dynamic redrawn every time you zoom or pan You cannot move labels - ArcMap decides where all the labels are placed…
- Working with Layers The Joins & Relates Tab Join tables and define relationships between them
- Working with Layers Image Layer Properties Control how Raster layers are displayed Includes air photos, scanned maps and raster data sets No labeling option Tabs vary based on the data source Most tab content is the same Will not see this if not working with raster data
- ArcMap – Working with Layers Can spend much time defining layer properties Labels, symbols, definitions etc. Layer Properties can be saved as a layer file and shared with other users(i.e. Quick Layers) .lyr extension Contains all of the instructions to reconstitute this layer Does not store data – only the definitions
- Exercise 2 – Working with Layers Create Data Frames and set properties Add Layers and set Layer Properties Create a Layer legend Set a Layer’s label properties Create a Layer file
- Accessing DNR Data The DNR’s GIS data is stored in a structured fashion called a Geospatial Data Resource Site (GDRS) ArcMap users can access all DNR GIS data through DNR QuickLayers. Landview users can access same data catalog when swapping in layers
- Accessing DNR Data The goal of QuickLayers is a single portal to DNR GIS data. ArcMap users should never have to hunt around for DNR data. DNR QuickLayers: Organize content by thematic class Provide metadata and status maps Achieve a standard look “right out of the starting gate” – most data is classified, labeled, and symbolized Access to Landview to quickly search/locate a place, then bounce back to that place in ArcMap
- Accessing DNR Data Quick Layers for ArcMap is accessible from Customize | Toolbars Turn on the toolbar using the checkbox
- Accessing DNR Data Quick Layers toolbar appears You can dock the toolbar
- Accessing DNR Data Topic Categories: MNDNR Basic– organized by thematic class <USERNAME> Custom Allows you to create your own category/layer structure Use Copy/Paste buttons to copy layers from main catalog into your custom catalog
- Accessing DNR Data Show metadata window Add selected data Data Source Updater Copy Paste Delete Insert Layer File Insert New Folder Edit Selected Folder Report Bug
- Accessing DNR Data View Metadata for Layers by expanding the QuickLayers window Links to the full metadata record Press the expand button to show or hide the metadata
- Accessing DNR Data Thematic Categories are represented as folders Each folder contains a number of Layers Layers are represented with a blue icon Double click layer to add it to ArcMap or use the add data button on right
- Accessing DNR Data To Create a Category Insert New Folder Give new folder a name
- Accessing DNR Data To Insert New Layer Create new Layer button
- Accessing DNR Data Can copy and paste from DRS Layers into Custom Layers: Use the Copy and Paste Layers tool, or … Context menu!
- Accessing DNR Data Change or add GDRS locations This is where QuickLayers will look for data Great for field work Prioritize GDRS Locations
- Accessing DNR Data Data source Updater For updating 9.3x (DRS) Map Document data sources to ArcMap 10 (GDRS) Automatically redirects your data sources for you
- Accessing DNR Data QuickLayers Bug Reporter
- Exercise 3 – Using Quick Layers Add the Quick Layers Toolbar Add Layers to ArcMap Group Layers Customize Quick Layers
- Exploring Your Data ArcGIS has many data exploration tools Some are familiar Identity Find (binoculars) Select by Attributes (Attribute Query) Select by Location (Spatial Query Spatial Bookmarks Viewer Windows Overview Window Magnifier
- Exploring Your Data ArcGISdoesn’t have Active Themes Tool result windows control what information shows E.g. Find & Identify Tool, You need to specify a layer, layers to retrieve information on. Selections are controlled via selectable layers You can have many layers selectable at one time.
- Exploring Your Data Identify Tool Lists the full attribute record of and feature you click on with the tool
- Exploring Your data User specifies which layers should participate Top-most layer Visible Layers Selectable Layers All Layers Individual layers are listed below…
- Exploring Your Data Don’t forget about Context menus! Flash Feature Zoom to Feature Select Feature Create Bookmark Open Entire Attribute Table
- Exploring Your Data The Find Tool Used to locate features using a text string Like the INFO tool, you can search All Layers Selectable Layers One layer by name Can restrict to certain fields
- Exploring Your Data The Find Tool All features found will be listed in the search window At this point right-click to bring up the context menu and: Flash Feature Zoom to feature Identify feature Set a bookmark Select the feature Unselect the feature
- Exploring Your Data The Select Feature Tool Use to interactively select features Select features to create layers from, run tool processes on, highlight, etc.. Uses Selectable Layer listing Features are identified in selection colors (default is aqua blue)
- Exploring Your Data Selection Menu Select by Attributes Select by Location Select by Graphics Zoom and pan to selected features Generate Statistics about selected features Interactive Selection Method Create New Selection Add to Current Selection Remove from Current Selection Select from Current Selection
- Exploring Your Data Queries Used to search for data based on specific sets of conditions Attribute – performed on attributes Spatial – performed on spatial location relative to other features
- Exploring Your Data Selection Menu Select by Attributes You are querying the attribute table Show me all wildfires over 500 acres
- Exploring Your Data Selection Menu Select by Location You are querying the data based on its spatial location Show me all wildfires in Hubbard County Hint: You can add to selections (Show me all the wildfires over 500 acres…..in Hubbard County!)
- Exploring Your Data Selected Feature Statistics Linked to feature selection As selection changes, so do statistics
- Exploring Your Data Selectable Layers Defined in TOC Default = Everything is selectable Having every layer selectable can be messy and slow Click selection icon to toggle selectable
- Exploring Your Data Selection options Use these to help control selection tool behavior Selection color Selection tolerance Interactive selection characteristics
- Exploring Your Data Can save the selected set of records to a new layer or shapefile Layer Context Menu Data –Export Data... Save All Features or selected features
- Exploring Your Data ArcGIS has several cool tools for exploring your data: Spatial Bookmarks – a bookmark that is tied to coordinates rather than a URL New Viewer Window – Open additional display window at user defined extent and scale Overview Window – a window that allows you to view where you are zoomed into (like a locator map) Magnifier – a window that magnifies the area under the cursor without having to actually zoom in
- Exploring Your Data Spatial Bookmarks keep track of where you’ve been – and want to go back to Create, Name, Edit and Zoom-To bookmarks Like a web bookmark, only location in nature Zoom to a place of interest and then use Bookmarks | create option
- Exploring Your Data Overview window: use the Window |Overview menu option Red outline indicates where you are Uses the bottom layer in TOC for background so can be a little flaky
- Exploring Your data Magnifier Window Toggle between Magnifier and Viewer windows by right-clicking the triangle Viewer option shows a snapshot - can move a Viewer window the Viewer image stays the same
- Exercise 4 – Exploring Your Data Using the Find tool Creating and using Bookmarks Creating an Overview window Using the Magnifier window Using the Identify tool Using the Select tool
- Working with Tables All Feature datasets have attribute tables Every feature you see has an associated attribute record in a table Open a table by right-clicking on the layer of interest and selecting the Open Attribute Table option
- Working with Tables Name of active table Fields and field names # of records selected Show all or selected records
- Working with Tables Select records with the mouse pointer along the left edge (on grey boxes) Active table. Other opened tables show as greyed-out tabs
- Working with Tables Related Tables Select by Attributes Table Options Switch Selection Clear Selection Zoom to Selected Delete Selected
- Working with Tables Display Tips: To hide a column, drag the right edge of the column to the left To make it visible again, double-click on the bold column edge, or go to Options | Restore Default Column Widths Double clicking any column edge will restore the default width
- Working with Tables Options Button Find and replace values Attribute Query Clear selected records Switch selection Select all records Add a field to the table Arrange table windows Turn All Fields On Restore Default Column Widths Related Tables tasks Create a graph Add a table to a layout Print Reports Export Table Set appearance of table
- Working with Tables Field Context Menu: Sort fields ascending or descending Summarize Fields New table created Generate Statistics No table created Calculate field Values Calculate Geometry Freeze/Unfreeze Column Holds column in display while scrolling Delete Field – yes delete field! Properties..
- Working with Tables Adding new fields: Specify Field Name Specify Field Type Short Integer – Up to 4 digits Long Integer - Up to 9 digits (Use Double for longer than 9 digits integer) Float - 7 significant digits (use for field calculations) Double - 15 significant digits (use for field calculations) Text Date Blob – Binary Large Object GUID For numeric fields Precision = length of field Scale = number of places to the right of the decimal Note: Add/Delete New field outside of an edit session
- Working with Tables To calculate distance/ area: Add a new field to the layer’s attribute table (float or double) Right-click on field name and choose Calculate Geometry Select type and units of calculation preferred Click OK to appending table without being in edit mode Field will be calculated
- Working with Tables Must repeat calculation once features are edited Calculations can be performed on all or selected records (get into the habit of calculating all . . . ) Process works for other desired calculations
- Working with Tables Retrieving “Snapshots” of attribute data: Statistics for numerical fields
- Working with Tables Want an easier way to update general calculations for shapefiles? Use ArcToolbox! DNRtoolbox has General tools | Calculate area/perimeter/length Double-click the tool, then drag a layer from TOC into dialog (or click browse folder)
- Working with Tables Summarize for text/date fields and to create synopses of large data sets Decide which field to summarize, and by what Adds a summary table to your TOC (i.e. Cause of fire by total acres)
- Working with Tables Graphs easily changed Incorporate into layouts and other applications
- Working with Tables New table placed in Source tab of TOC Opening new table shows synopsis Use summary tables to create graphs
- Exercise 5 - Working with Tables Sorting/resizing Statistics Selecting records Select by attribute (querying) Graphing Calculating geometry
- Labels, Annotation and Graphics ArcMap has powerful map graphic tools Placement of text, symbols and graphics is much improved – but there is much more to learn Need to know how these are applied in ArcMap to become proficient with them First, some terminology…
- Labels, Annotations and Graphics Labels: text that displays some field of an attribute table dynamically As you pan and zoom they are regenerated Labels are placed based on layer properties you cannot modify a single label Label placement properties travel with a layer file Linked to a feature If a features attribute value changes, so does the label You can set certain restriction of where to place labels, but overall, ArcMap DECIDES where labels are placed
- Labels, Annotation and Graphics Annotation: storing text as graphics Often converted from the existing labels, but can create a new ones Can manually change the properties for each label Once placed, they don’t move unless you move them Two storage options In you map document as map document annotation Best option if not much text and text used in one map In a geodatabase as geodatabase annotation Stored in special types of feature classes inside the geodatabase – good for text used in multiple maps Best option if text is numerous
- Labels, Annotation and Graphics Labels Dynamically placed by ArcMap – no moving them Managed as a group Created for features in the Data View Linked to features For on-screen viewing or creating map books Save in a map document Annotation Static Managed individually May or may not be linked to feature Use to create high quality map output Save in a map document or geodatabase
- Labels, Annotation and Graphics Accessing Label Properties Layer Properties Individual layer properties Label Manager Icon on Labeling Toolbar Display and set all labeling properties for Layers in the Data Frame
- Labels, Annotation and Graphics The Labeling Toolbar Label Priority Ranking Label Weight Ranking Label Manager Lock Labels View Unplaced Labels Pause Labeling
- Labels, Annotation and Graphics Setting Label Properties Numerous methods for controlling label drawing behavior/conflict detection Label Priority Defines the hierarchy for drawing order of labels between layers Specify if labels overlap features
- Labels, Annotation and Graphics Label Weight Ranking Used to assign relative importance to labels and features. Only used when there is a conflict such as an overlap between a label and feature. By Default, features have a feature weight of None for label classes
- Labels, Annotation and Graphics Point Label Placement Predefined placement scheme Many schemes available Custom placement options Locations Angles Duplicate Labels options
- Labels, Annotation and Graphics Predefined point label placement schemes Place labels in one of eight standard positions 0 = off limits 1 = preferred placement 2 = medium 3 = lowest
- Labels, Annotation and Graphics Line label placement Orientation Horizontal = always placed atop line at a best fit location Parallel = straight and placed parallel to direction of feature Curved = follows orientation of the line at a best fit location Perpendicular = straight but perpendicular Position Above Line, On the line, or Below, Orientation and Offset Location – Start point of a line Duplicate Labels
- Labels, Annotation and Graphics Polygon label placement Placement options: Horizontal (try first) Straight Only place inside polygon Duplicate labels
- Labels, Annotation and Graphics Label visibility Controls label drawing at various scales If not defined, label visibility defined by layer visibility Labels are displayed between these scales
- Labels, Annotation and Graphics Locking Labels Locks size and position of labels in the current extent How? Label Toolbar | Lock Labels button Why? Redraws faster because label placement is not calculated No label movement when zooming in or out (remember that labels are placed dynamically) Labels are only created in the View extent
- Labels, Annotation and Graphics Converting Labels to Annotation Automatic Placement doesn’t always work When individual labels need to be moved or have individual properties Annotation is choice for high quality maps where label placement is critical (“fine –tuning”) Automatically place labels, then convert to Annotation and adjust what you need to
- Labels, Annotation and Graphics Converting Labels Store annotation In a database In the map Create Annotation All Features Features in Current Extent Selected Features Unplaced Labels By default, unplaced labels are not converted to the annotations.
- Labels, Annotation and Graphics Control Annotation in the Data Frame Properties Convert to map document annotation: Where to store? All features or Features in current extent? Name the annotation group or take the default Click “Convert”
- Labels, Annotation and Graphics Annotation converted to geodatabase Locate or create a geodatabase to store geodatabase annotation To Create a File Geodatabase: Start ArcCatalog Create a file geodatabase and name it (gets a .GDB extension) in ArcCatalog Right-click Layer name and choose Convert to Annotation in ArcMap’s TOC.
- Labels, Annotation and Graphics Geodatabases are: A file type in ArcGIS Collection of geographic datasets of various types all under one folder such as Tables Feature Classes (points, lines, polygons, annotations, dimension, multi-patches, multi-points) Raster datasets Non-spatial data
- Labels, Annotation and Graphics Several types of geodatabases: File Geodatabases= stored as folders in a file system. Each dataset is held as a file that can scale up to 1 TB in size. Recommended over personal geodatabases. Personal Geodatabases= all datasets are stored within a Microsoft Access data file, limited to 2 GB. ArcSDEGeodatabases= stored in a relational database using Oracle, Microsoft SQL Server, IBM DB2, or IBM Informix. These multi-user geodatabases require use of ArcSDE. Unlimited in size and numbers of users.
- Labels, Annotation and Graphics More information about geodatabases in ArcMap Help system (type “overview of geodatabase”)
- Labels, Annotation and Graphics Once annotation is created, it can be edited Use Select Element tool, double-click text to edit
- Labels, Annotation and Graphics Graphics = shapes you draw on Data or Layout View(s) using the tools in the Drawing tool bar: Not spatial data Can be cut/copied/pasted to and from ArcGIS Like graphics in most windows programs: Nudged Aligned Distributed Flipped Can place text using the Text tool
- Labels, Annotation and Graphics Many of similar operations used to create spatial data (shapefiles, geodatabases) may apply: Union Intersect Remove Overlap (aka Erase) Subtract Like annotation, silimartools and principles may apply
- Labels, Annotation and Graphics To create graphics: Draw graphic using the drop-down Drawing button of tools Use Text tool for text graphic Use Select Elements tool to move, resize, otherwise edit the graphic If drawing a freehand line or polygon, use edit line or polygon buttons to show vertices and move/add/delete them
- Exercise 6 – Labels, Annotation, and Graphics Labeling Setting a scale range Create a labeling expression Changing label symbology Converting labels to annotation Selecting elements Editing elements Challenge – Geodatabase annotation
- Working with Layouts ArcMap has two presentations: Data View = ad-hoc data exploration Equivalent to a View document in ArcView 3 Can have multiple data frames within the Data View Layout View = map creation Equivalent to a Layout document in ArcView 3 Unlike ArcView 3, can’t have multiple Layouts (but can have different Data Frames you drag in and out of the paper margins) Switch Views using the buttons on the lower part of the view window; otherwise use View: Data View/Layout View
- Working with Layouts Layout View: A piece of paper with Data Frames Two Data Frames
- Working with Layouts Setting Page characteristics: File | Page and Print Setup option
- Working with Layouts Layout View has two navigation toolbars: One for the map (Tools tool bar) – work on a data frame: One for the data (Layout tool bar) – works on a page You can zoom and pan data in the layout to get it positioned just right A great feature - allows fine-tuning the Data View placement on the map
- Working with Layouts These work on the Data Frame, not the page These work on the Page, not on the data
- Working with Layouts Cartographic Elements Inserted into the Layout View using Insert | menu In ArcView these were tools and in a menu . . . Titles Text Neatlines Legends North Arrows Scale Bars – Graphic Scale Bars Scale Text – 1:24,000 Pictures – bitmap, jpeg, gif, etc.. Objects – (Word Documents, Excel Spreadsheets)
- Working with Layouts Cartographic Elements Inserted Cartographic Elements are placed in map center Move/resize it to be where you want Text when placed can be hard to see!
- Working with Layouts All elements placed have properties (right-click with a select element tool) Use Select Elements tool to select, resize, or move objects Delete using [del] key Double-clicking or right clicking on the objects to access their properties
- Working with Layouts Graphic Element Context Menu Many familiar options related to graphic operations Use for the cartographic elements that are selected light blue)
- Working with Layouts Legends have myriad options, and they can be edited after they are created
- Working with Layouts Legend Properties to change: Title Symbology Spacing Frames, backgrounds Items to include Columns Classes Patch/label order Grouping Double click legend to change any property
- Working with Layouts Want to change what shows up in the legend? Go to Layer Properties
- Working with Layouts but can also change how classes are displayed in Legend Properties using Style button
- Working with Layouts Printing Layouts Just like other programs: FILE | Print Print button Print Preview option PDF - For quick portable, scaleable, “GIS-like” maps where layers can be turned on and off, choose Export Map | Save as PDF
- Exercise 7 – Building a Basic Layout Printer and page setup Inserting map elements Creating a legend Adding additional Data Frames Navigating in the Data View and the Layout View Exporting maps


More Related
Audio
Live Player