Download
1 / 16
160 likes | 286 Vues
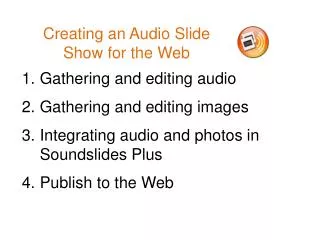
Creating an Audio Slide Show for the Web. Gathering and editing audio Gathering and editing images Integrating audio and photos in Soundslides Plus Publish to the Web. Audio. Good audio is the basis of multimedia. Audio. WHAT YOU NEED TO GATHER AUDIO:

E N D
Creating an Audio Slide Show for the Web Gathering and editing audio Gathering and editing images Integrating audio and photos in Soundslides Plus Publish to the Web
Audio Good audio is the basis of multimedia.
Audio WHAT YOU NEED TO GATHER AUDIO: Digital recorder (that saves as .wav, .wma or .mp3 format) Headphones Microphone Cables Backup batteries Audio converter software (if your recorder doesn’t save as .mp3)
Getting Started with Recorder 1. Turn it on. 2. Find record, stop, playback, files etc. 3. Plug in headphones and microphone. 4. Press record. 5. Listening on your headphones. 6. Start talking. Listen for sound quality. Reposition mic.
Tips for Interviewing Find a quiet place. Encourage the subject to answer in complete sentences by keeping your questions short and open ended. Avoid “yes” or “no” questions.
Tips for Interviewing Do not move your hand or shake the device. Do not say “uh huh” or talk while you interview. Listen. Maintain eye contact. Listen. Nod. Get an ID: Name, age, occupation, location.
Collect Other Sound Ambient Sound The background sound of the room. Turn on your recorder and let it run for 3 minutes. Use it to layer under your interview later.
Collect Other Sound Sound Effects Car doors slamming. Eggs frying. Dogs barking. Birds chirping. Gavel pounding. Dentist drilling. Etc.
Editing Audio Audio Editing Programs GarageBand (for Macs) Audacity (for PCs and Macs) – Free download
Editing Audio Common Types of Audio Files You Should Be Able to Recognize .wma (windows media audio) .wav (uncompressed windows file) .mp3 (most universal audio format – the Soundslides format) .aiff (Mac and standard podcasting format)
Editing Audio 1. Plug your recorder into the USB. 2. Drag your audio file(s) onto your desktop. 3. Make a copy. 4. Edit the copy, NOT the original.
Editing Audio Switch Audio Converter A free download Works on both Macs and PC Available in Boz 134 Go>Applications>Switch
Editing Audio Switch Audio Converter Go>Applications>Switch Drag file in. 3. Set Output to .aiff for Garageband or .wav for Audacity. 4. Hit “Convert” button
Editing Audio Edit your audio to desired length Cut out the your questions, “ums,” weird noises, etc. Save and Export as .mp3 Share>Export Song to Disk. Save as .mp3 in “High Quality.”
Photos Make a lot of photos: 100+ You need 1 image for every five seconds of edited audio. (i.e. 90 sec of audio = 18 images) Wide, medium, close-ups. Action. Surroundings. People.
Preparing Photos Select only the photos you want to use Crop Rotate Make color corrections Make sure they are saved as .jpg “High Quality” Put them in a folder