Download
1 / 66
750 likes | 1.78k Vues
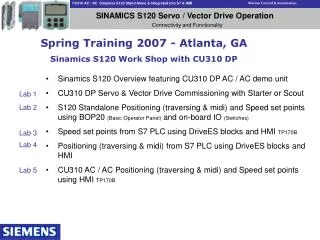
EZ Positioning with SINAMICS S120 Agenda. Starter Basic Sinamics Drive Setup Insert Drive (CU310 or CU320) Auto Configure CU and Drive-CLIQ Devices Starter Offline Configuration Drive Configuration Wizard Telegram Setup for EZ _Speed Block Check S7 Hardware Configuration

E N D
Starter Basic Sinamics Drive Setup Insert Drive (CU310 or CU320) Auto Configure CU and Drive-CLIQ Devices Starter Offline Configuration Drive Configuration Wizard Telegram Setup for EZ _Speed Block Check S7 Hardware Configuration Execute EZ_Speed Script File Copy from Example Project Execute and Save Project Download to Sinamics Step7 Simatic Manager Programming Copy Needed blocks to new Program Setup FB120 in new Program Edit Symbol Table Save and Download S7 Project Test EZ Speed Application on Demo Run through all Testing with S7 PLC and S120 Demo Sinamics EZ EPOS Agenda
Open S7 and Select File / New Select new Name for Project and Press OK Start New Project with S7 Simatic Manager
Right Click on New Project and insert new Object Choose Simatic 300 Station New Station inserted --Note Hardware Icon Insert S7 300 Simatic Station
Start Hardware Configuration Click on Hardware Icon and Open HW Configuration • Open Hardware Catalogue • Insert S7 300 Rack, Power Supply, and CPU
Add Sinamics S120 in Hardware Configuration Drag the drive on to the Profibus Network • Choose Node Address 4 • Select Present Firmware Version (2.5) • Choose Telegram Type None
Save and Close Hardware Configuration Press Save an Compile Button • Hardware Configuration should Save and Compile • Correct any errors if they occur Exit the Hardware Configuration • HW Config must not be Open for Next Section!
EZ Speed with SINAMICS S120Basic Starter Online Commissioning
Open Starter by Motor Icon for Sinamics Open Starter Program & Go Online • Go Online with Starter –Use • Do not Upload to the PG!
Right Click On CU310 (or CU320) and Choose… Target Device / Restore Factory Settings Default CU310 or CU320 • Check the Box – Save Factory Settings to ROM • Power Cycle Drive after RAM to ROM Completed
Complete Auto Configuration • Select Auto Configuration and Start Auto Configuration • Choose Control type for Motor type • Close after Initialization
Starter Offline Configuration Go Offline with the Sinamics Select Configuration under the Device Folders • This Configuration is under the Drive Object Used • Click On Configure DDS to Parameterize Drive Settings
EZ Speed with SINAMICS S120Basic Starter Offline Commissioning
Open Starter by Motor Icon for Sinamics Open Starter Program & Go Offline Go Offline with Starter –Use
From the Drive to be Commissioned Choose… Configuration Open DDS (Drive Data Set) • Choose Configure DDS… • Offline Configuration Wizard is Opened
Control Structure Setup Vector • Select Speed Control with Encoder • Use Function Modules when Needed** • **For the Servo Extended Setpoint Channel is needed • Next, Select Continue
Control Structure Setup - Servo • Select Speed Control with Encoder • Use Function Modules when Needed** • **For the Servo Extended Setpoint Channel is needed • Next, Select Continue
Power Unit Configuration Power Unit Data Up-read in Auto Configuration (Drive-CLIQ) • Confirm Device type is Correct via Part label • Select Continue for next Configuration Screen
Motor Configuration Motor Data Up-read in Auto Configuration (Drive-CLIQ) ** • **If Motor is a Drive-CLIQ Motor • Non Drive-CLIQ Motors can be Selected from List • Third Party Motors can have data entered
Motor Configuration For Third Party Motors Select Complete Motor ID • Motor ID will be Completed on First Start Command • Motor may rotate back and forth slightly on Demo • Insure motor is braked for actual application if needed
Holding Brake Configuration Motor Data Up-read in Auto Configuration (Drive-CLIQ) ** • **If Motor is a Drive-CLIQ Motor • Non Drive-CLIQ Motors Check Motor Name Plate • DEMO drives do not Use Holding Brakes
Encoder Configuration Choose Encoder Data for Non Drive – CLIQ Encoder • Siemens and Third Party Encoders can be Parameterized • Choose 1024 HTL for the DEMO Induction Motor • Note Encoder 1 is from Motor Encoder
Technology Type Choose Standard Technological Application • Other Option is for Fans & Pumps • Note the Motor ID Parameter is set
Profibus Telegram type Choose Free Telegram with BICO • The Profibus Telegram will be Configured Later • Free Telegram allows Custom Telegrams • Script Files will be used to Setup Telegram Mapping
Summary Data Acceptance Review data and Click Finish if Complete • After Completing DDS Wizard “Save and Compile” • DDS Wizard Data is now Complete
Profibus Telegram Configuration • From the Drive to be Commissioned Choose… • Configuration • Use Up – Down Buttons to Move Drive Objects • CU is 1st and Drive (S) should be in Preceding Order • S7 Hardware Configuration Should be Closed!
Profibus Telegram Configuration Select Word Length For Telegrams • CU Telegram not needed for Demo Word Length For Telegrams • EZ_EPOS uses 10 words IN and 10 Words Out • EZ_APC_SPEED uses 10 Words IN and 10 Words Out • EZ_Basic_SPEED uses 6 Words IN and 6 Words Out
Profibus Telegram Configuration Select Transfer to HW Config • CU Telegram will be sent to the S7 Hardware Config. • Select Yes to transfer
Profibus Telegram Configuration Telegram has Successfully been Transferred • Note Blue Check Boxes Save and Compile Program before Proceeding • Save and Compile Using Starter
Copy Script file from Example Program Open Starter Program in Example S7 Given • Close Example Program’s Starter and go to new Program
Right Click On Drive to be Commissioned Expert / Insert Script Folder Create Script Folder in New Program Paste Script in New Script Folder
Click On the Speed Script The Script Editor Opens Open Script in New Project • Click inside the Script Editor area • The Script Editor Buttons appear on the Task Bar
Click On the Accept and Execute Button The script File parameterizes the drive for Speed Block All the Drive Parameters needed by FB110 are Complete Save and Compile the Starter Program The Program is now Ready for Download Accept and Execute the Script
Go Online with Starter to the Drive Choose Download to the Drive Choose RAM to ROM Drive is now ready for Operation Download to the Drive
Open S7 Program & S7 Hardware • Open New Sinamics S7 Project • And Open Hardware Configuration • To Confirm Configuration of Telegram
Verify Telegram Configuration • Highlight the Profibus Card and View the Telegram • Telegram will be “User Defined” • Length should be 6 words (12 bytes)
Download Configuration to PLC • Save and Compile HW Configuration • Download Configuration to PLC
Download Configuration to PLC • Follow S7 Sequence to Download Hardware Config • Select Target Module (If Multiple PLCs) • Restart PLC after Download • PLCs LED will still show Fault
Copy Blocks to New S7 Program • Open the Example Program and Copy Relevant Blocks • Task Bar – Use Window / Arrange Horizontally
Copy Blocks to New S7 Program • Open the Example Program and Copy Relevant Blocks • See Example Below for Copying Blocks • Paste Blocks in new S7 Program • VAR (Variable Table) can be copied • VAR may need editing if Instance DB # Changes • Instance DB will be Created in Later Step • Copy Relevant Profibus Communication Blocks • OB82, OB86, and OB122 • SFC14 and SFC15 are PLC System Function Blocks
Insert FC (Function Call) for Drive(s) • Right Click on S7 Blocks Folder and Insert a FC • Edit Symbolic Name and Comments
Open New FC and Insert Drive FB • Open FC and Choose Drive FB from Catalogue • Note Catalogue Icon Highlighted on Task Bar • Insert a network and Drag FB115 on to Network
Insert Instance DB in Drive FB • DB number is Entered to Generate Instance DB • Enter DB115 in “????” to test with Variable table included • Multiple FB115s with Specific DBs can be used
Parameterize Function Block • Nominal RPM and Hex address from Drive • Use Nominal Current, Volts, Torque, and RPM for Demo • Address is same as in Hardware Config-Profibus for Drive • Address is Hex value and not decimal value • Save FC
Insert FC In OB1 • Open OB1 Block • Save Program in OB1 After Inserting FC
Edit Symbol Table • Open Symbol Table and Edit Instance DB • Name for DB can be symbolic to Axis • Save Symbol Table
Download S7 Project to PLC • Open the Blocks Folder and Download the Blocks • Use the Download Button on the S7 Manager task bar • System data has been loaded in the Hardware Config • SFC14 and SFC15 are included with S7 PLC